
Three Bean Chili in a Jar
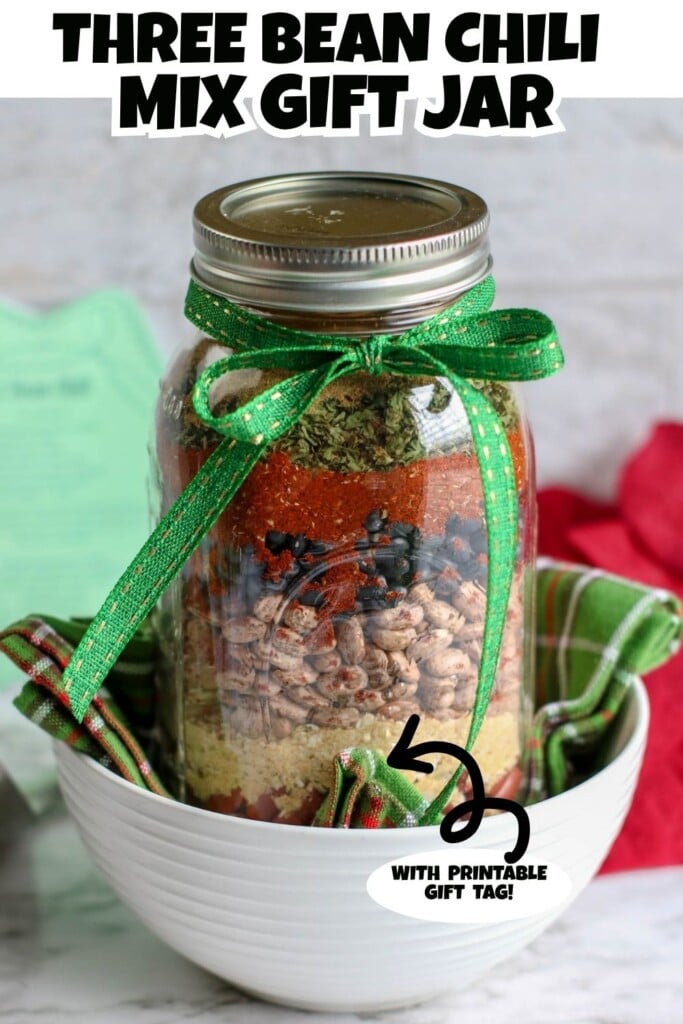
This three bean chili in a jar is the homemade gift I come back to every holiday season: dried kidney, pinto, and black beans layered with chili spices in a quart mason jar, with a free printable tag so your recipient can turn it into a big pot of chili. Readers have been making this jar since I first shared it in 2019, and your questions in the comments shaped every update on this page, including a full cooking section and one important safety step for slow cooker fans.
This post contains affiliate links. As an Amazon Affiliate, I earn a commission on qualifying purchases.
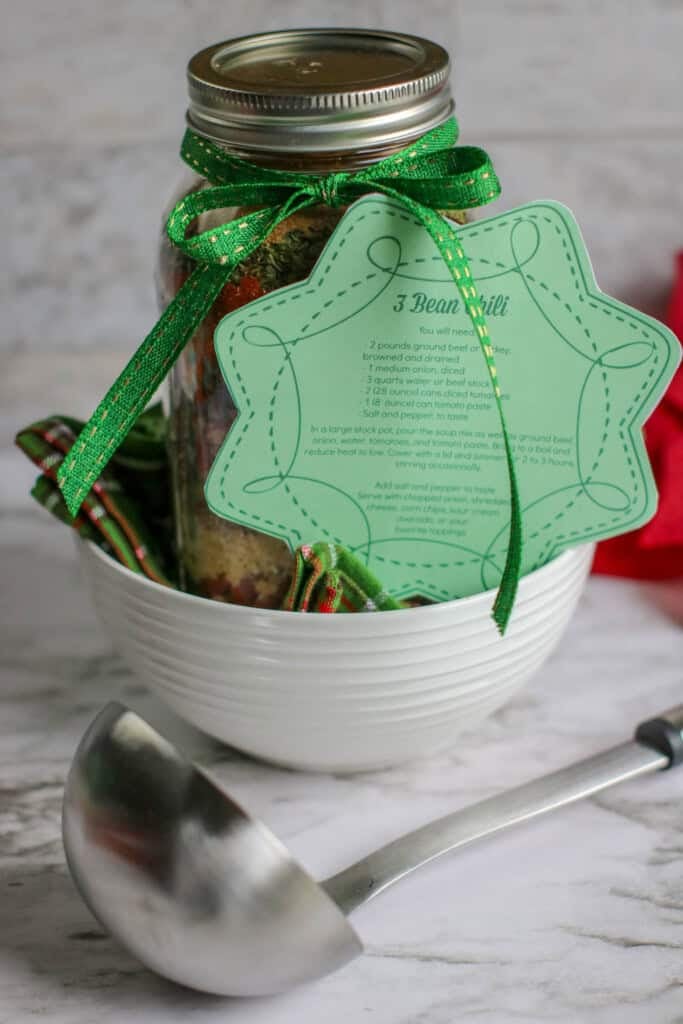
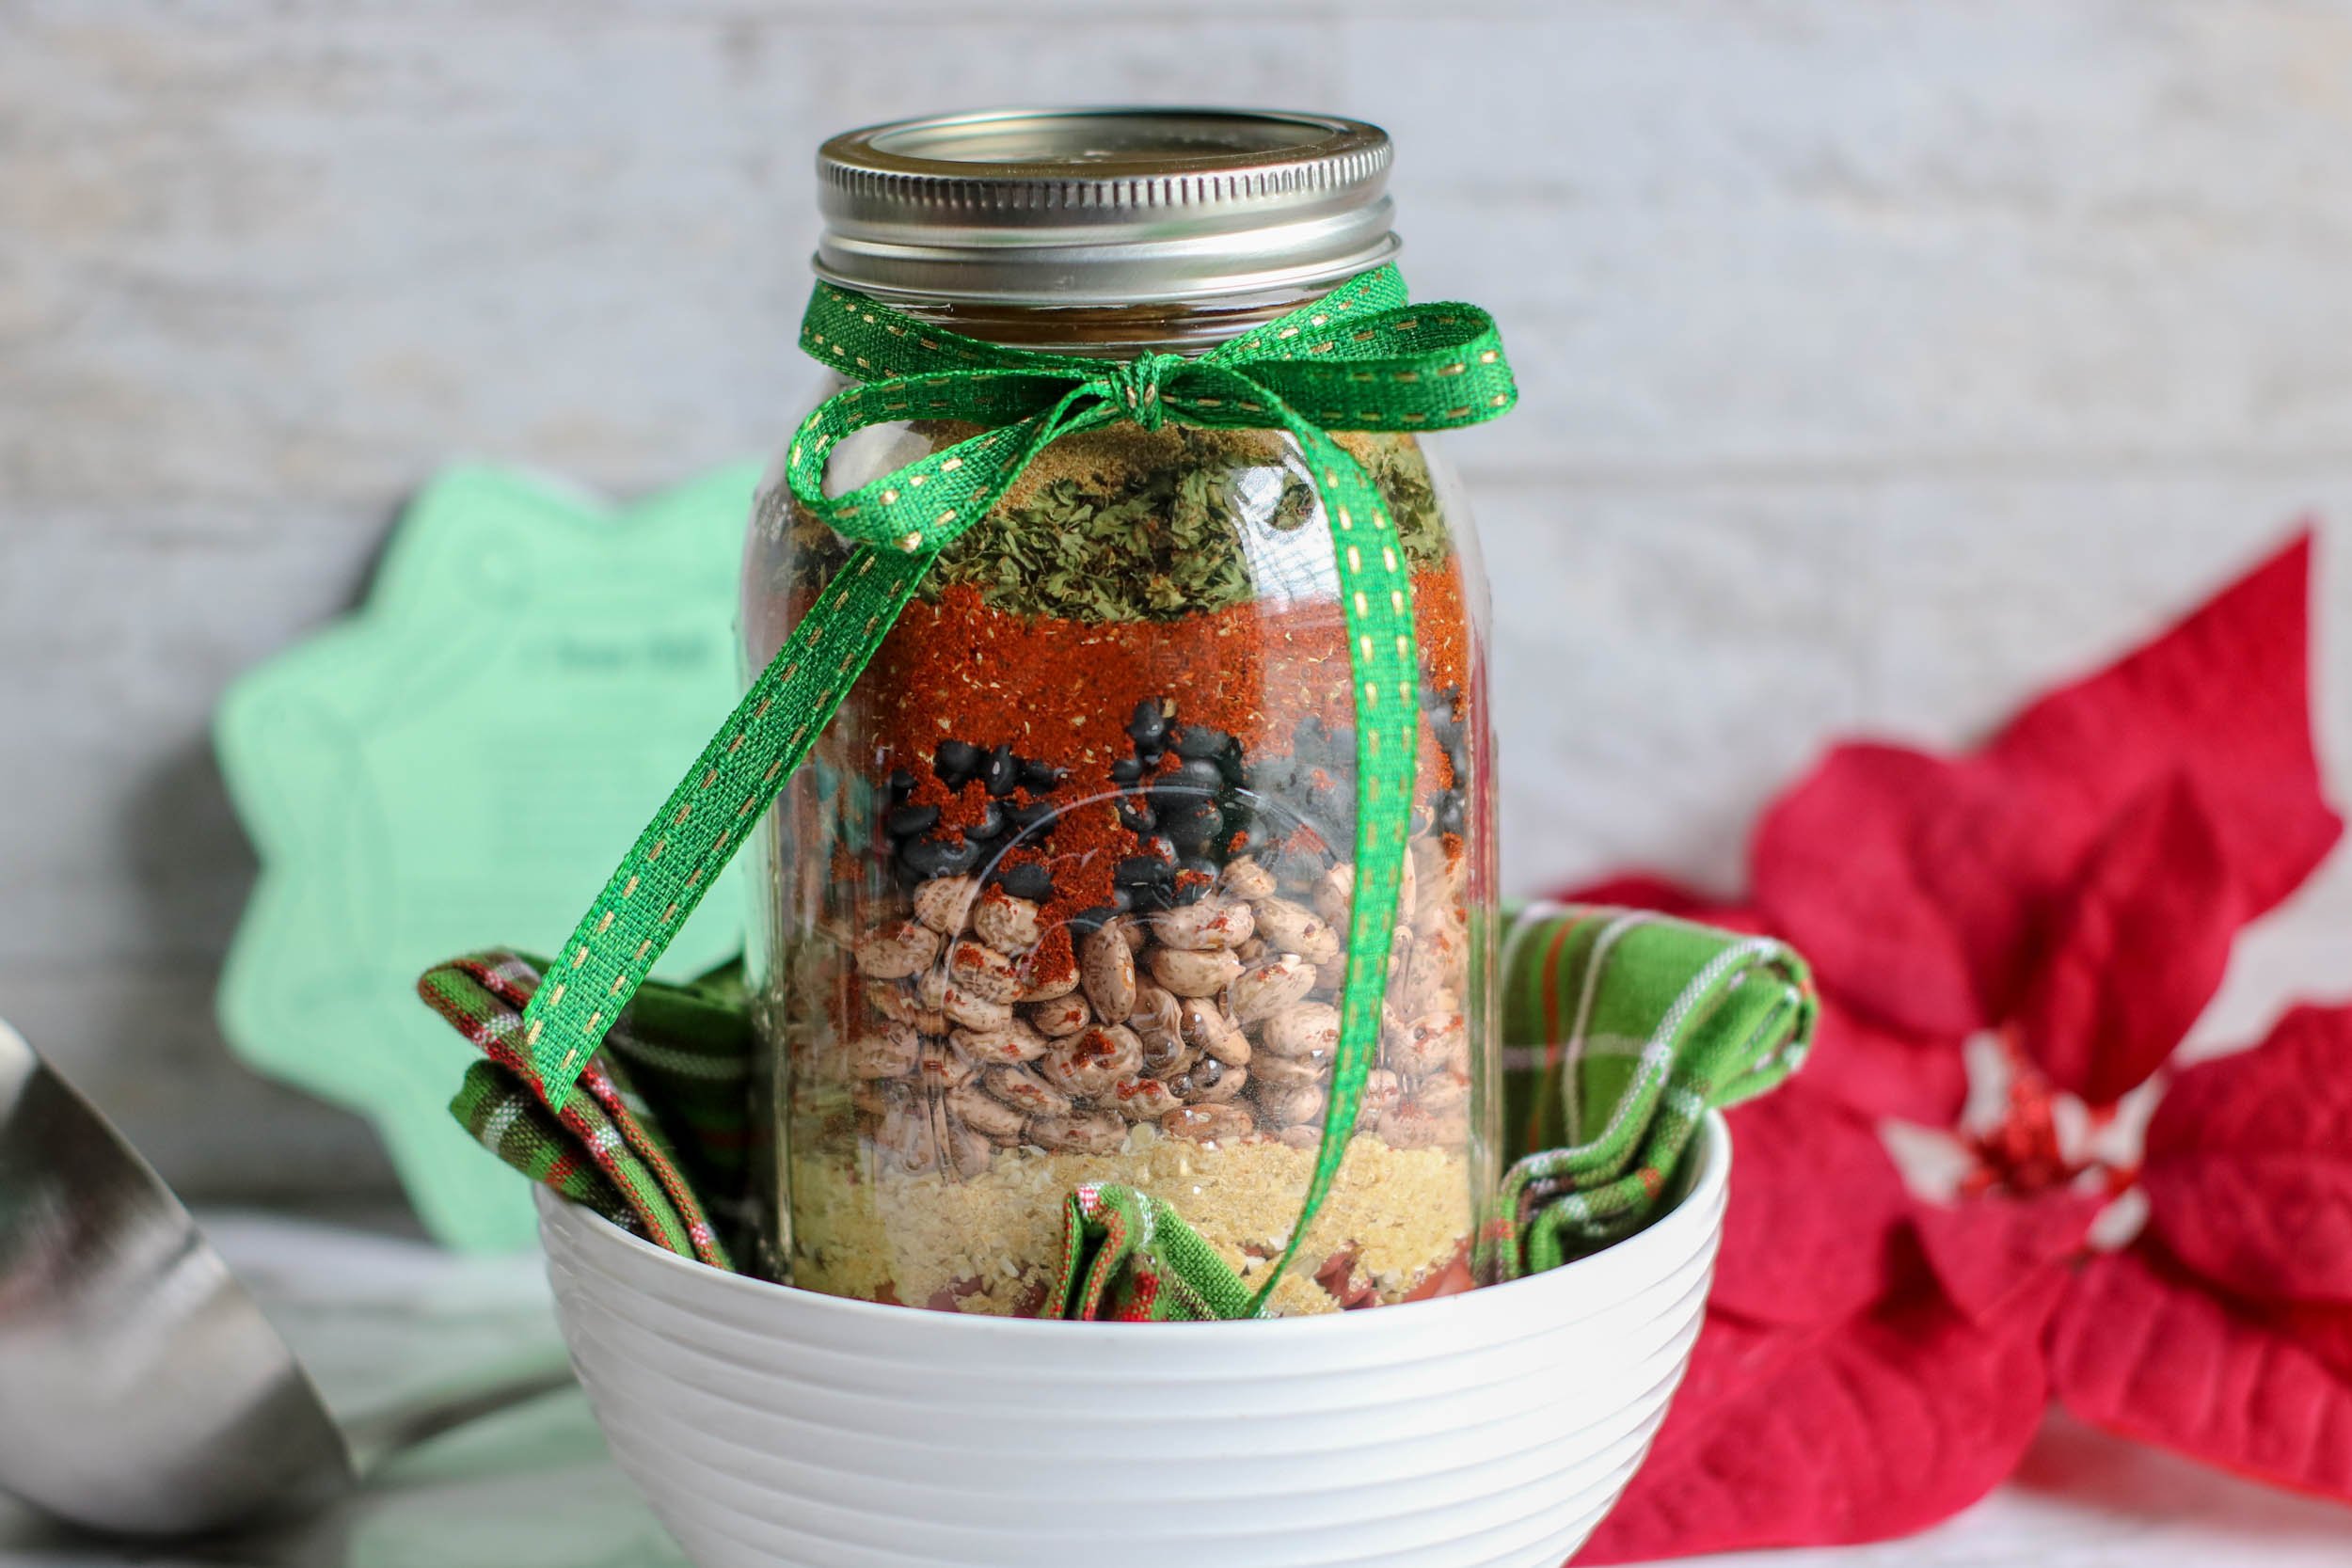
Gift-giving doesn't have to mean spending hours in stores or breaking your budget. This Three Bean Chili Mix Gift Jar combines practicality with presentation, creating a gift that looks impressive while providing everything needed for a satisfying family meal. The layered beans and spices create an attractive visual display, while the included recipe card makes preparation simple for the recipient.
Whether you're looking for teacher appreciation gifts, holiday presents for neighbors, or hostess gifts throughout the year, these chili jars offer a homemade touch that store-bought gifts simply can't match. Plus, they're incredibly easy to assemble once you have your supplies organized.
 Why This Gift Works
 Why This Gift Works
Budget-Friendly: Cost just a few dollars per jar to make, yet feels much more valuable than the investment.
Pantry-Stable: Recipients can store the jar for months and make the chili whenever they're ready.
Family-Sized Meal: The finished chili serves 10-12 people, making it perfect for family dinners or meal prep.
Customizable: Easy to adjust spice levels or add personal touches to suit different tastes.
Presentation-Ready: The layered beans create natural visual appeal without requiring artistic skills.
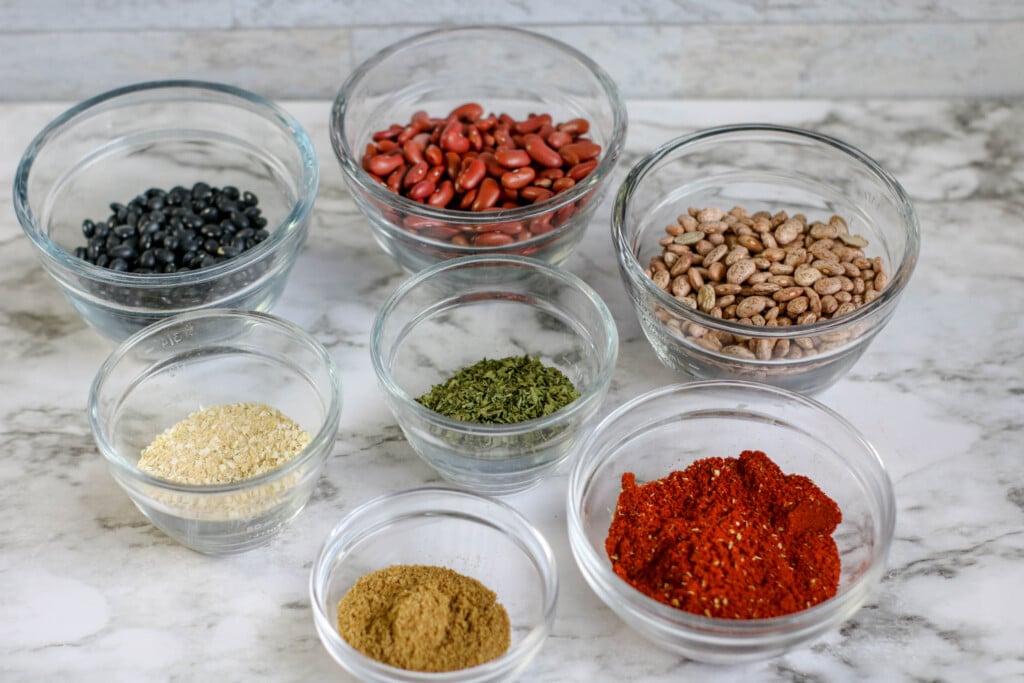
Ingredients for Three Bean Chili Mix Gift Jar
For the Jar:
- 1 quart (32-ounce) mason jar with lid
- 1 cup dried kidney beans
- 1 cup dried pinto beans
- 1 cup dried black beans
- 2 tablespoons dried minced onion
- 2 teaspoons garlic powder
- ¼ cup chili powder
- ⅛ teaspoon cayenne pepper (optional, for heat)
- 2 tablespoons dried parsley
- 1 tablespoon dried oregano
- 2 tablespoons ground cumin
- Printable recipe card (link provided below)
Ingredients that recipient will need that is not in the jar:
- 2 pounds ground beef or ground turkey
- 1 fresh onion, diced
- 3 quarts water or beef stock
- 2 (28-ounce) cans diced tomatoes
- 1 (8-ounce) can tomato paste
- Salt and pepper to taste
🩺 A Nurse's Note on Cooking Dried Kidney Beans
As a registered nurse with 25 years of clinical experience, I want to flag the one step in this recipe you should never skip: the 30-minute boil. Dried red kidney beans contain a natural lectin that causes severe vomiting and diarrhea when the beans are undercooked, and according to the FDA, as few as four or five improperly cooked beans can make someone sick. A hard boil destroys it, but many slow cookers never reach a true boil, which is why the slow cooker method below always starts on the stovetop. Cooked properly, each serving gives you about 30 grams of protein and 10 grams of fiber; it also carries around 700 mg of sodium, so use low-sodium stock if you're watching salt.
- Angela Campos, RN
Selecting Your Jars
Wide-mouth quart mason jars work best for this project because the opening makes layering easier and looks more polished. Ball and Kerr brands are widely available and come with two-piece lids that seal securely during storage. If you're making multiple jars, look for bulk mason jar sets at craft stores or online retailers for better value.
Clean and thoroughly dry your jars before assembling. Any moisture can cause the dried ingredients to clump or develop mold during storage. If reusing jars, make sure they're completely free of any previous contents or odors.
Preparing Your Spice Mixtures
Before you begin layering, combine your spices into three separate small bowls. This makes the layering process much smoother and ensures even distribution of flavors throughout the jar.
Mixture 1 (Onion & Garlic): Combine 2 tablespoons dried minced onion with 2 teaspoons garlic powder. These aromatics form the flavor base of the chili.
Mixture 2 (Chili Spices): Mix ¼ cup chili powder with ⅛ teaspoon cayenne pepper. If you're gifting to someone who prefers mild heat, you can omit the cayenne entirely. For spice lovers, increase cayenne to ¼ teaspoon.
Mixture 3 (Herbs): Combine 2 tablespoons dried parsley with 1 tablespoon dried oregano. These herbs add depth and brightness to the finished chili.
Layering Your Jar
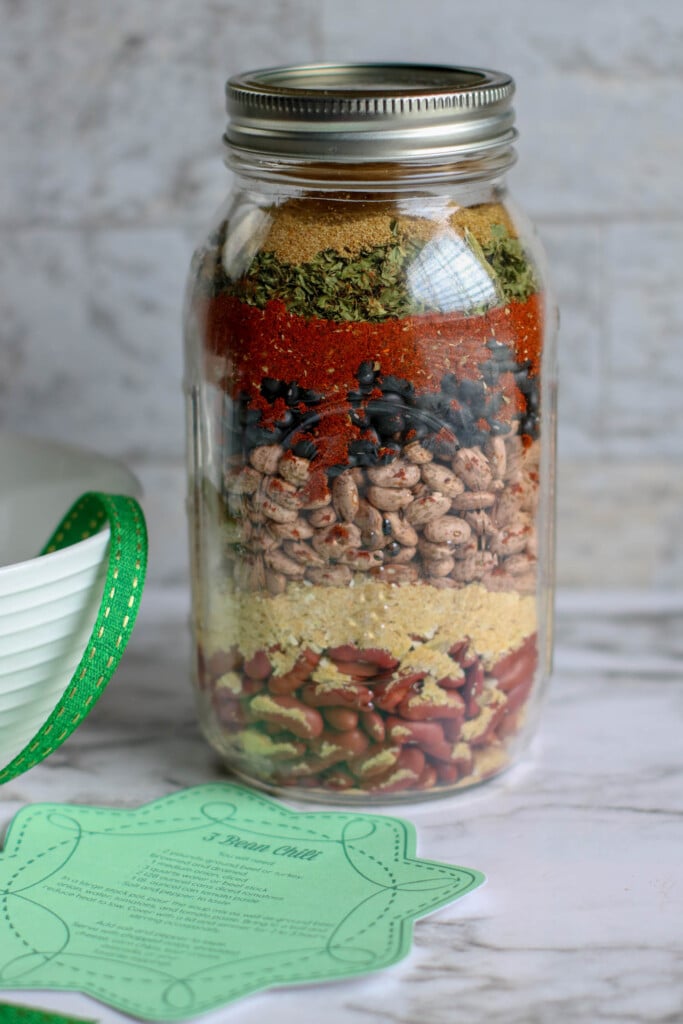
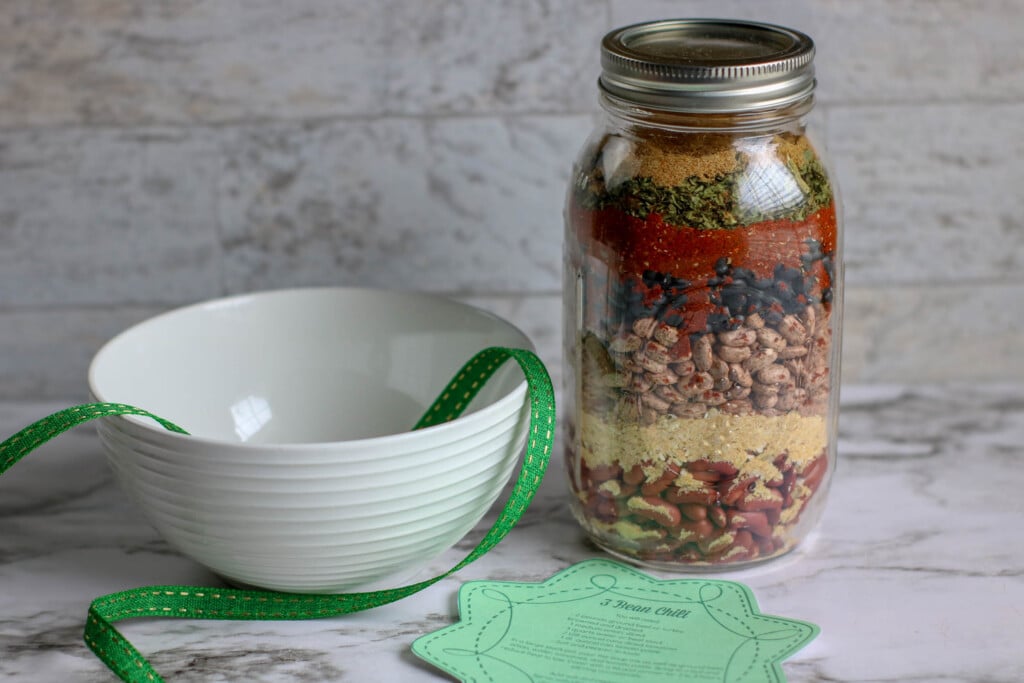
The key to a beautiful presentation is creating distinct, visible layers. Press down firmly after adding each layer to compact the ingredients and prevent shifting during transport. Follow this specific order for the best visual effect:
- First Layer - Kidney Beans: Pour in 1 cup kidney beans and press down firmly with the back of a spoon or your hand.
- Second Layer - Onion & Garlic Mixture: Add your combined onion flakes and garlic powder, spreading evenly across the beans.
- Third Layer - Pinto Beans: Add 1 cup pinto beans and press down firmly.
- Fourth Layer - Black Beans: Pour in 1 cup black beans and press down.
- Fifth Layer - Chili Spices: Add your chili powder and cayenne mixture, spreading to create an even red layer.
- Sixth Layer - Herb Mixture: Sprinkle your parsley and oregano combination across the top.
- Final Layer - Cumin: Top with 2 tablespoons ground cumin for the finishing touch.
Important Assembly Tips
After adding all seven layers, you'll likely notice some empty space between the cumin and the jar lid. This is completely normal and won't be visible once the lid is in place. To prevent ingredients from shifting during transport or storage, you have two options:
Add 2-3 additional tablespoons of any type of beans to fill the remaining space, or place a small piece of crumpled paper towel or tissue paper at the very top of the jar. The lid will hide this filler material while keeping all your carefully arranged layers perfectly in place.
Don't skip this step. Without something to fill that top space, the ingredients will settle and shift during handling, and your beautiful layers will become jumbled.
IMPORTANT NOTE: There will likely be some space open between the cumin and the top of the jar that will not be visible because of the lid. If this is the case, you can simply add a few more tablespoons of beans or a scrunched up paper towel or napkin to reach the very top of the jar. This will keep all of the ingredients tightly packed in the jar and prevent shifting of the ingredients
Creating Your Gift Tag
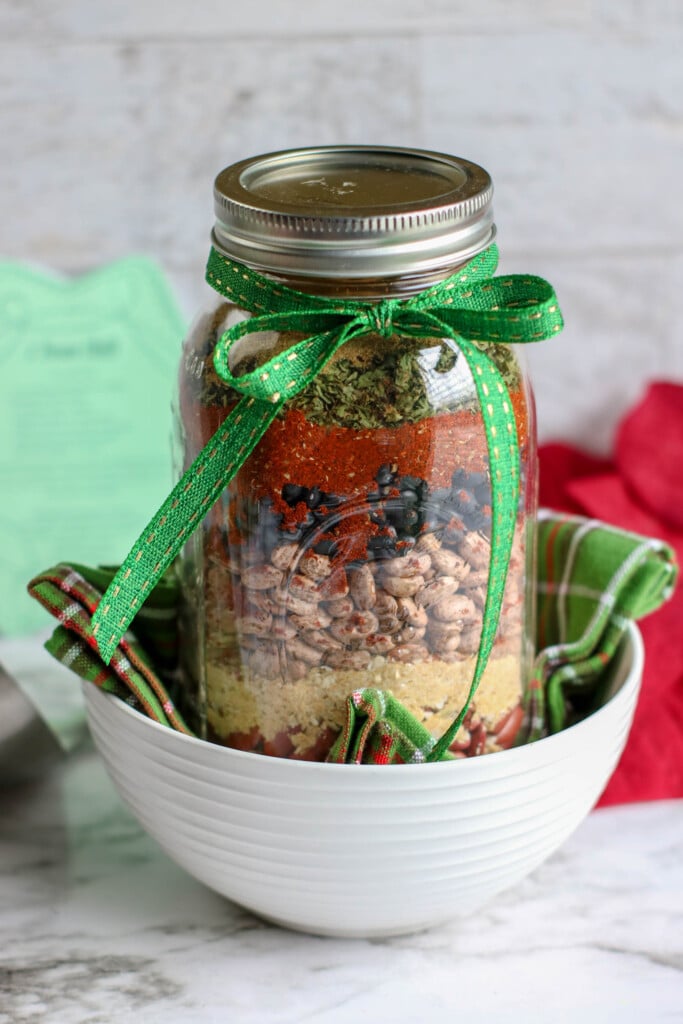
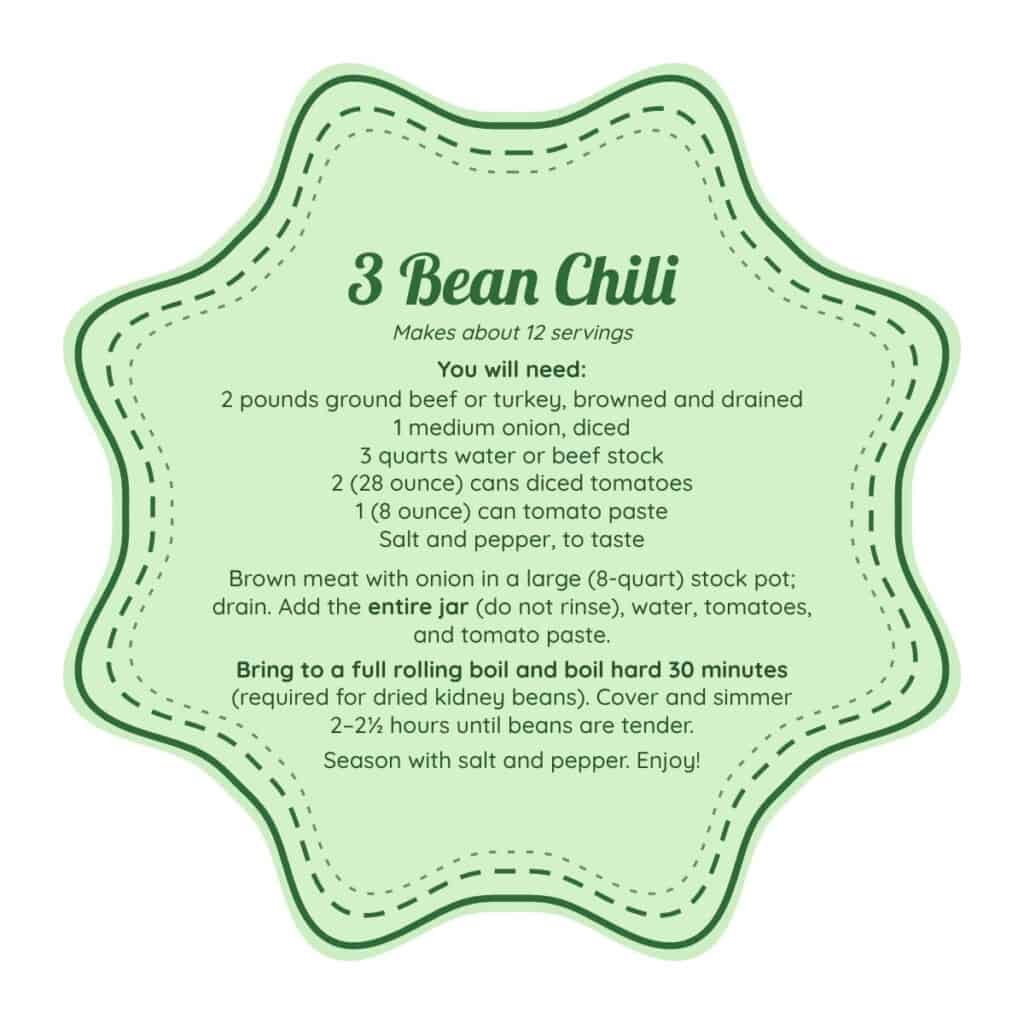
The recipe card is what transforms your jar from a decorative item into a practical gift. Download and print the free recipe card template, which includes complete cooking instructions, the list of additional ingredients needed, and helpful preparation tips.
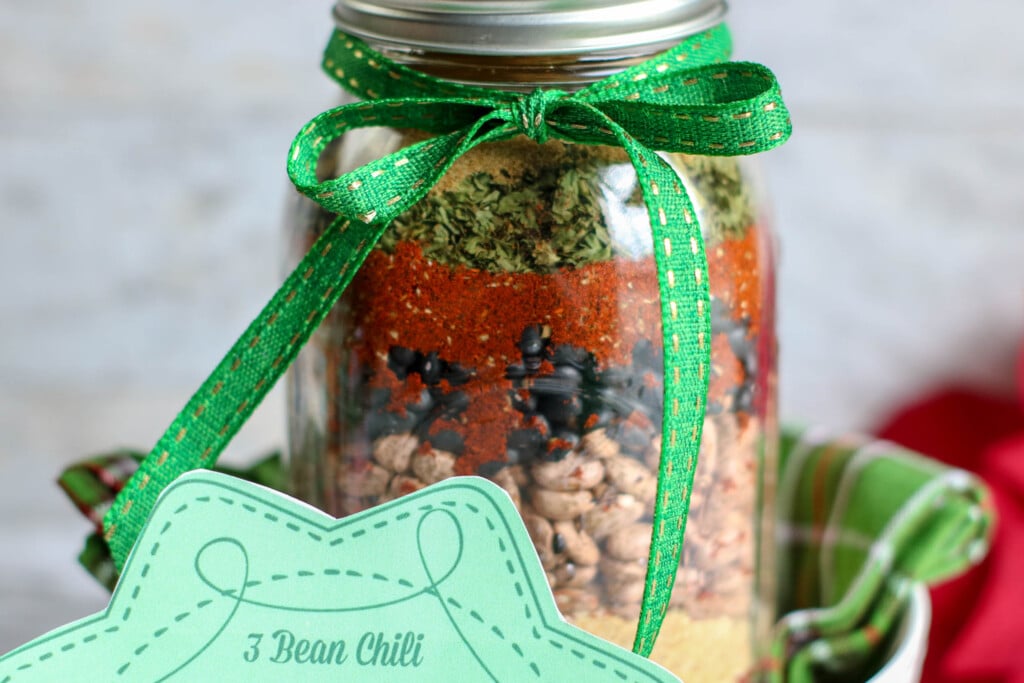
To Print Your Recipe Cards: Print on cardstock for durability. Regular printer paper works too but may not hold up as well if it gets splashed during cooking. Cut out the cards carefully, leaving a small border around the edges. Punch a hole in the corner and attach to the jar lid with twine, ribbon, or raffia.
For a more polished presentation, you can also laminate the recipe cards before attaching them. This protects the instructions from spills and makes the cards reusable if the recipient wants to make the chili again.
PRINT THE GIFT CARD HERE: Three Bean Chili Gift Jar Tag
Want More Details?
While the printable gift tag included with your jar provides everything your recipient needs to make delicious chili, I've also created a comprehensive instruction guide with additional details for those who want to dive deeper. This optional PDF includes ingredient substitutions, three different cooking methods (stovetop, slow cooker, and Instant Pot), spice level adjustments, flavor variations, and creative presentation ideas. It's perfect if you're making these jars for yourself and want all the options in one place, or if you'd like to provide extra guidance to recipients who enjoy experimenting in the kitchen. The basic gift tag is completely adequate for gift-giving, but if you'd like the expanded version, you can download the complete instructions PDF here. Either way, your gift recipients will have everything they need to create a warming, satisfying meal!e
DOWNLOAD DETAILED INSTRUCTIONS WITH ADDITIONS & SUBSTITUTIONS HERE
How to Cook Chili in a Jar
Whether you received a jar or made one for yourself, here's how to turn it into about 12 servings of chili. You'll need 2 pounds of ground beef or turkey, 1 diced onion, 3 quarts of water or beef stock, two 28-ounce cans of diced tomatoes, one 8-ounce can of tomato paste (a 6-ounce can works fine), and salt and pepper.
Stovetop Method
Step 1: Brown the meat. In a large pot (8 quarts or bigger), brown the ground beef or turkey with the diced onion. Drain the fat.
Step 2: Add the whole jar. Pour the entire contents of the jar into the pot. Do not rinse the beans. The spices are layered in with them, and rinsing would wash all the flavor down the drain.
Step 3: Add the liquid and tomatoes. Stir in the water or stock, diced tomatoes, and tomato paste.
Step 4: Boil hard for 30 minutes. Bring the pot to a full rolling boil and keep it boiling for 30 minutes, stirring often so nothing sticks. This is the step that makes dried kidney beans safe to eat (see my Nurse's Note above).
Step 5: Simmer until tender. Reduce the heat, cover, and simmer for 2 to 2½ hours, stirring occasionally, until the beans are completely soft. Season with salt and pepper at the end.
Slow Cooker Method
Complete Steps 1 through 4 on the stovetop, including the full 30-minute boil. Then transfer everything to a 7-quart or larger slow cooker and cook on HIGH for 4 to 6 hours, until the beans are completely tender. Do not skip the stovetop boil and put the raw jar straight into the slow cooker; many slow cookers never get hot enough to make dried kidney beans safe.
Instant Pot Method
This full recipe is too big for a 6-quart Instant Pot, so use an 8-quart and reduce the liquid to 2 quarts. Brown the meat and onion on Sauté, drain, then add the jar contents and liquid and stir. Pour the tomatoes and tomato paste on top without stirring (this helps prevent a burn warning). Cook on HIGH pressure for 45 minutes, then allow a full natural release. Pressure cooking gets well above boiling, so no separate boil step is needed.
Storage and Shelf Life
Assembled jars will keep for up to 6 months when stored in a cool, dry place away from direct sunlight. Make sure the lid is sealed tightly to prevent moisture from getting in. The dried beans and spices are shelf-stable, but humidity is their enemy.
For recipients, note on the recipe card that once the jar is opened and the chili is prepared, leftovers should be refrigerated and will keep for 4-5 days. The chili also freezes beautifully for up to 3 months.
Decorating and Presenting Your Jars
Beyond the recipe card, consider these finishing touches to make your gift extra special:
Fabric Jar Topper: Cut a 6-inch circle of festive fabric and secure it over the lid with the metal ring. This adds color and hides any space at the top of the jar.
Decorative Ribbon: Tie coordinating ribbon or twine around the neck of the jar. Red and white baker's twine looks particularly festive for holiday gifts.
Personalized Tags: Add a small tag with the recipient's name or a brief personal message alongside the recipe card.
Gift Basket Presentation: Include a wooden spoon, a small bottle of hot sauce, or a package of cornbread mix alongside the jar for an expanded gift.
Multiple Jar Sets: Package two jars together with a note suggesting one jar for now and one to save for later.
👩🍳 Tips from My Kitchen
I first shared this jar in 2019, and the comments on this post have made it better every single year. Here's what I've learned, including a couple of things I learned from you.
- Fill the jar to the very top. Three cups of beans plus the spices leaves a little headspace in a quart jar, and several readers told me their layers got jumbled on the way to the recipient. Top it off with 2 to 3 extra tablespoons of beans or a small wad of foil or paper towel under the lid.
- Never rinse the jar contents. I'll own this one: an earlier version of my printable instructions said to rinse the beans, and you rightly asked how the spices would survive that. They wouldn't. The whole jar goes straight into the pot, and the printables are now corrected.
- Yes, it really is ¼ cup of chili powder. It looks like a lot in the jar, but it's seasoning a 12-serving pot of chili. Leave out the cayenne if you're gifting to someone who likes it mild.
- Use fresh beans for gifting. Old dried beans can stay firm no matter how long they cook. Buy a fresh bag for your jars, and if the beans are still stubborn, hold back the tomatoes until the last 45 minutes, since acid slows beans from softening.
What Makes This Gift Special
Homemade food gifts carry meaning that store-bought items simply can't match. They say, "I took time to create something specifically for you." This chili mix gift jar hits the perfect balance between thoughtful and practical. It's beautiful enough to display before using, yet it transforms into a real, nourishing meal that will feed a family.
The recipient doesn't need special skills or experience to create an impressive dinner. Everything is measured, organized, and ready to use. All they need to do is add fresh ingredients and cook. It's a gift that keeps giving, as the memories of enjoying a warm bowl of homemade chili linger long after the jar is empty.
Chili in a Jar FAQs
Do I need to soak the beans first?
No. The spices are layered in with the beans, so soaking isn't practical. Instead, the chili boils hard for 30 minutes and then simmers for 2 to 2½ hours, which fully cooks the dried beans and makes them safe to eat.
Do I rinse the contents of the jar?
No. Pour the entire jar into the pot after browning the meat and onion. Rinsing would wash away all of the spices.
Is ¼ cup of chili powder too much?
It sounds like a lot, but this recipe makes about 12 servings, so it's the right amount for a big pot. For a milder chili, leave out the cayenne.
Can I make chili in a jar in the slow cooker?
Yes, but start on the stovetop. Bring everything to a full rolling boil for 30 minutes first, then transfer it to a 7-quart or larger slow cooker and cook on HIGH for 4 to 6 hours. Many slow cookers never reach boiling, which isn't enough to make dried kidney beans safe on their own.
Can I use canned beans instead of dried?
Yes, if you're making the chili without a gift jar. Use one 15-ounce can each of kidney, pinto, and black beans, drained and rinsed, along with the same spices. Cut the liquid to about 4 cups and simmer for 30 to 45 minutes, since the beans are already cooked.
How long does a chili mix jar last?
Up to 6 months in a cool, dry place away from sunlight, with the lid sealed tightly. The beans keep longer than that, but the ground spices start to lose their flavor. Once cooked, store leftover chili in the refrigerator for 4 to 5 days or freeze it for up to 3 months.
Can I make it vegetarian?
Yes. Skip the ground meat, use vegetable broth instead of water or beef stock, and add an extra can of beans or some diced bell peppers and zucchini for heartiness.
More Homemade Gift Ideas
If you're enjoying creating gift jars, try these other ideas from Marathons and Motivation:
- White Chocolate Cranberry Cookie Mix Jar
- Hot Cocoa Mix in a Jar
- Homemade Everything Bagel Mix
- Homemade Onion Soup Mix
This Three Bean Chili Mix Gift Jar proves that the most meaningful gifts don't have to be expensive or complicated. With just a few dollars in ingredients and fifteen minutes of your time, you can create something beautiful, practical, and truly appreciated. Whether you're making one jar for a special teacher or assembling dozens for holiday gift-giving, this project delivers impressive results with minimal effort.
Three Bean Chili Mix Gift Jar
Ingredients
- 1 quart (32 ounce) jar with lid
- Printable label/gift tag
- 2 tablespoons dried minced onion
- 2 teaspoons garlic powder
- ¼ cup chili powder
- ⅛ teaspoon cayenne pepper optional
- 2 tablespoons dried parsley
- 1 tablespoon dried oregano
- 1 cup dried kidney beans
- 1 cup dried pinto beans
- 1 cup dried black beans
- 2 tablespoons ground cumin
To make the chili, you will also need:
- 2 pounds ground beef or ground turkey browned and drained
- 1 onion diced
- 3 quarts water or beef stock
- 2 28 ounce cans diced tomatoes
- 1 8 ounce can tomato paste
- Salt and pepper to taste
Instructions
- In a small bowl, combine the onion flakes and garlic powder and set aside.
- In a separate small bowl, combine the chili powder and cayenne (if desired).
- In a third small bowl, combine the parsley and oregano.
- Then, layer the ingredients in this order, taking care to firmly press ingredients down between layers: 1. Kidney beans 2.Onion flake and garlic powder mixture 3. Pinto beans 4.Black beans 5. Chili powder and cayenne mixture 6. Parsley and oregano mixture 7. Cumin
- IMPORTANT NOTE: There will likely be some space open between the cumin and the top of the jar that will not be visible because of the lid. If this is the case, you can simply add a few more tablespoons of beans or a scrunched up paper towel or napkin to reach the very top of the jar. This will keep all of the ingredients tightly packed in the jar and prevent shifting of the ingredients.
- Seal the jar with the lid. Print and attach the recipe instruction gift tag.
To Cook the Chili:
- In a large pot, brown the ground beef or turkey with the diced onion. Drain.
- Add the entire contents of the jar (do not rinse), the water or stock, diced tomatoes, and tomato paste.
- Bring to a full rolling boil and boil for 30 minutes, stirring often. This step is required to fully cook the dried kidney beans.
- Reduce heat, cover, and simmer for 2 to 2½ hours, until the beans are tender. Season with salt and pepper.
- Slow cooker option: complete the 30-minute boil on the stovetop, then transfer to a 7-quart or larger slow cooker and cook on HIGH for 4 to 6 hours.
Notes
Nutrition





43 Comments