Pastel Hot Cocoa Bomb Recipe
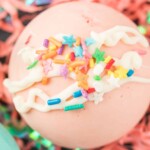
You may think hot chocolate is reserved for the winter months. But making this pretty Pastel Hot Cocoa Bomb Recipe might just change your mind! These beautiful bombs are the perfect way to welcome spring while still enjoying a warm cup of hot chocolate. Fill them with hot chocolate and marshmallows, and watch them explode right in your mug. They make a lovely treat for an Easter brunch.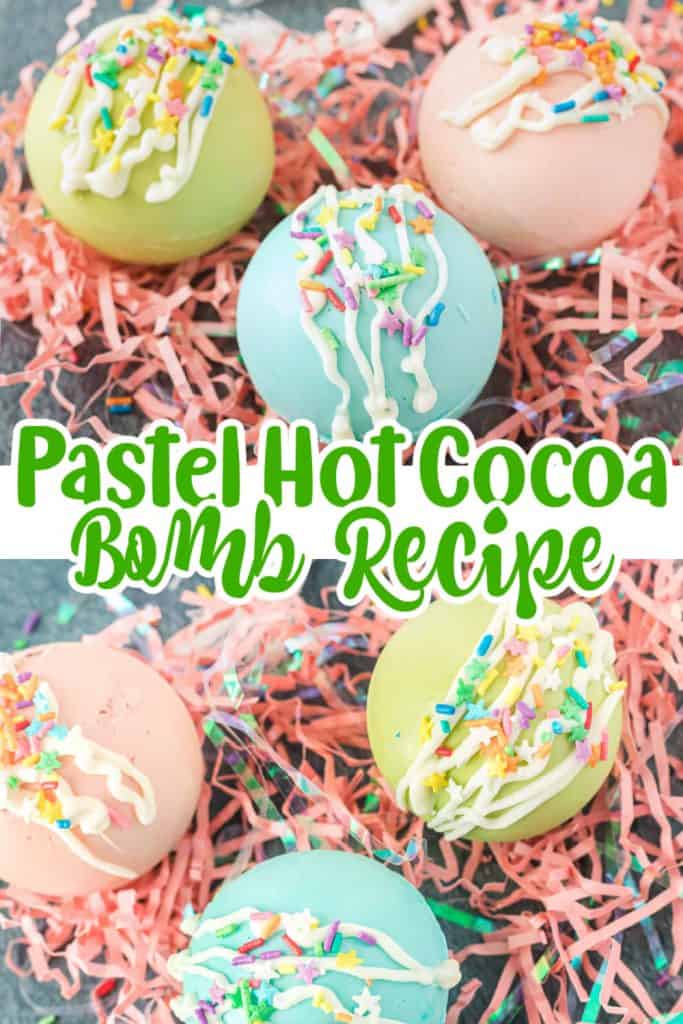
*This post contains affiliate links. As an Amazon affiliate, I earn a commission on qualifying purchases.
What Do I Need for the Hot Cocoa Bomb Recipe?
Making these bombs couldn't be simpler. In fact, putting your own colorful hot cocoa bombs together is similar to making any other hot chocolate bombs. There's just one added step - dying your chocolate. Here's what you'll need:
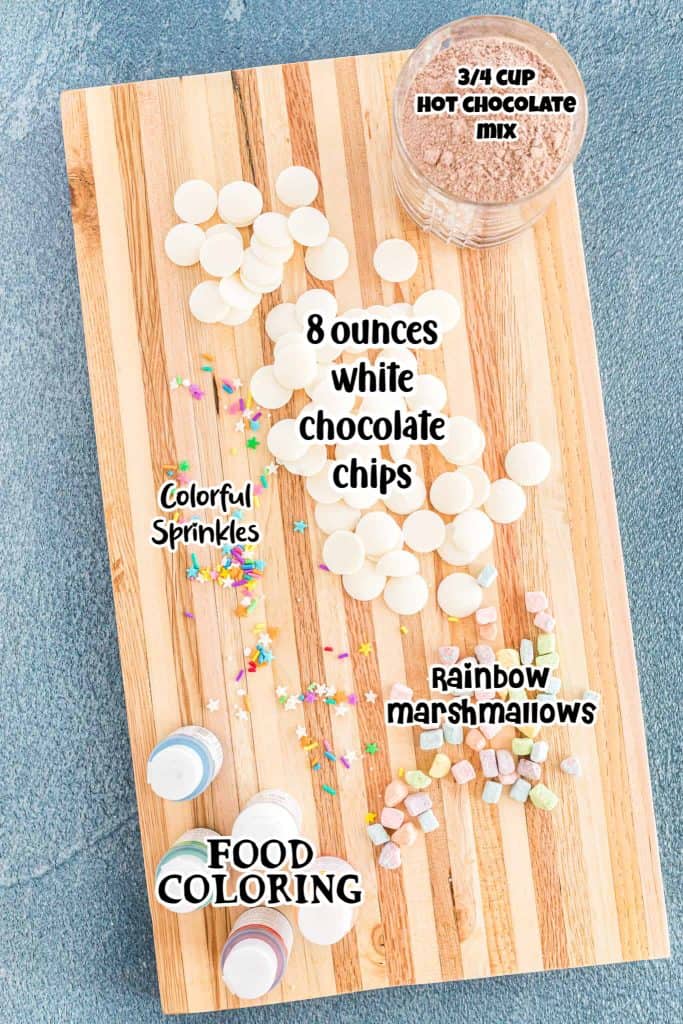
- White chocolate chips (or almond bark)
- Food coloring
- Hot cocoa mix
- Rainbow marshmallows
- Spring colored or Easter themed sprinkles
- Semi-sphere silicone mold
Looking for more Hot Chocolate Bomb recipes? Give these reader favorites a try:
Galaxy Hot Cocoa Bombs | Easy Hot Chocolate Bombs with M&Ms | White Chocolate Hot Chocolate Bombs
How Do I Make the Hot Cocoa Bomb recipe?
Once you have all your ingredients gathered, you can start putting your hot cocoa bombs together. Follow these six easy steps to make your own colorful treats right at home.
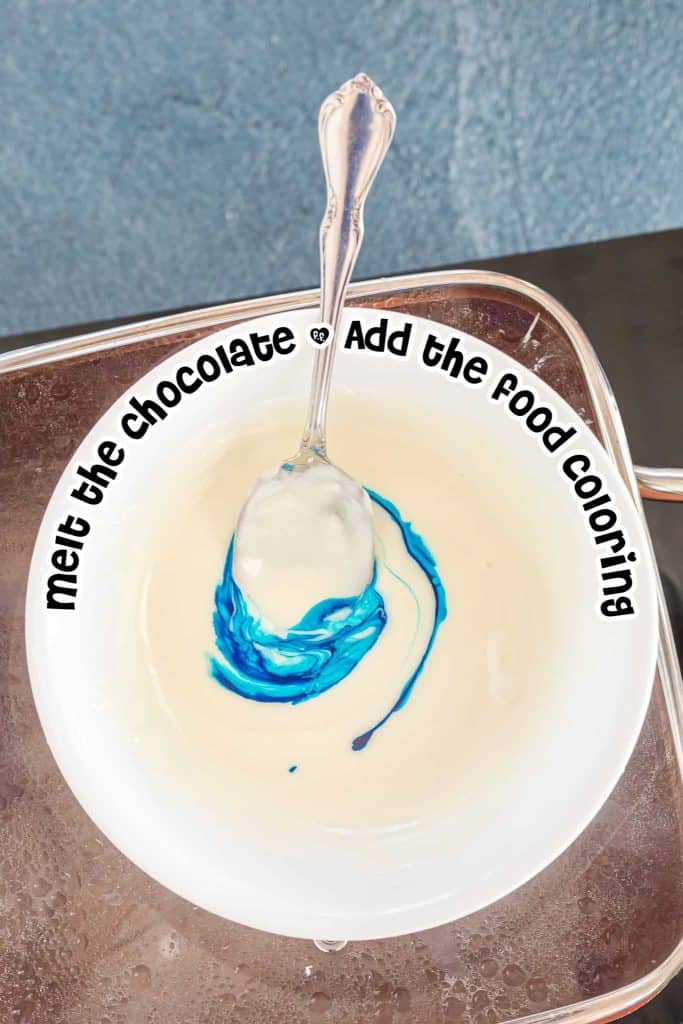
Step One: Melt the Chocolate
The first step is to melt the chocolate or almond bark. This can be done in a double boiler or in the microwave. For a double boiler, boil water in bottom pan, add chocolate to top pan and stir continuously until chocolate is melted. If you are using a microwave, place the white chocolate chips in a microwave safe bowl and microwave in 30 second intervals. Stir between each interval, until the chocolate chips are fully melted.
PRO TIP: If the chocolate is too thick, add in a small amount of butter or cooking oil to thin out. Do NOT use water as this will cause the chocolate to break.
Step Two: Color the Hot Cocoa Bombs
Add food coloring, a few drops at a time, to the melted chocolate. Continue adding the coloring to the dye, stirring between each addition, until your desired color has been reached. For multiple colors, separate the chocolate and tint each bowl of chocolate with each color.
Step Three: Fill the Silicone Mold
Spoon a small amount of colored chocolate into the mold, then use the back of your spoon to spread the chocolate around the sides of the semi-circle. Continue spreading until the chocolate has completely covered the mold, all the way up to the top.
Would you like to save this?
Step Four: Allow the Chocolate to Set
Set the mold aside and allow the chocolate to rest until it has hardened. To speed up the setting process, allow the chocolate to chill in the refrigerator or freezer.
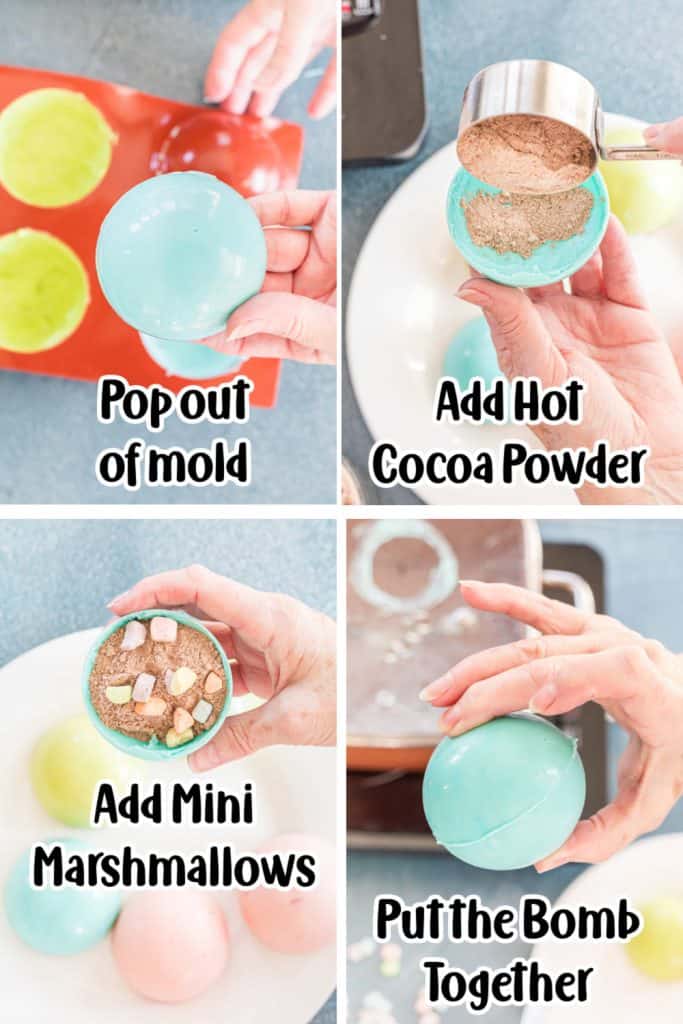
Step Five: Put the Hot Cocoa Bombs Together
When the chocolate has had time to harden, gently pop the chocolate pieces out of the mold. Fill half the pieces with hot chocolate mix and mini marshmallows. To seal the bombs, warm a plate in the microwave and rotate the edges of the remaining pieces to melt the chocolate. Place the melted edges on top of a filled piece and hold into place. If the edges don't seal, melt leftover chocolate in the microwave and spread the melted chocolate along the seam.
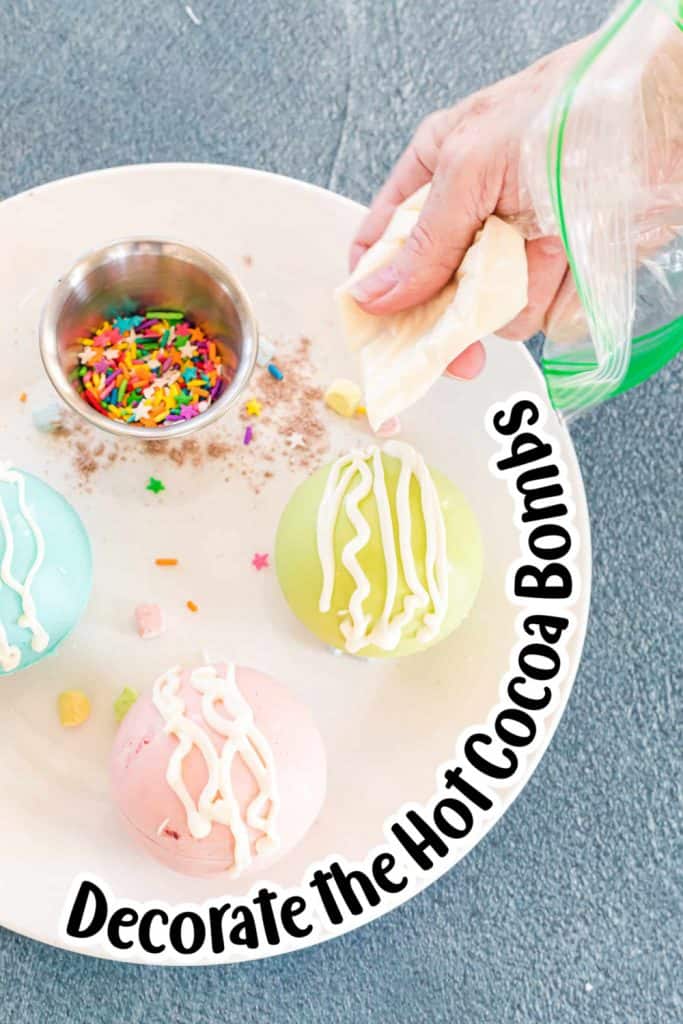
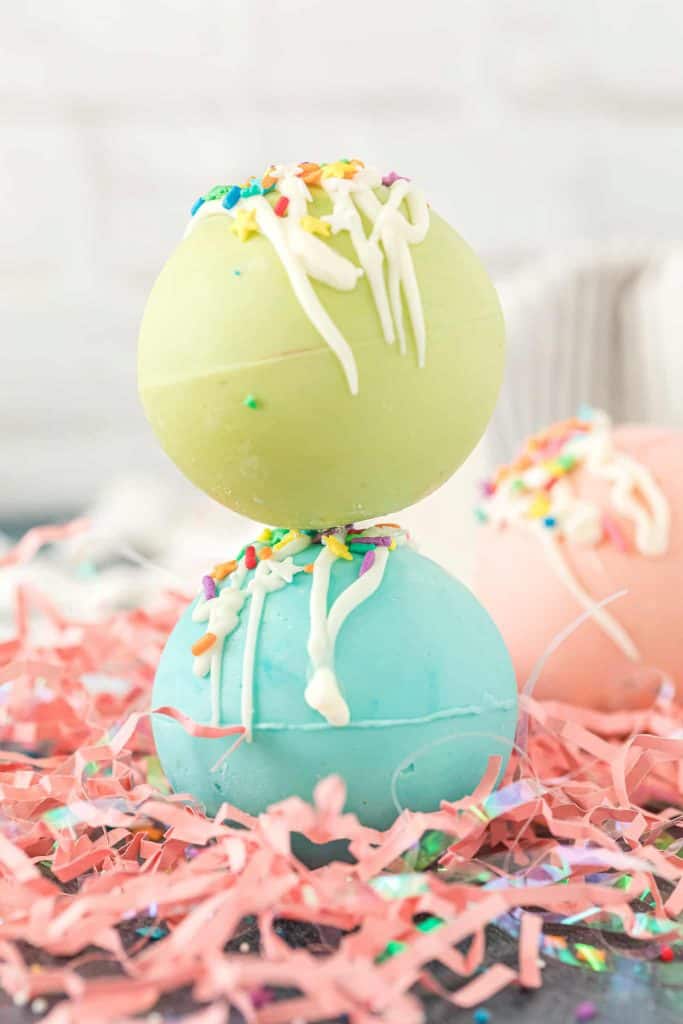
Step Six: Decorate the Bombs
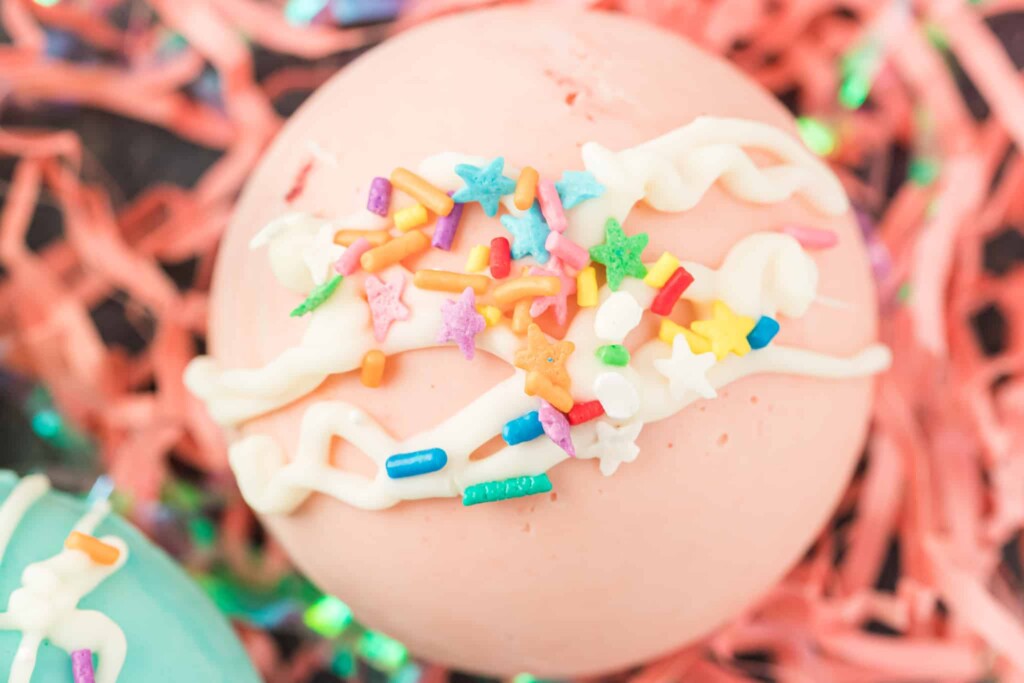
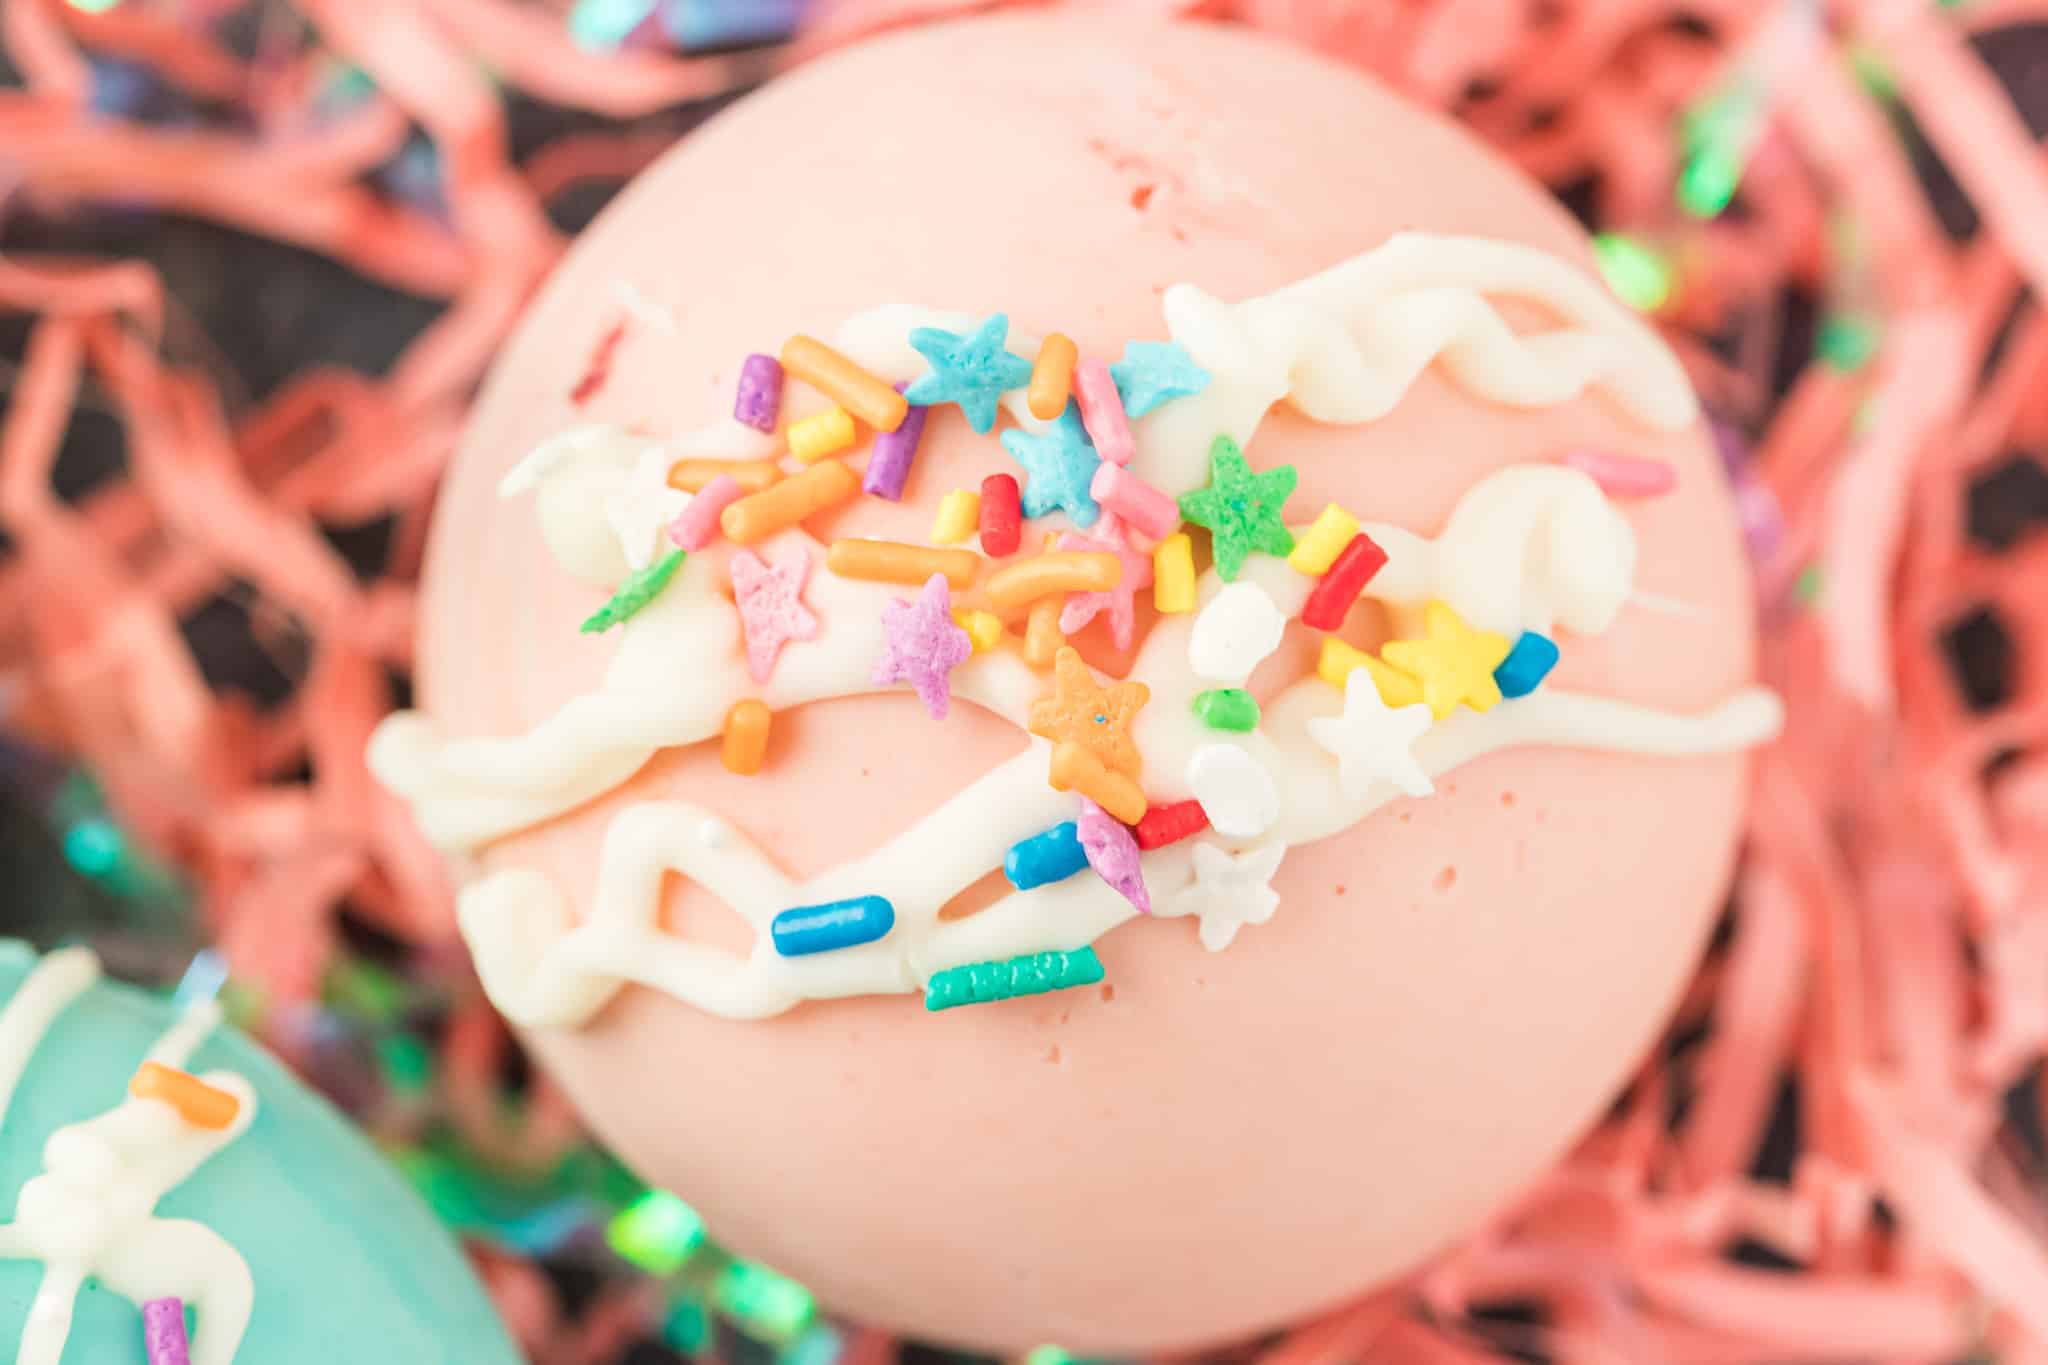
When all the hot chocolate bombs are put together, it's time to start decorating. Melt some white chocolate and drizzle the melted chocolate over the top of each bomb, then top with spring sprinkles.
Tips for Making Hot Cocoa Bombs
You'll love how simple these bombs are to make! These tips can make putting together your hot cocoa bombs even easier.
- If you don't have a double boiler (or microwave) to melt the chocolate, you can make your own double boiler. This is done by placing a small amount of water in the bottom of a saucepan. Bring the water to a boil, then place a large glass measuring cup in the pan to hold the chocolate. Add the chocolate chips to the measuring cup and stir continuously until melted.
- You don't need a piping bag to decorate your bombs. Use a plastic bag to hold the melted chocolate, then snip a small hole in the end to drizzle the chocolate over the bombs.
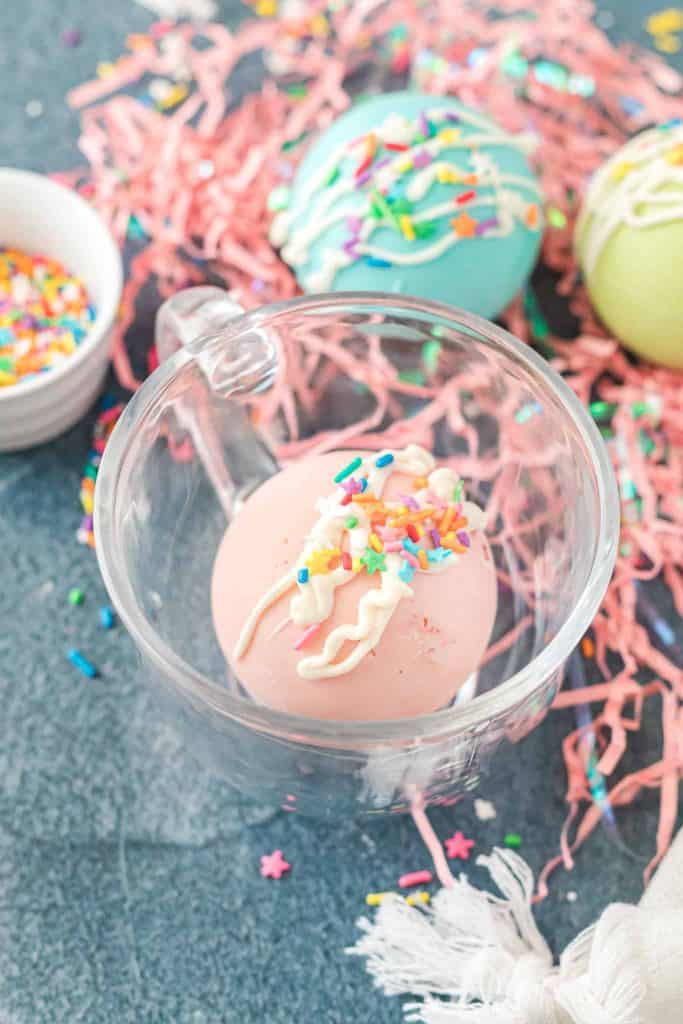
How Do I Serve Hot Cocoa Bombs?
Serving your hot cocoa bombs is the most fun part of making them! First, place the bomb in the bottom of a mug. Warm one cup of water or milk in the microwave, then pour the hot water (or milk) over the top of the bomb. As the water covers the chocolate, it will begin to melt, causing the bomb to explode and the marshmallows to pop out.

Are there any tips for adding color to the chocolate?
Adding color to your hot chocolate bombs is a fun way to dress them up for any occasion. To tint the chocolate, simply add the food coloring one drop at a time until the chocolate is the desired shade. When adding food coloring to your chocolate, it may cause the chocolate to thicken. If your food coloring causes your chocolate to become too thick, add ½ teaspoon of shortening and stir until the shortening melts.
How Do I Store Hot Cocoa Bombs?
To store your homemade hot cocoa bombs, place them in an airtight container or plastic bag in a cool, dry place. Heat will cause your bombs to melt, so it's important to keep them cold or at room temperature. When stored properly, your bombs should last two to three weeks.
Pastel Hot Cocoa Bombs
Ingredients
- 7-8 oz White Chocolate or Almond Bark
- Food Coloring
- ¾ cup Hot Chocolate Mix of choice
- Colored Marshmallows
- Pastel Spring or Easter Themed Sprinkles
- Large Cavity Semi-Sphere Silicone Mold
Instructions
- Melt white chocolate (or almond bark) in a double boiler or microwave. For a double boiler, boil water in bottom pan, add chocolate to top pan and stir continuously until chocolate is melted. If you are using a microwave, place the white chocolate chips in a microwave safe bowl and microwave in 30 second intervals. Stir between each interval, until the chocolate chips are fully melted.
- Add food coloring, a few drops at a time, to melted chocolate and stir until well blended (this step can be repeated several times until you achieve the desired color)(optional).
- Spoon several tablespoons of melted chocolate into mold and “paint” the entire mold using the back of a small spoon - make sure you get the chocolate all the way to the top of the mold.
- Allow molds to rest until chocolate is hardened. (If desired, speed up this process by placing molds in freezer for several minutes).
- Gently pop chocolate spheres out of molds, being careful not to chip them.
- Rotate bottom half of bomb on a warm plate to smooth edges.
- Fill with ¼ cup hot chocolate mix and colored marshmallows to taste.
- Rotate top half of sphere on warm plate to smooth edges and gently press two halves together. The slightly melted edge will seal the two halves. Do this step quickly so that the chocolate doesn’t start to dry before you get the halves together.
- Drizzle tops with melted white chocolate and pastel/Easter sprinkles.
Notes
- These pastel colored hot cocoa bombs make very cute little Easter gifts, you could place them in clear bags and tie them with a small ribbon or combine them with a cute mug.
- Gel food coloring does not blend well with chocolate, alcohol based food coloring works much better.