
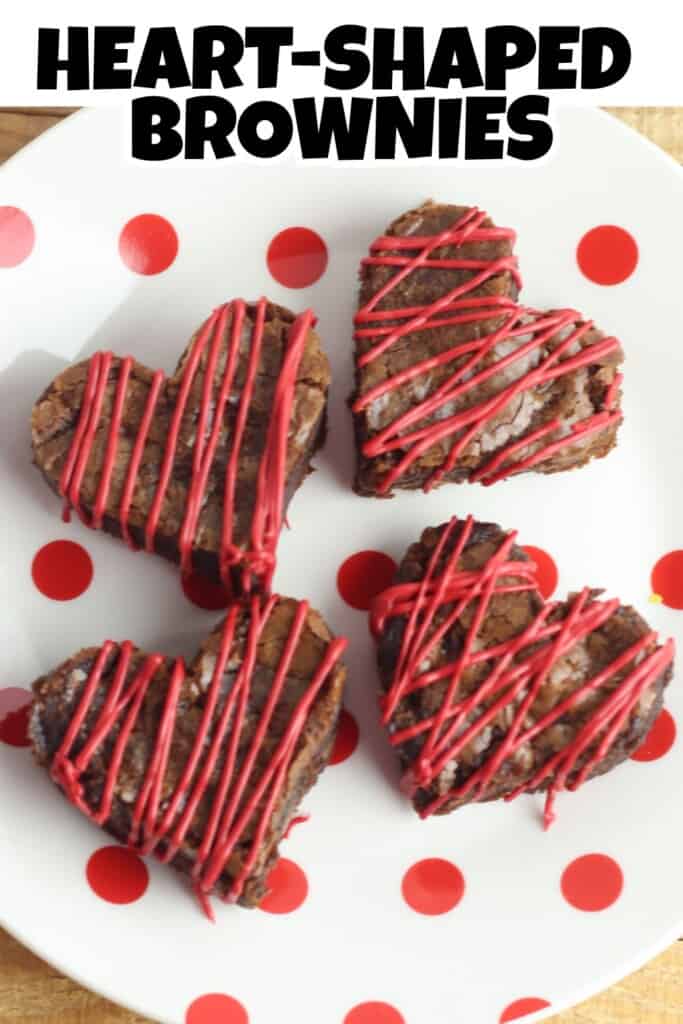
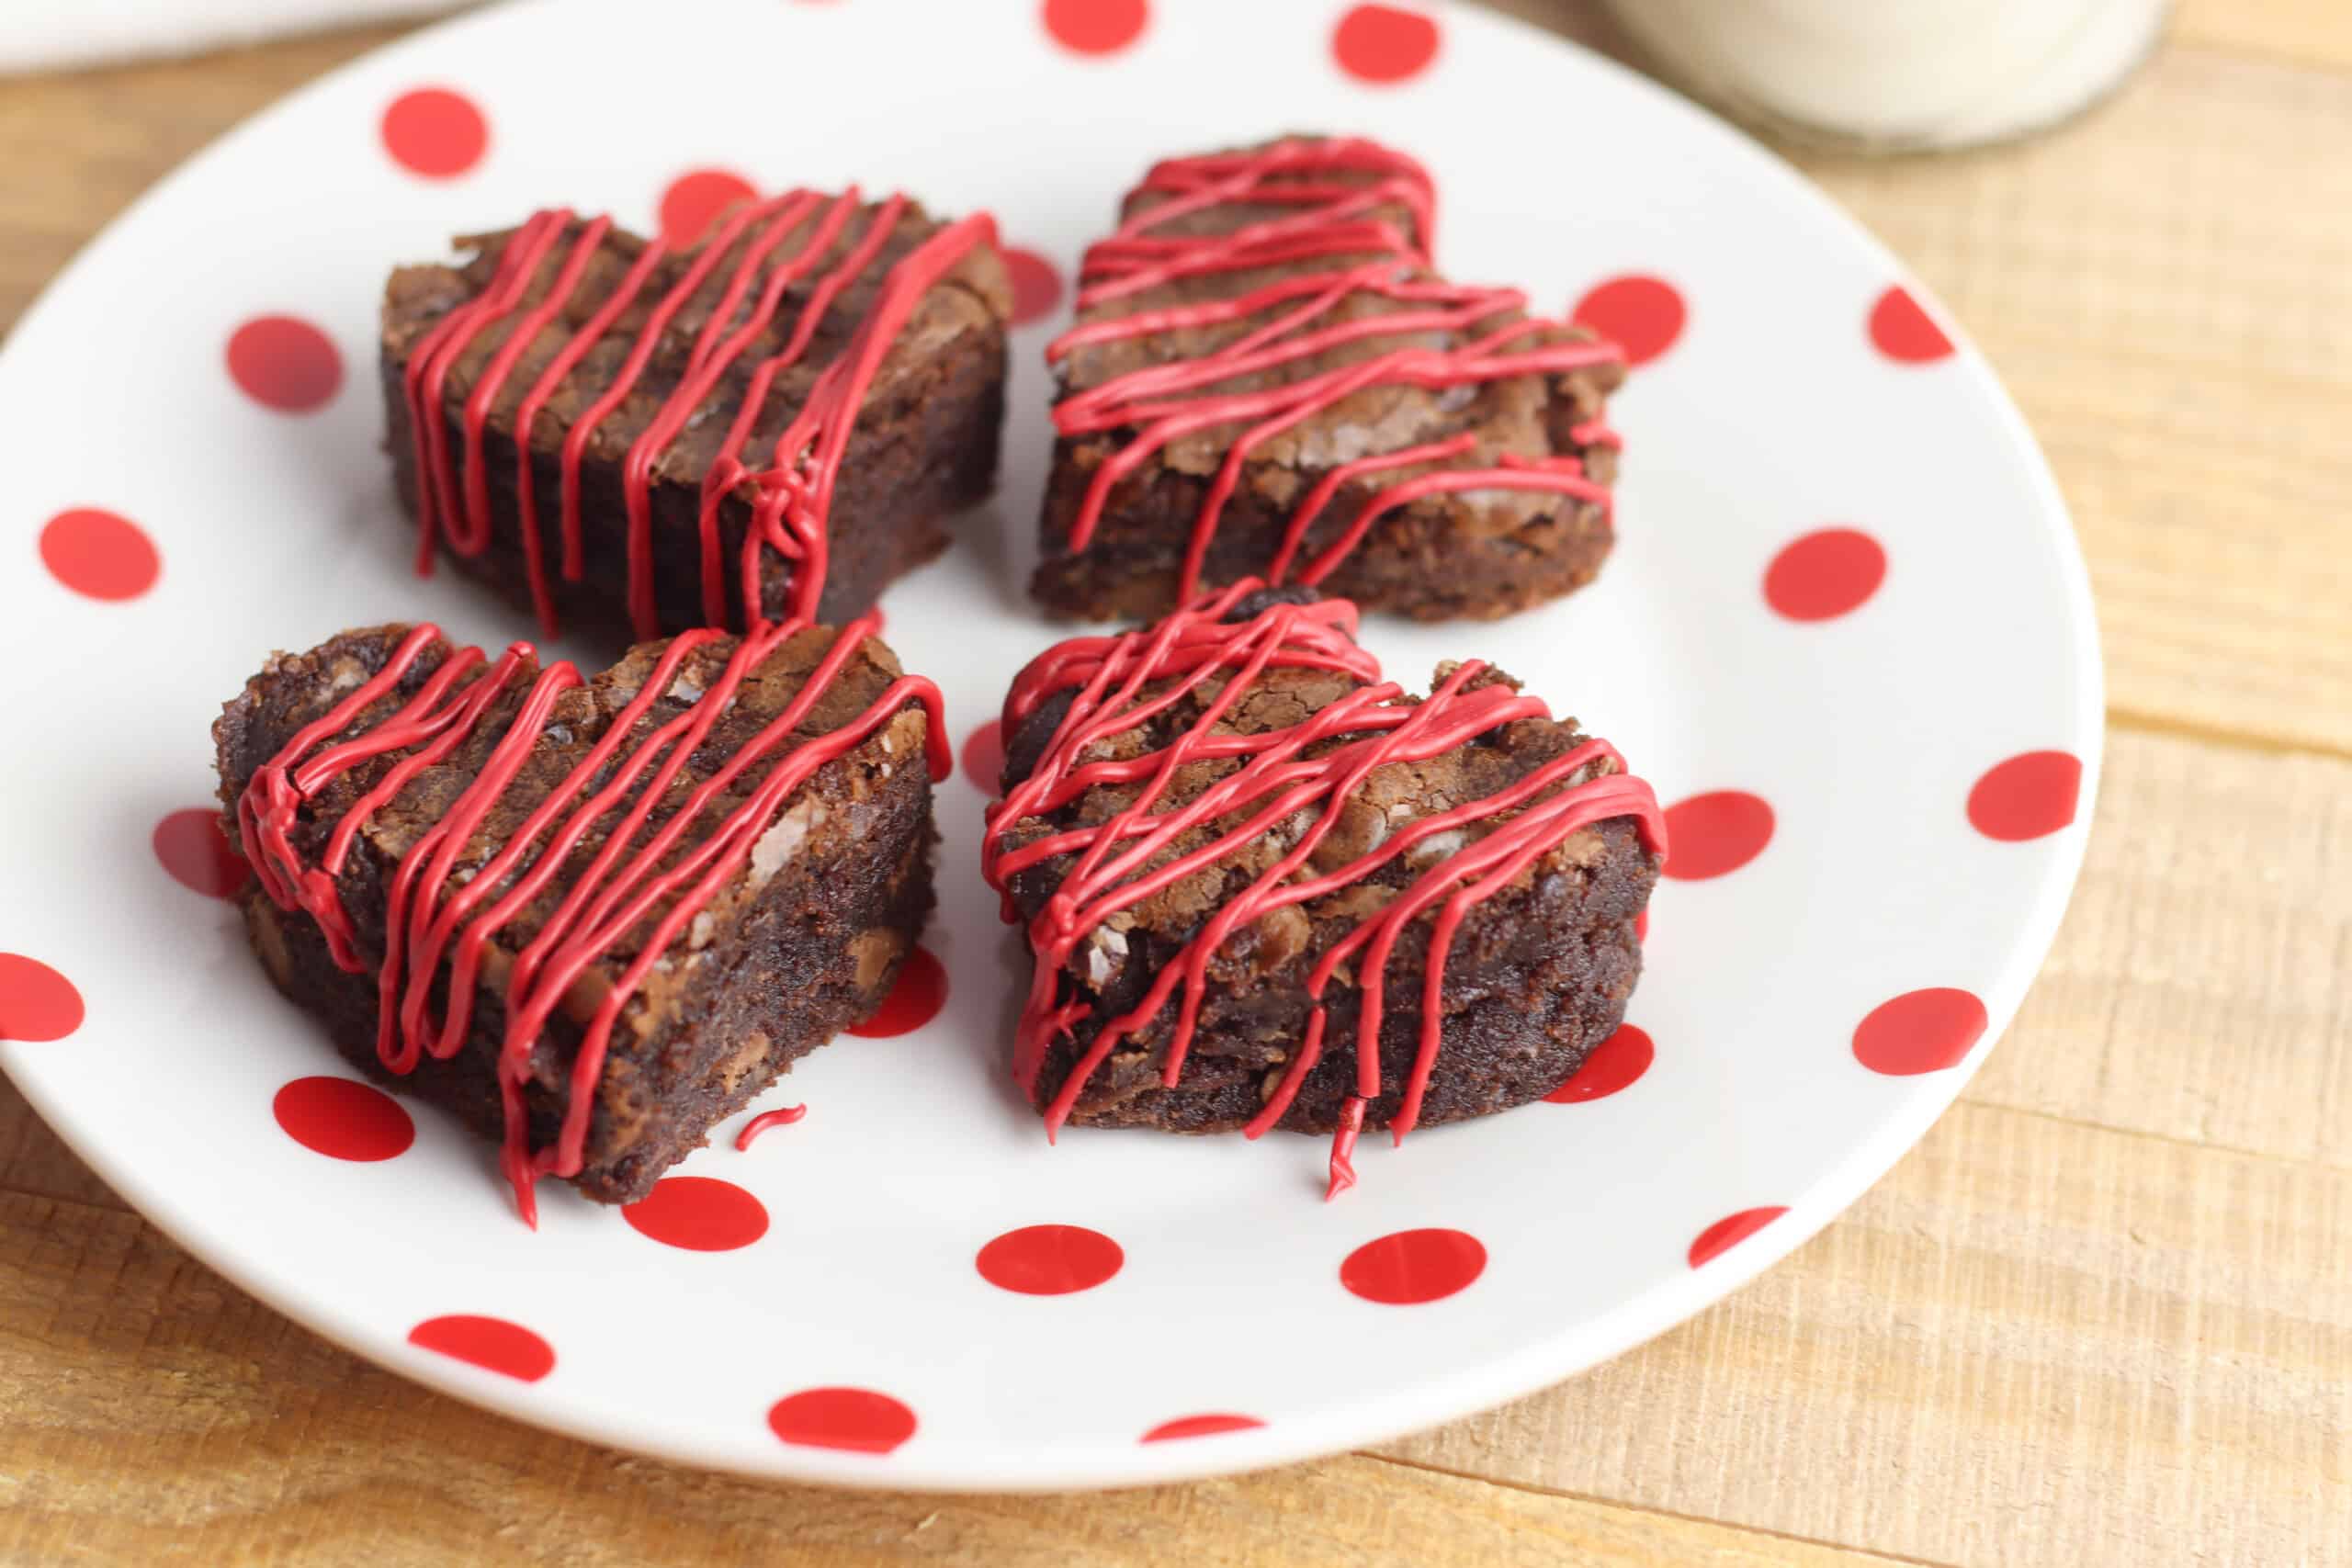
Heart-Shaped Brownies (Easy Valentine's Day Dessert!)
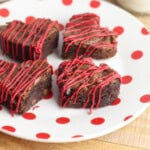
These heart-shaped brownies are a festive and fun treat for Valentine's Day! Made with rich, moist chocolate brownies from scratch and decorated with melted red candy, they're perfect for baking with kids, classroom parties, or surprising someone special.
This post contains affiliate links. As an Amazon Affiliate, I earn a commission on qualifying purchases.
If you're looking for a Valentine's Day dessert that's impressive but actually doable on a busy weeknight, these heart-shaped brownies are about to become your new favorite! I've made these for classroom parties, baked them with my kids on lazy Sunday afternoons, and boxed them up as sweet gifts for neighbors.
They look like you spent hours in the kitchen, but here's our little secret-they come together in about 30 minutes of actual hands-on time. The chocolate chips add extra chocolatey goodness, and the heart shapes make them irresistibly cute!
Why You'll Love These Heart-Shaped Brownies
- From scratch but easy: This homemade brownie recipe is just as simple as a box mix-but tastes so much better with richer chocolate flavor and fudgier texture.
- Perfect for baking with kids: Little ones love pressing the cookie cutters and decorating with candy melts and sprinkles. It's like edible arts and crafts!
- Great for gifting: Pop a few into a cellophane bag, tie with a ribbon, and you've got a Valentine that beats any store-bought card.
- Classroom party approved: Makes 12 perfectly portioned heart brownies-ideal for school celebrations.
- Customizable decorations: Use any color candy melts, sprinkles, or drizzles to match your occasion.
- Budget-friendly: Uses simple pantry staples you probably already have on hand.
- Make-ahead friendly: Bake the brownies ahead and decorate the day you need them.
Ingredient Notes
For the Brownies:
Unsalted Butter (¾ cup): Melted butter creates that signature fudgy texture. Make sure it's slightly cooled before adding to the sugar so you don't scramble the eggs later. I always use unsalted so I can control the salt level.
Granulated Sugar (1½ cups): Regular white sugar gives these brownies their shiny, crackly top and chewy texture. Don't substitute brown sugar here-it changes the texture significantly.
Large Eggs (3): Eggs provide structure and richness. Add them one at a time and whisk well after each addition for the smoothest batter. Room temperature eggs incorporate best, but cold eggs will work in a pinch.
Pure Vanilla Extract (2 teaspoons): Don't skip this! Vanilla enhances the chocolate flavor beautifully. Use pure vanilla extract, not imitation, for the best taste.
All-Purpose Flour (1 cup): Regular all-purpose flour is all you need. Don't pack it-spoon it into your measuring cup and level off for accurate measurement.
Unsweetened Cocoa Powder (⅔ cup): This is where all that deep chocolate flavor comes from. I use regular unsweetened cocoa powder (like Hershey's), but Dutch-process works too for a slightly milder flavor.
Mini Chocolate Chips (½ cup): These add pockets of melty chocolate throughout. Mini chips distribute better than regular-sized chips in a thin brownie layer.
For Decorating:
Red Candy Melts (1 cup): Wilton Red Candy Melts work perfectly and are easy to find at craft stores or in the baking aisle. They melt smoothly and set with a nice shine.
Optional Toppings: Valentine's sprinkles, mini heart candies, or additional chocolate chips add extra festive flair. Get creative!
How to Make Heart-Shaped Brownies
Make the Brownie Batter
Step 1: Prep your pan. Preheat oven to 350°F (175°C). Grease a 9×13-inch baking pan and line with parchment paper, leaving some hanging over the edges for easy removal later. This step is crucial for getting your brownies out cleanly!
Step 2: Mix dry ingredients. In a medium bowl, whisk together flour, cocoa powder, baking powder, and salt. Set aside.
Step 3: Combine wet ingredients. In a large bowl, whisk together melted butter and sugar until well combined and smooth, about 1 minute. The mixture should look glossy.
Step 4: Add the eggs. Add eggs one at a time, whisking well after each addition. Stir in vanilla extract. The batter will become thick and shiny.
Step 5: Combine wet and dry. Add the dry ingredients to the wet ingredients and fold gently with a spatula until just combined. Do not overmix-a few streaks of flour are okay. Overmixing develops gluten and makes tough brownies.
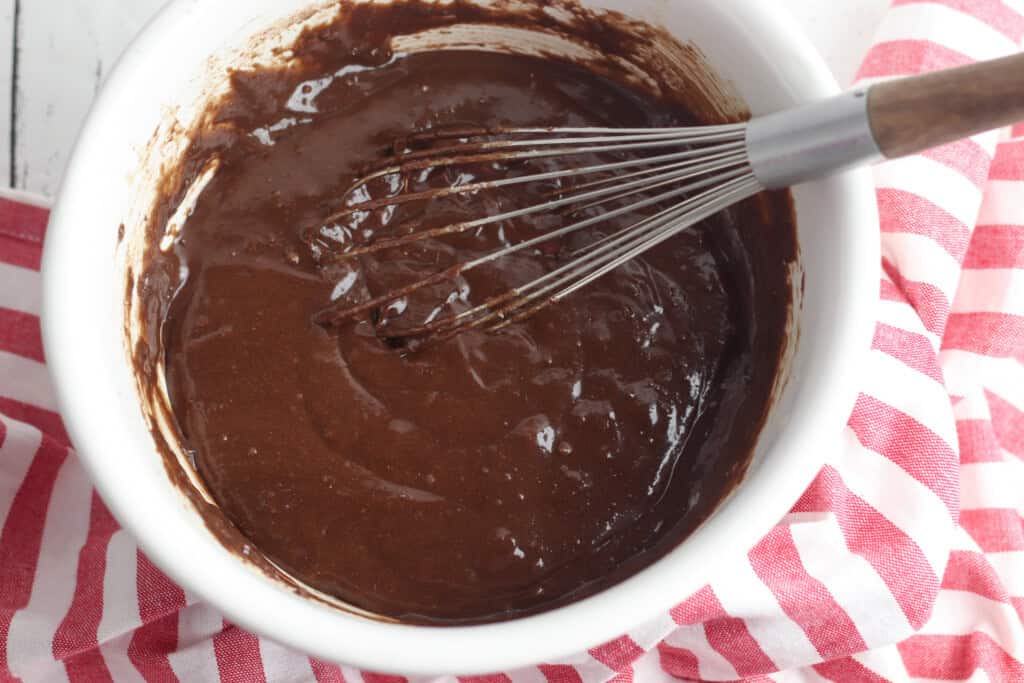
Step 6: Add chocolate chips. Fold in mini chocolate chips until evenly distributed throughout the batter.
Step 7: Bake. Pour batter into the prepared pan and spread evenly with a spatula. Bake for 23-25 minutes, or until a toothpick inserted in the center comes out with a few moist crumbs (not wet batter). Do not overbake!
Step 8: Cool completely. Let brownies cool in the pan on a wire rack for at least 1 hour. The brownies MUST be completely cool before cutting into shapes, or they'll crumble.
Cut and Decorate
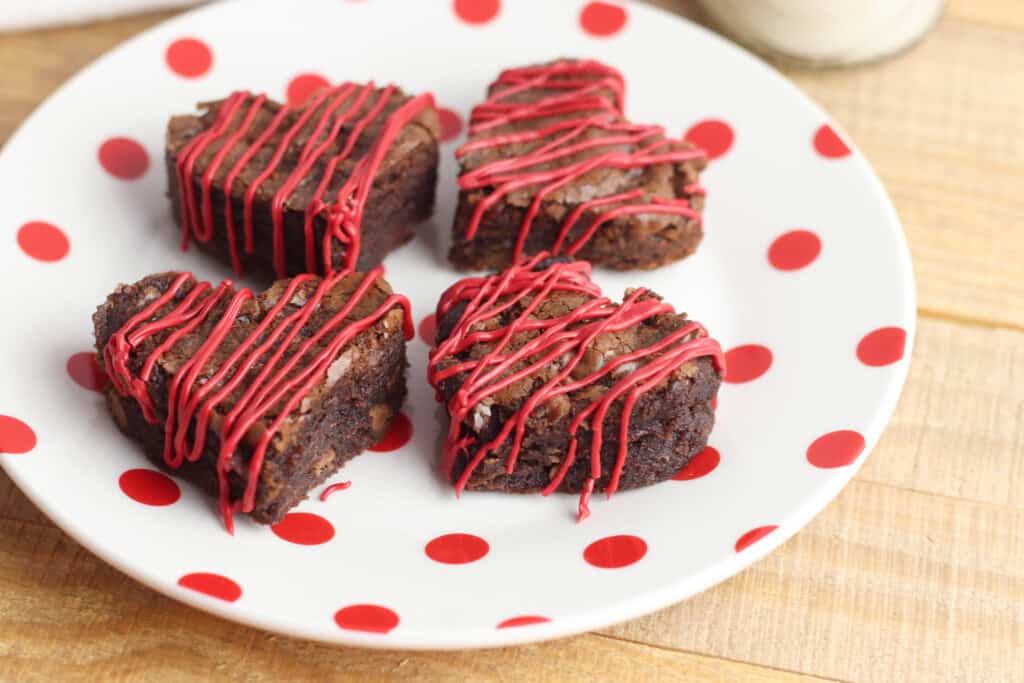
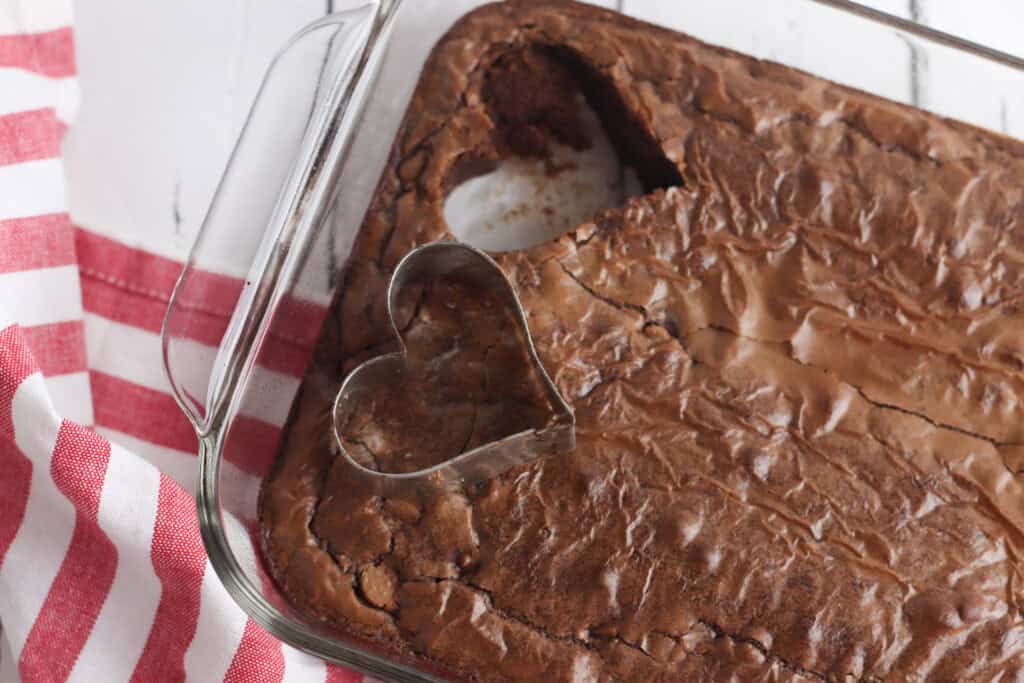
Step 1: Cut heart shapes. Once brownies are completely cool, use the parchment overhang to lift them out of the pan and place on a cutting board. Using a 2-inch heart-shaped cookie cutter, cut out 12 hearts. Press firmly and wiggle gently to release each heart.
Step 2: Save the scraps. Don't throw away the leftover brownie pieces! They're perfect for snacking, crumbling over ice cream, or making brownie truffles.
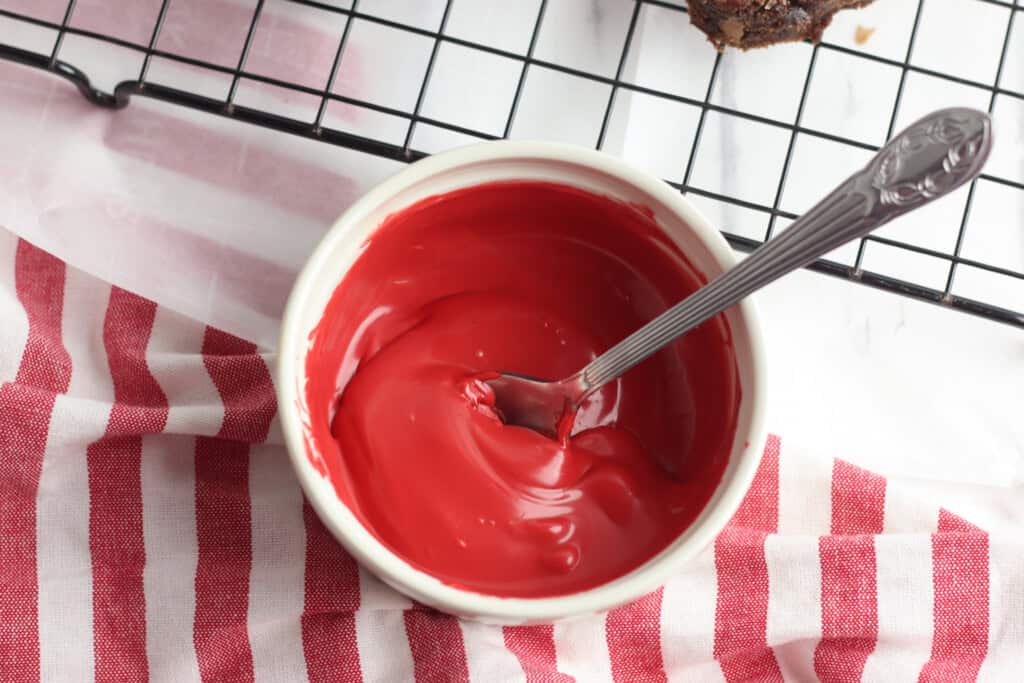
Step 3: Melt the candy. Melt red candy melts according to package instructions (usually 30-second intervals in the microwave, stirring between each interval, until smooth).
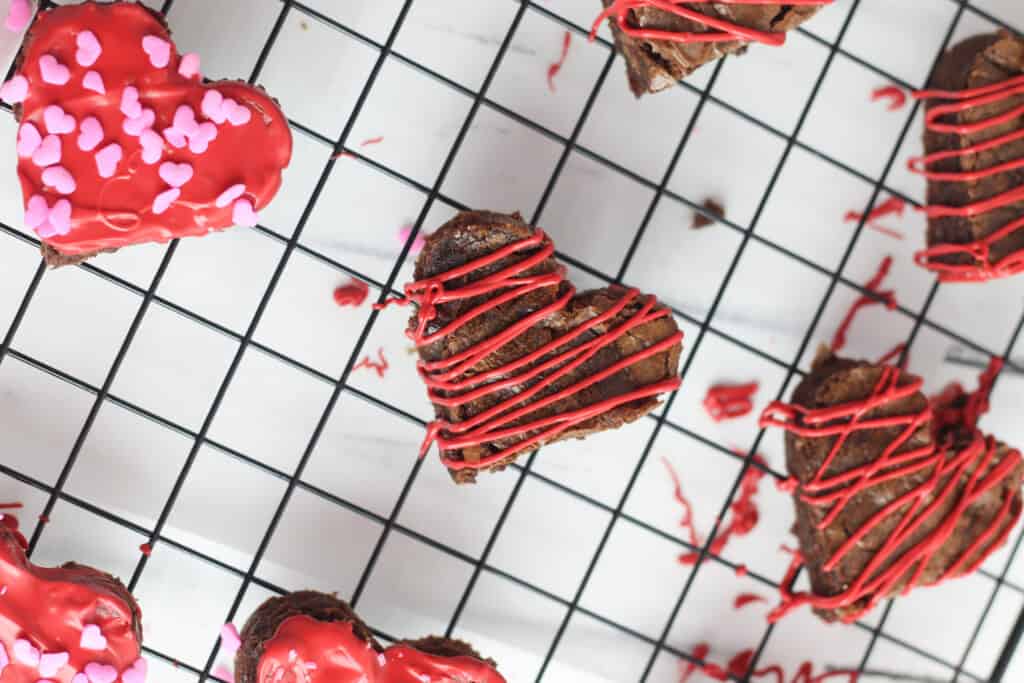
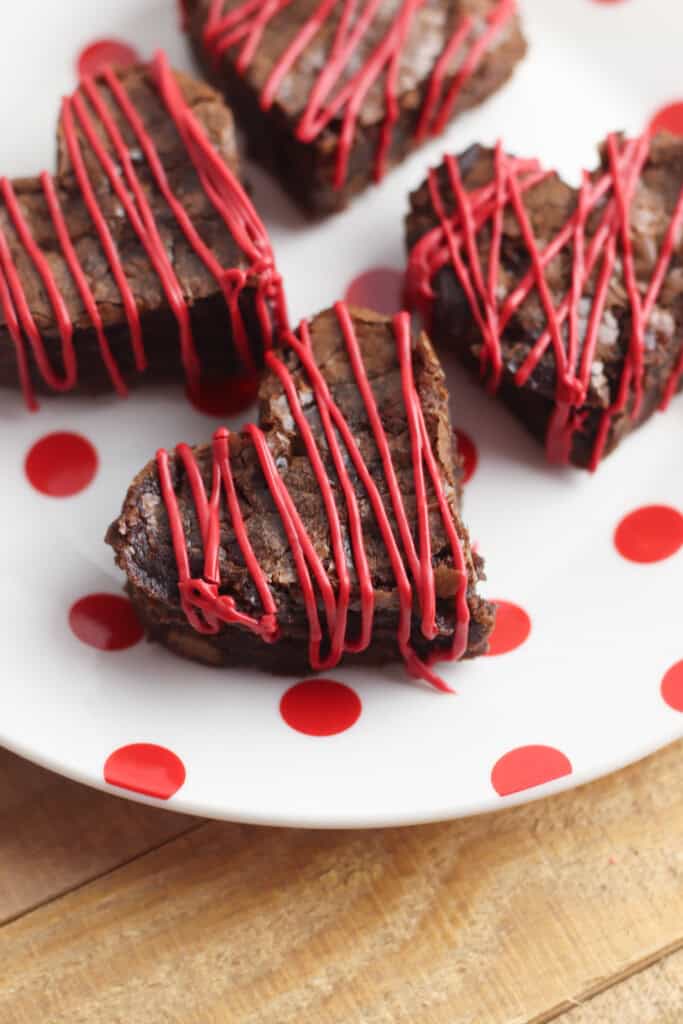
Step 4: Decorate. Transfer melted candy to a piping bag or zip-lock bag with a small corner cut off. Pipe stripes, zigzags, or swirls over the heart-shaped brownies. Alternatively, spread the melted candy over the entire top of each brownie and decorate with sprinkles while the candy is still wet.
Step 5: Let set. Let the decorated brownies sit at room temperature for 15-20 minutes until the candy hardens completely.
Tips for Perfect Heart-Shaped Brownies
Don't overbake! This is the number one mistake with brownies. Pull them from the oven when a toothpick comes out with a few moist crumbs-not wet batter, but not completely clean either. They'll continue cooking as they cool. Overbaked brownies are dry and crumbly, making cutting shapes nearly impossible.
Cool completely before cutting. I cannot stress this enough! Warm brownies will fall apart the second you try to cut shapes. Give them at least an hour at room temperature, or pop them in the fridge for 30 minutes if you're short on time.
Use metal cookie cutters. If you have both plastic and metal cutters, reach for the metal ones. They have sharper edges and cut more cleanly through dense brownies.
Try the hot water trick. Here's a game-changer: dip your heart cookie cutter in hot water and wipe it dry between each cut. The warm metal slices through the brownie like butter, giving you perfectly clean edges.
Choose the right size cutter. A 2-inch heart is the perfect size-big enough to be satisfying but small enough to yield about 12 hearts from a 9×13 pan.
Melt candy properly. Microwave candy melts in 30-second intervals, stirring between each one. Overheating makes them thick and clumpy. If your candy gets too thick, stir in a tiny bit of coconut oil to thin it.
Storage & Make-Ahead Tips
Refrigerator: Store decorated brownies in an airtight container with parchment paper between layers for up to 4 days at room temperature. The candy coating helps seal in moisture and adds a nice crunch.
Make-ahead strategy: Bake brownies up to 2 days ahead and store uncut in an airtight container at room temperature. Cut and decorate the day you plan to serve them for the freshest look.
Freezing undecorated brownies: Wrap the cooled, uncut brownie slab tightly in plastic wrap, then aluminum foil. Freeze for up to 3 months. Thaw overnight in the refrigerator before cutting and decorating.
Don't freeze decorated brownies: The candy coating can become sticky and lose its shine when frozen and thawed.
Delicious Variations to Try
- White Chocolate Hearts: Use white candy melts instead of red and top with pink sprinkles for an elegant look.
- Peppermint Brownies: Add ½ teaspoon peppermint extract to the batter and decorate with crushed candy canes-perfect for Christmas!
- Peanut Butter Drizzle: Skip the candy melts and drizzle with melted peanut butter mixed with a little powdered sugar.
- Orange Chocolate: Add 1 teaspoon orange zest to the batter for a sophisticated twist.
- S'mores Style: Top with mini marshmallows and a graham cracker crumble before the chocolate drizzle.
- Double Chocolate: Use milk chocolate candy melts and top with chocolate sprinkles for serious chocolate lovers.
Serving Suggestions
These Heart-Shaped Brownies are perfect for:
- Valentine's Day classroom parties and school celebrations
- Baking activity with kids on a weekend afternoon
- Romantic dessert for two (with plenty of leftovers!)
- Neighbor gifts packaged in cellophane bags with ribbon
- Galentine's Day brunch with girlfriends
- Anniversary or birthday surprise
For an extra special presentation, place each brownie in a cupcake liner and arrange on a tiered serving stand. Add a few conversation hearts and rose petals around the platter for a stunning Valentine's display!
These heart-shaped brownies hit that sweet spot of looking absolutely adorable while being totally manageable for real life. Whether you're baking for a classroom party, a family dessert, or just because it's Tuesday and you want chocolate, this recipe has you covered.
From my kitchen to yours, happy baking! 💕
Pin this recipe for later and share your Heart-Shaped Brownies on Instagram-tag @marathonsandmotivation so I can see your creations!
Note: This post was originally published February 1, 2020 and updated on February 1, 2026.
HEART-SHAPED BROWNIES
Equipment
- 2-inch heart-shaped cookie cutter
- Piping bag or zip-lock bag (for decorating)
Ingredients
Dry Ingredients:
- 1 cup all-purpose flour
- ⅔ cup unsweetened cocoa powder
- ½ teaspoon baking powder
- ½ teaspoon salt
Wet Ingredients:
- ¾ cup unsalted butter, melted and slightly cooled
- 1½ cups granulated sugar
- 3 large eggs
- 2 teaspoons vanilla extract
Mix-ins:
- ½ cup mini chocolate chips
For Decorating:
- 1 cup red candy melts (such as Wilton Red Candy Melts)
- Optional: Valentine's sprinkles mini heart candies, or additional chocolate chips
Instructions
Make the Brownies:
- Preheat oven to 350° F. Grease a 9×13-inch baking pan and line with parchment paper, leaving some parchment paper hanging over the edges for easy removal.
- Prepare dry ingredients: In a medium bowl, whisk together flour, cocoa powder, baking powder, and salt. Set aside.
- Make wet mixture: In a large bowl, whisk together melted butter and sugar until well combined and smooth, about 1 minute. Add eggs one at a time, whisking well after each addition. Stir in vanilla extract.
- Combine: Add the dry ingredients to the wet ingredients and fold gently with a spatula until just combined. Do not overmix—a few streaks of flour are okay. Fold in chocolate chips until evenly distributed.
- Bake: Pour batter into the prepared pan and spread evenly with a spatula. Bake for 23-25 minutes, or until a toothpick inserted in the center comes out with a few moist crumbs (not wet batter). Do not overbake.
- Cool completely: Let brownies cool in the pan on a wire rack for at least 1 hour. The brownies must be completely cool before cutting into shapes.
Cut and Decorate:
- Cut heart shapes: Once brownies are completely cool, use the parchment overhang to lift them out of the pan and place on a cutting board. Using a 2-inch heart-shaped cookie cutter, cut out 12 hearts. Press firmly and wiggle gently to release each heart.
- Save the scraps: Don't throw away the leftover brownie pieces! They're perfect for snacking, crumbling over ice cream, or making brownie truffles.
- Melt the candy: Melt red candy melts according to package instructions (usually 30-second intervals in the microwave, stirring between each interval, until smooth).
- Decorate: Transfer melted candy to a piping bag or zip-lock bag with a small corner cut off. Pipe stripes, zigzags, or swirls over the heart-shaped brownies. Alternatively, spread the melted candy over the entire top of each brownie and decorate with sprinkles or mini heart candies while the candy is still wet.
- Set: Let the decorated brownies sit at room temperature for 15-20 minutes until the candy hardens completely.
- Serve and enjoy!
Notes
Nutrition


15 Comments