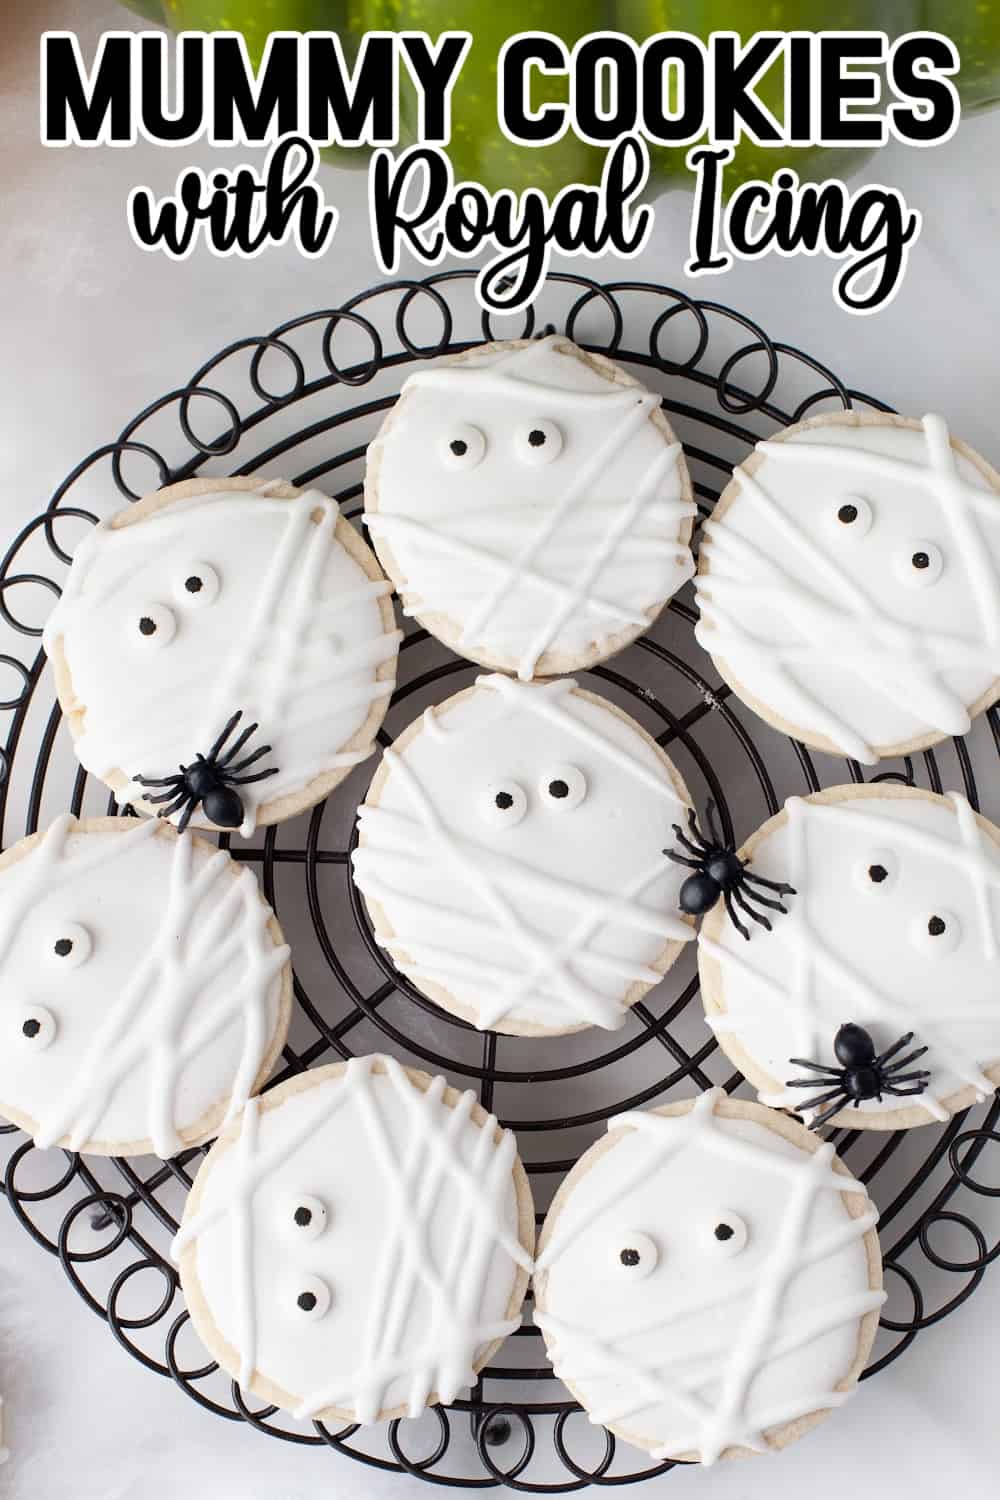
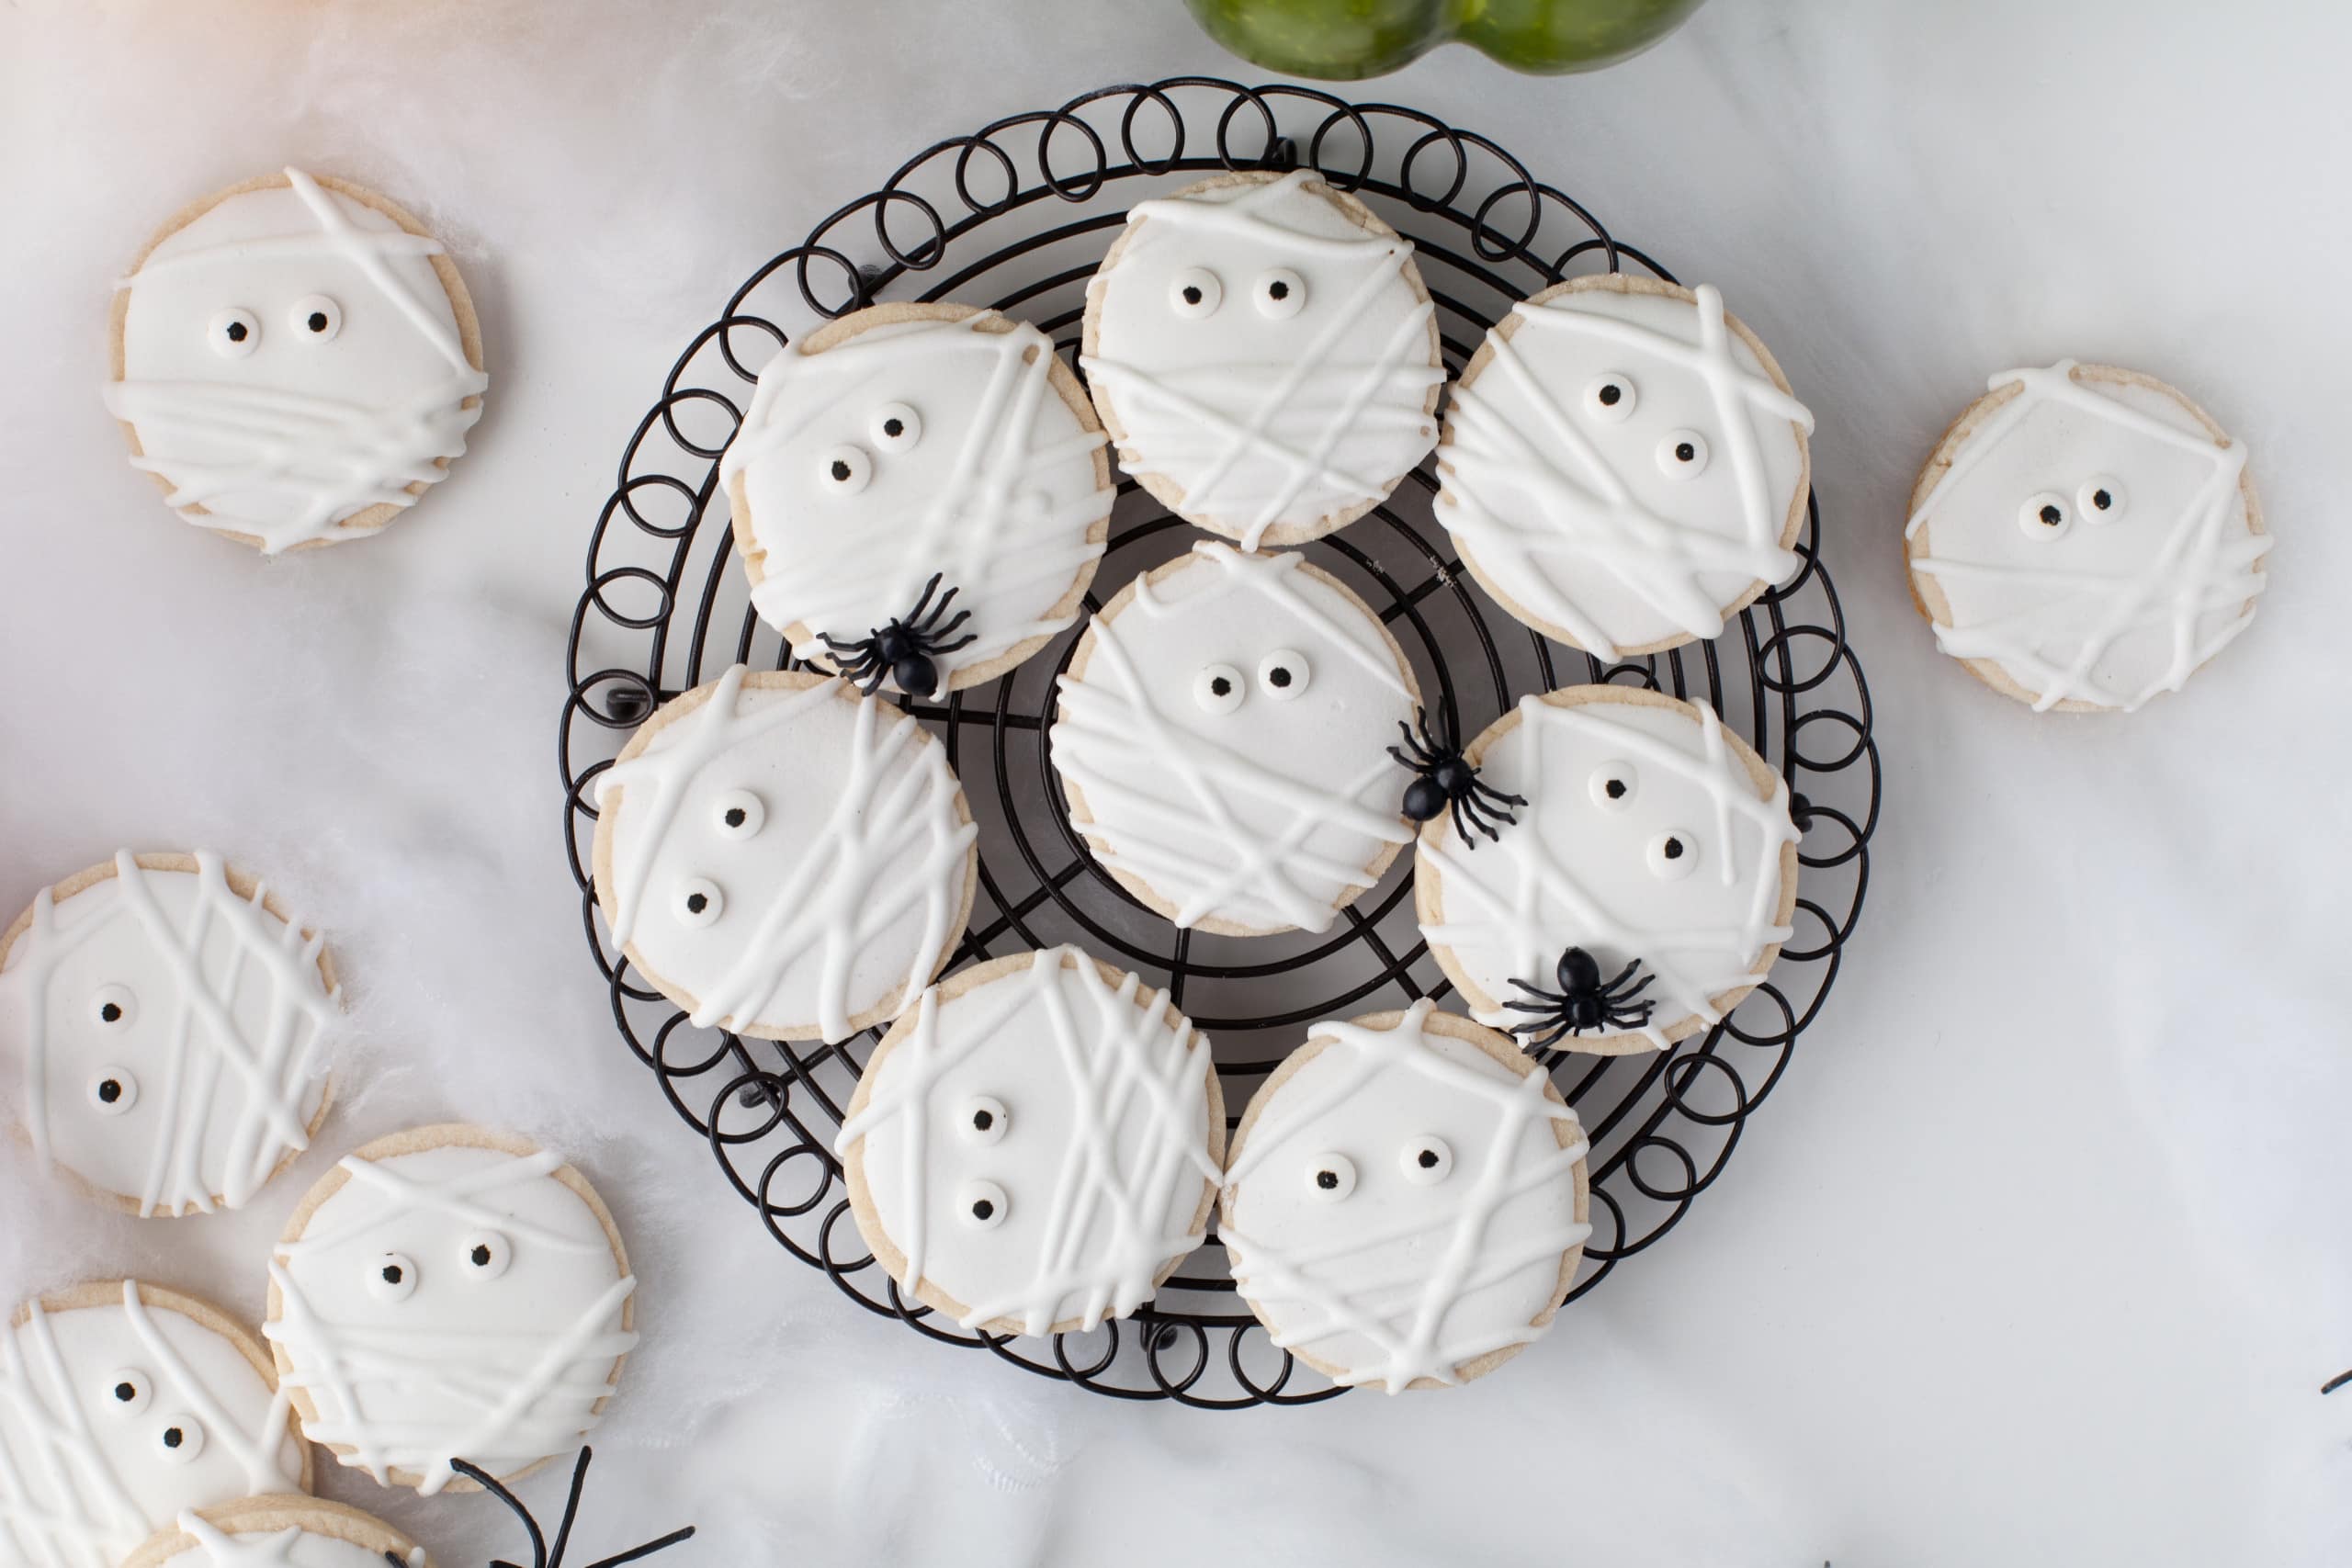
Mummy Cookies with Royal Icing

There's no better way to celebrate Halloween than by making some spooky treats! And with this simple mummy cookies recipe, you can turn boring sugar cookies into cute snacks with the help of some white royal icing and candy eyes. Prepare your cookies from scratch and add the decorations on top to whip up these adorable sweet treats for your Halloween party.
*This post contains affiliate links. As an Amazon Affiliate, I earn a commission on qualifying purchases.
What Do I Need to Make Mummy Cookies?
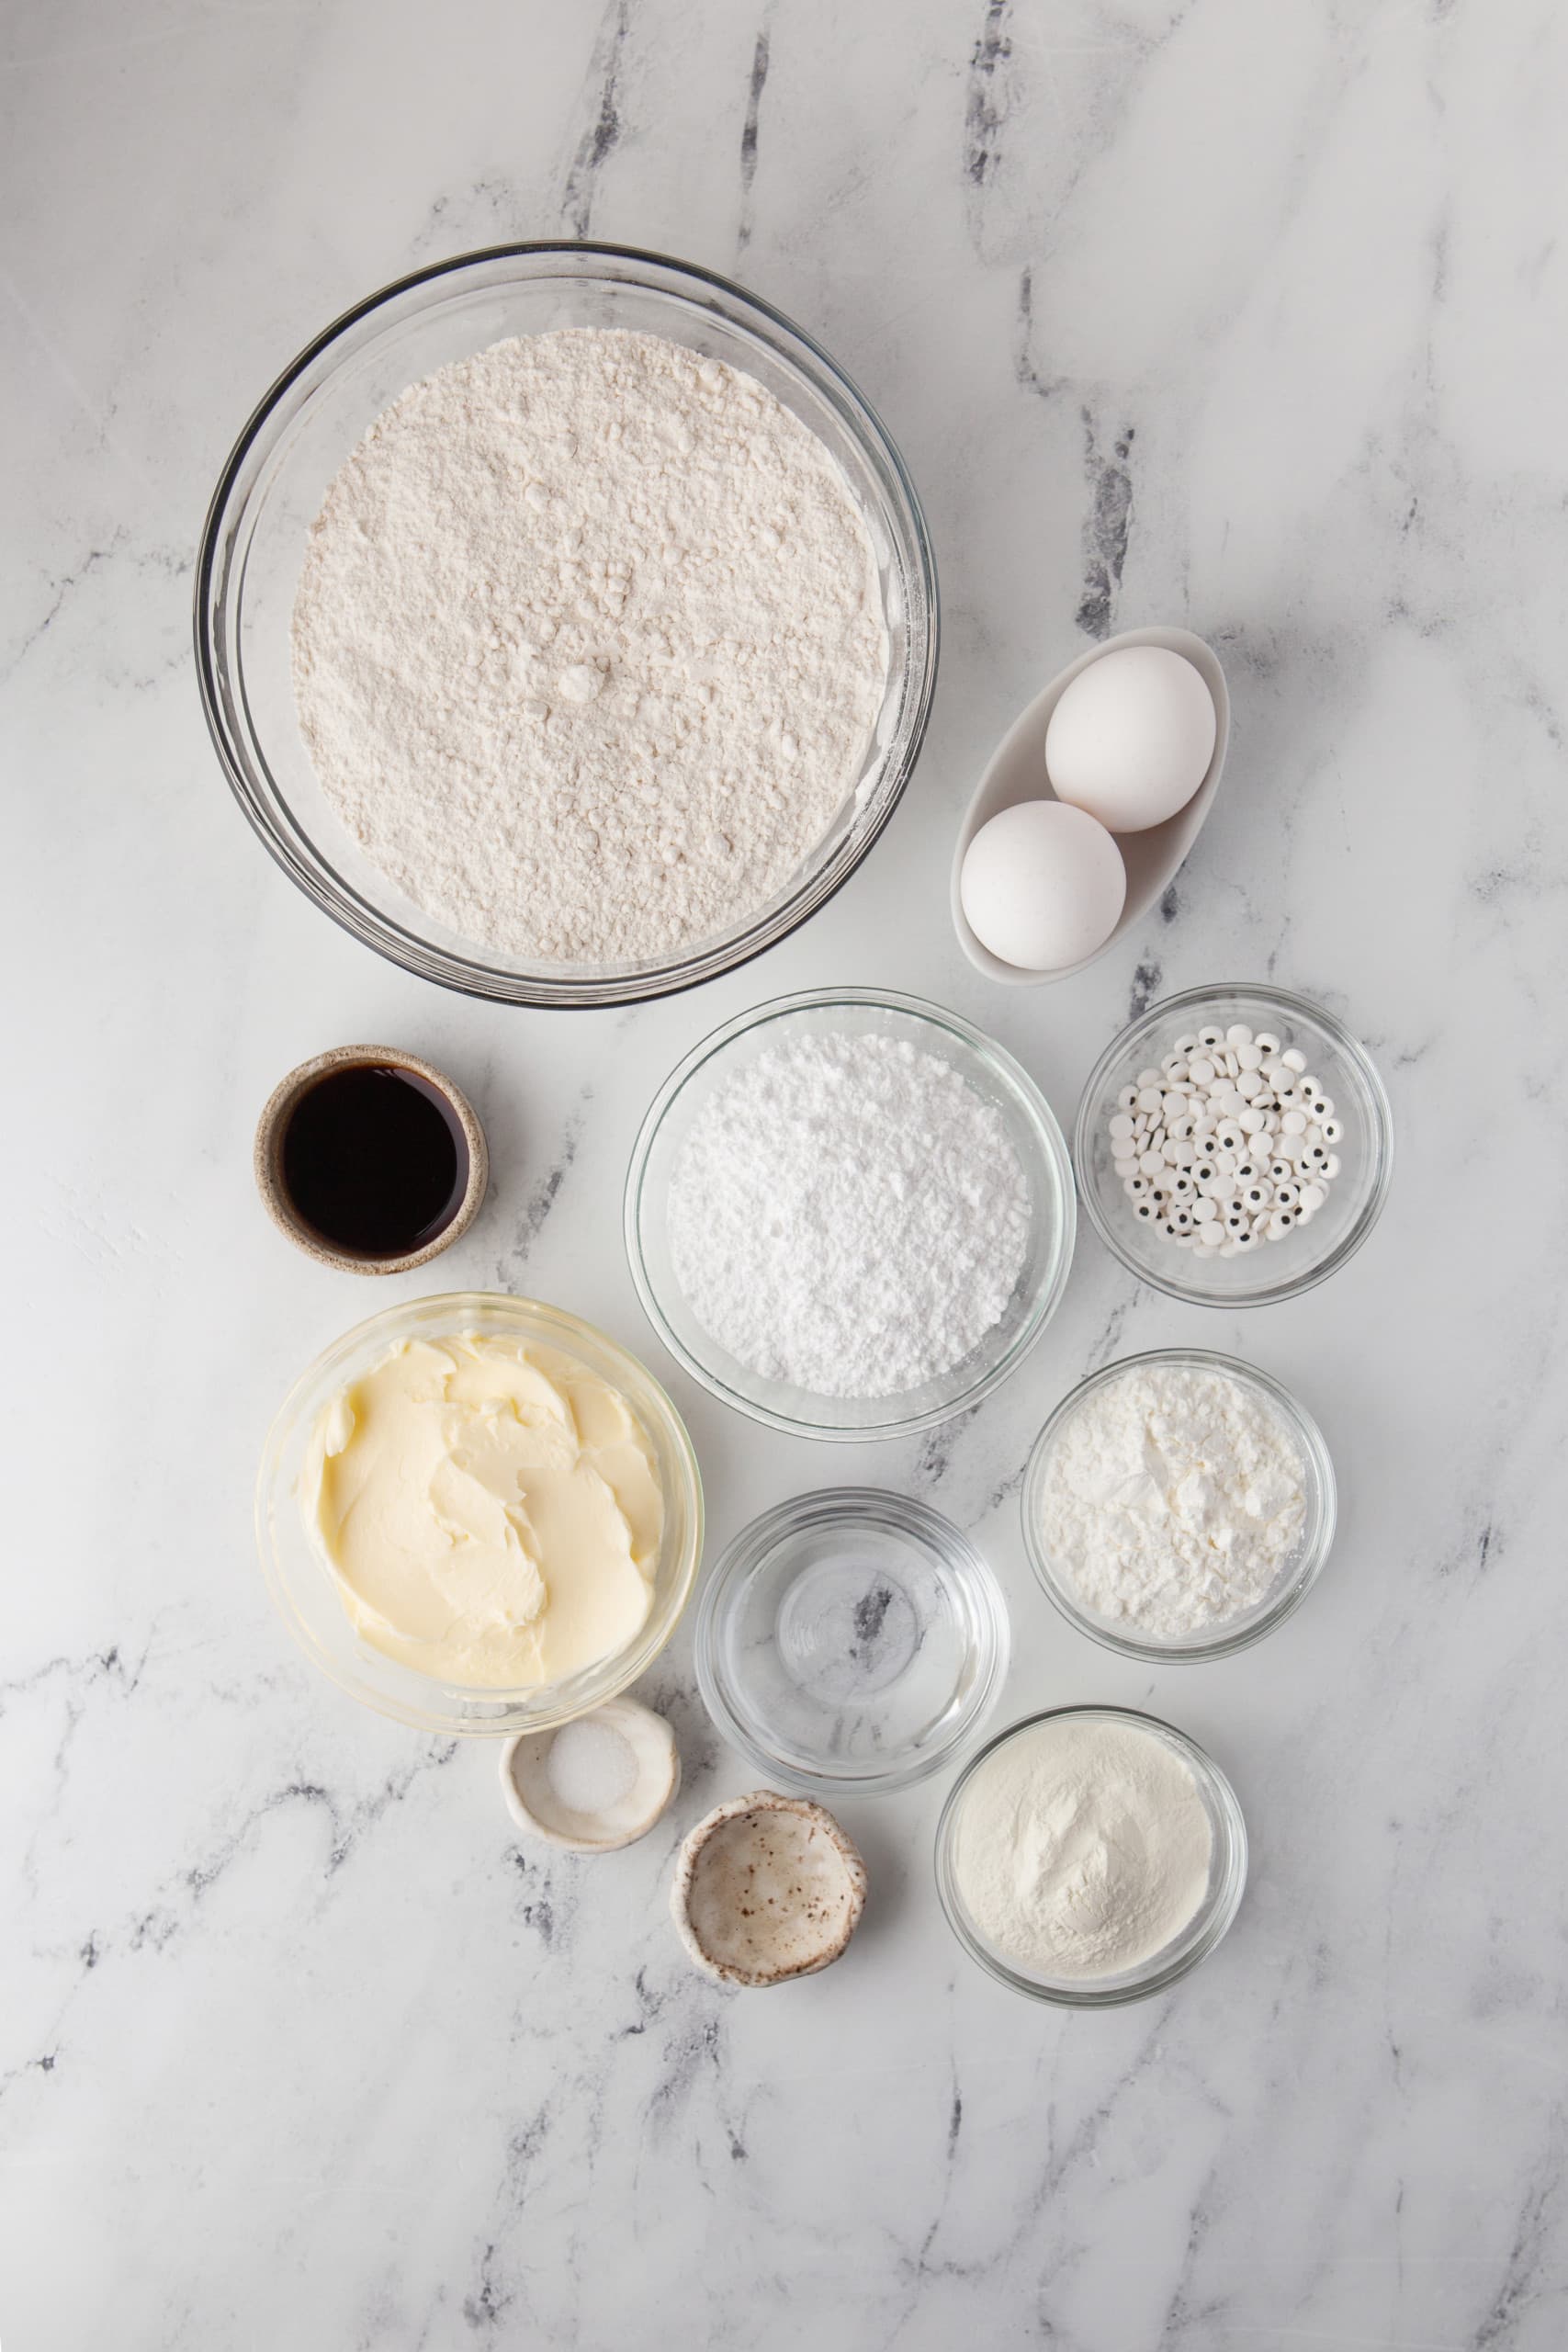
This fun Halloween recipe consists of homemade sugar cookies and from-scratch royal icing. But just because you're preparing all the elements yourself doesn't mean you need a ton of ingredients to make your own mummy cookies. To make these spooky treats, you'll need:
- Unsalted butter
- Powdered sugar
- Small eggs
- Vanilla extract
- Salt
- Cornstarch
- Flour
- Warm water
- Meringue powder
- Clear vanilla extract
- Candy eyes
Looking for more fun Halloween treats? Give these reader favorites a try!
Breadstick Witch's Fingers for Halloween | Easy Halloween Cookies with Sprinkles | Witch's Brew Halloween Bark|Halloween Rice Krispie Pops |Halloween Witch Chips and Guacamole
How Do I Make Mummy Cookies?
You'll love how quick and easy these Halloween cookies are to prepare! Bake the cookies, add the decorations on top, and these mummy treats are ready to serve. To make your mummy sugar cookies, follow these simple instructions.
Step One: Prepare the Cookie Dough
Start your Halloween treats by combining the butter and 1 cup powdered sugar in the stand mixer bowl fitted with the paddle attachment. Beat the ingredients together at medium speed and continue mixing until the butter is light and fluffy. Add the eggs and vanilla and beat to combine. Whisk together the flour, salt, and cornstarch in a separate bowl, then add the dry ingredients to the butter mixture and beat to combine.
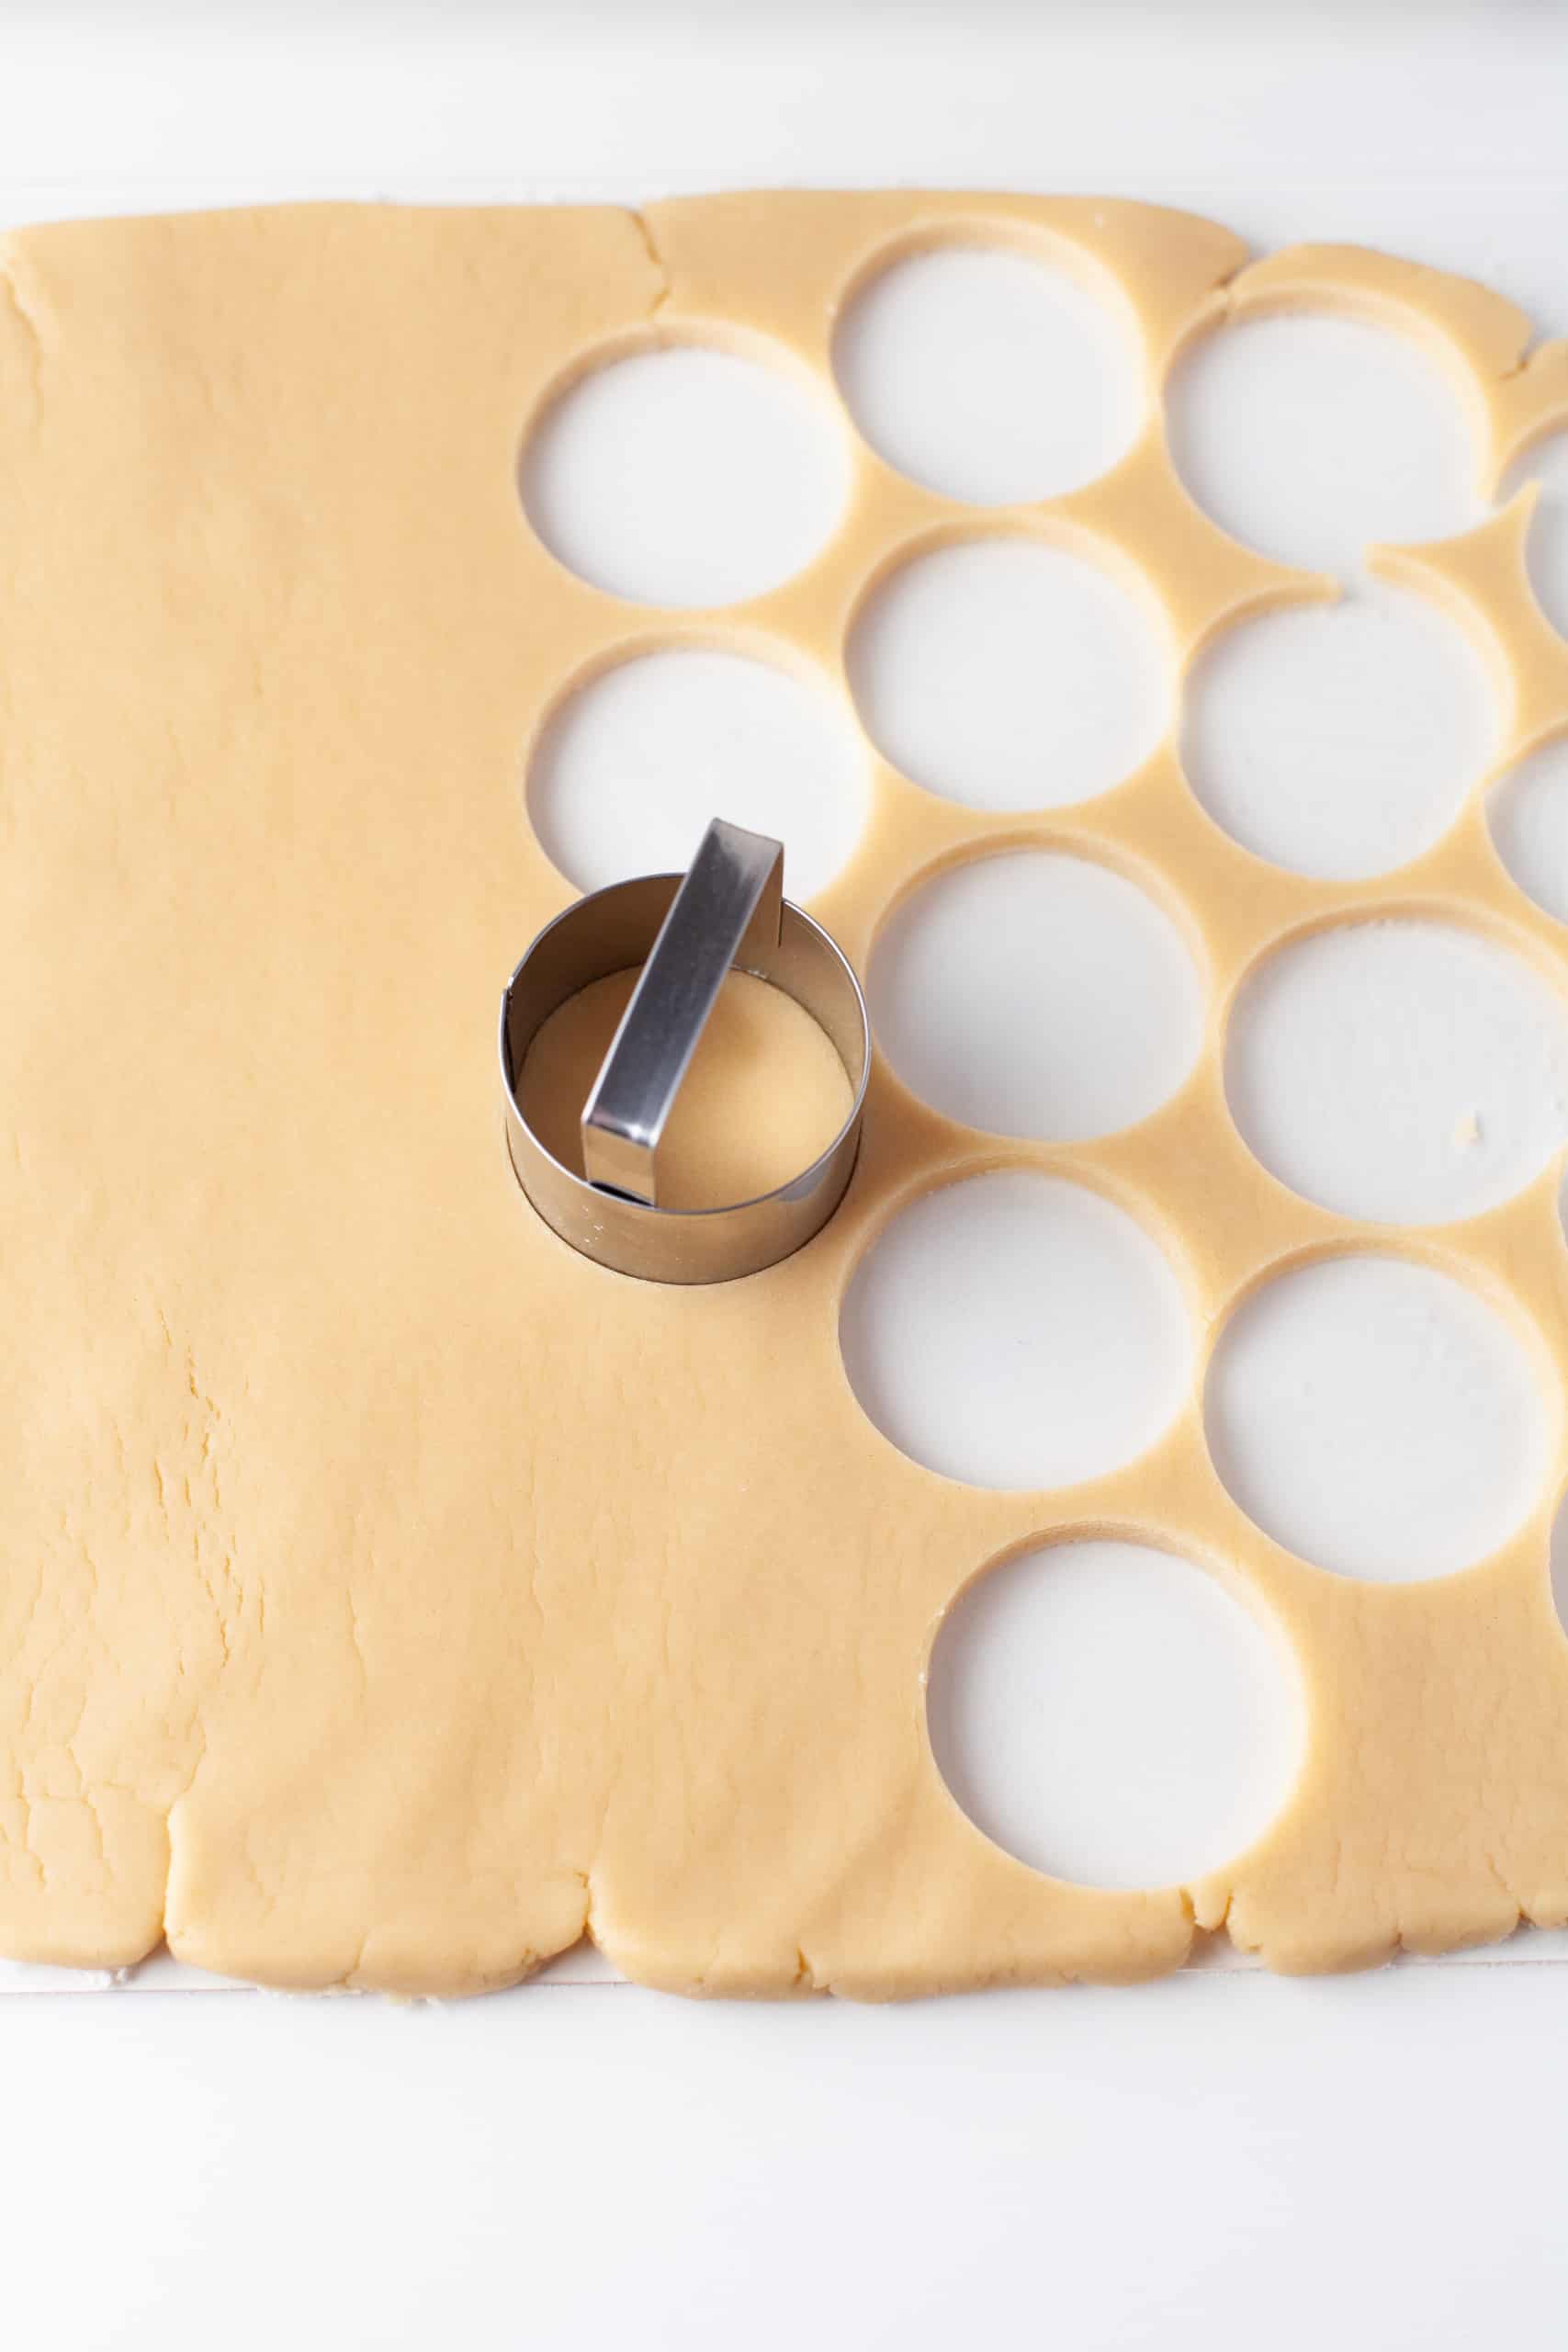
Step Two: Cut Out the Cookies
Once the cookie dough is ready, transfer it to a sheet of parchment paper and flatten it into a disk. Place the disk in the refrigerator to chill for at least 30 minutes, then roll out the dough until it's ¼ inch thick. Use a round cookie or biscuit cutter (The one I used was 2.5 inches in diameter) to cut out the dough, gather the scraps of dough and re-roll it as needed until all the dough has been used.
Step Three: Bake the Sugar Cookies
Place the round cookies on a baking sheet greased with nonstick cooking spray. Bake the cookies for 12 to 15 minutes, until the edges are golden brown. Allow the cookies to cool for at least one hour before decorating.
Would you like to save this?
Step Four: Make the Royal Icing
While the cookies are cooling, prepare the royal icing by combining the powdered sugar, clear vanilla-flavored extract, warm water, and meringue powder in the bowl of your stand mixer. Using the whisk attachment, beat the ingredients together until the icing is light and fluffy, which could take up to five minutes. After beating the ingredients, check the consistency to ensure that your royal icing is medium consistency. If it's too thick, add a small amount of water. If it's too thin, add a small amount of powdered sugar.
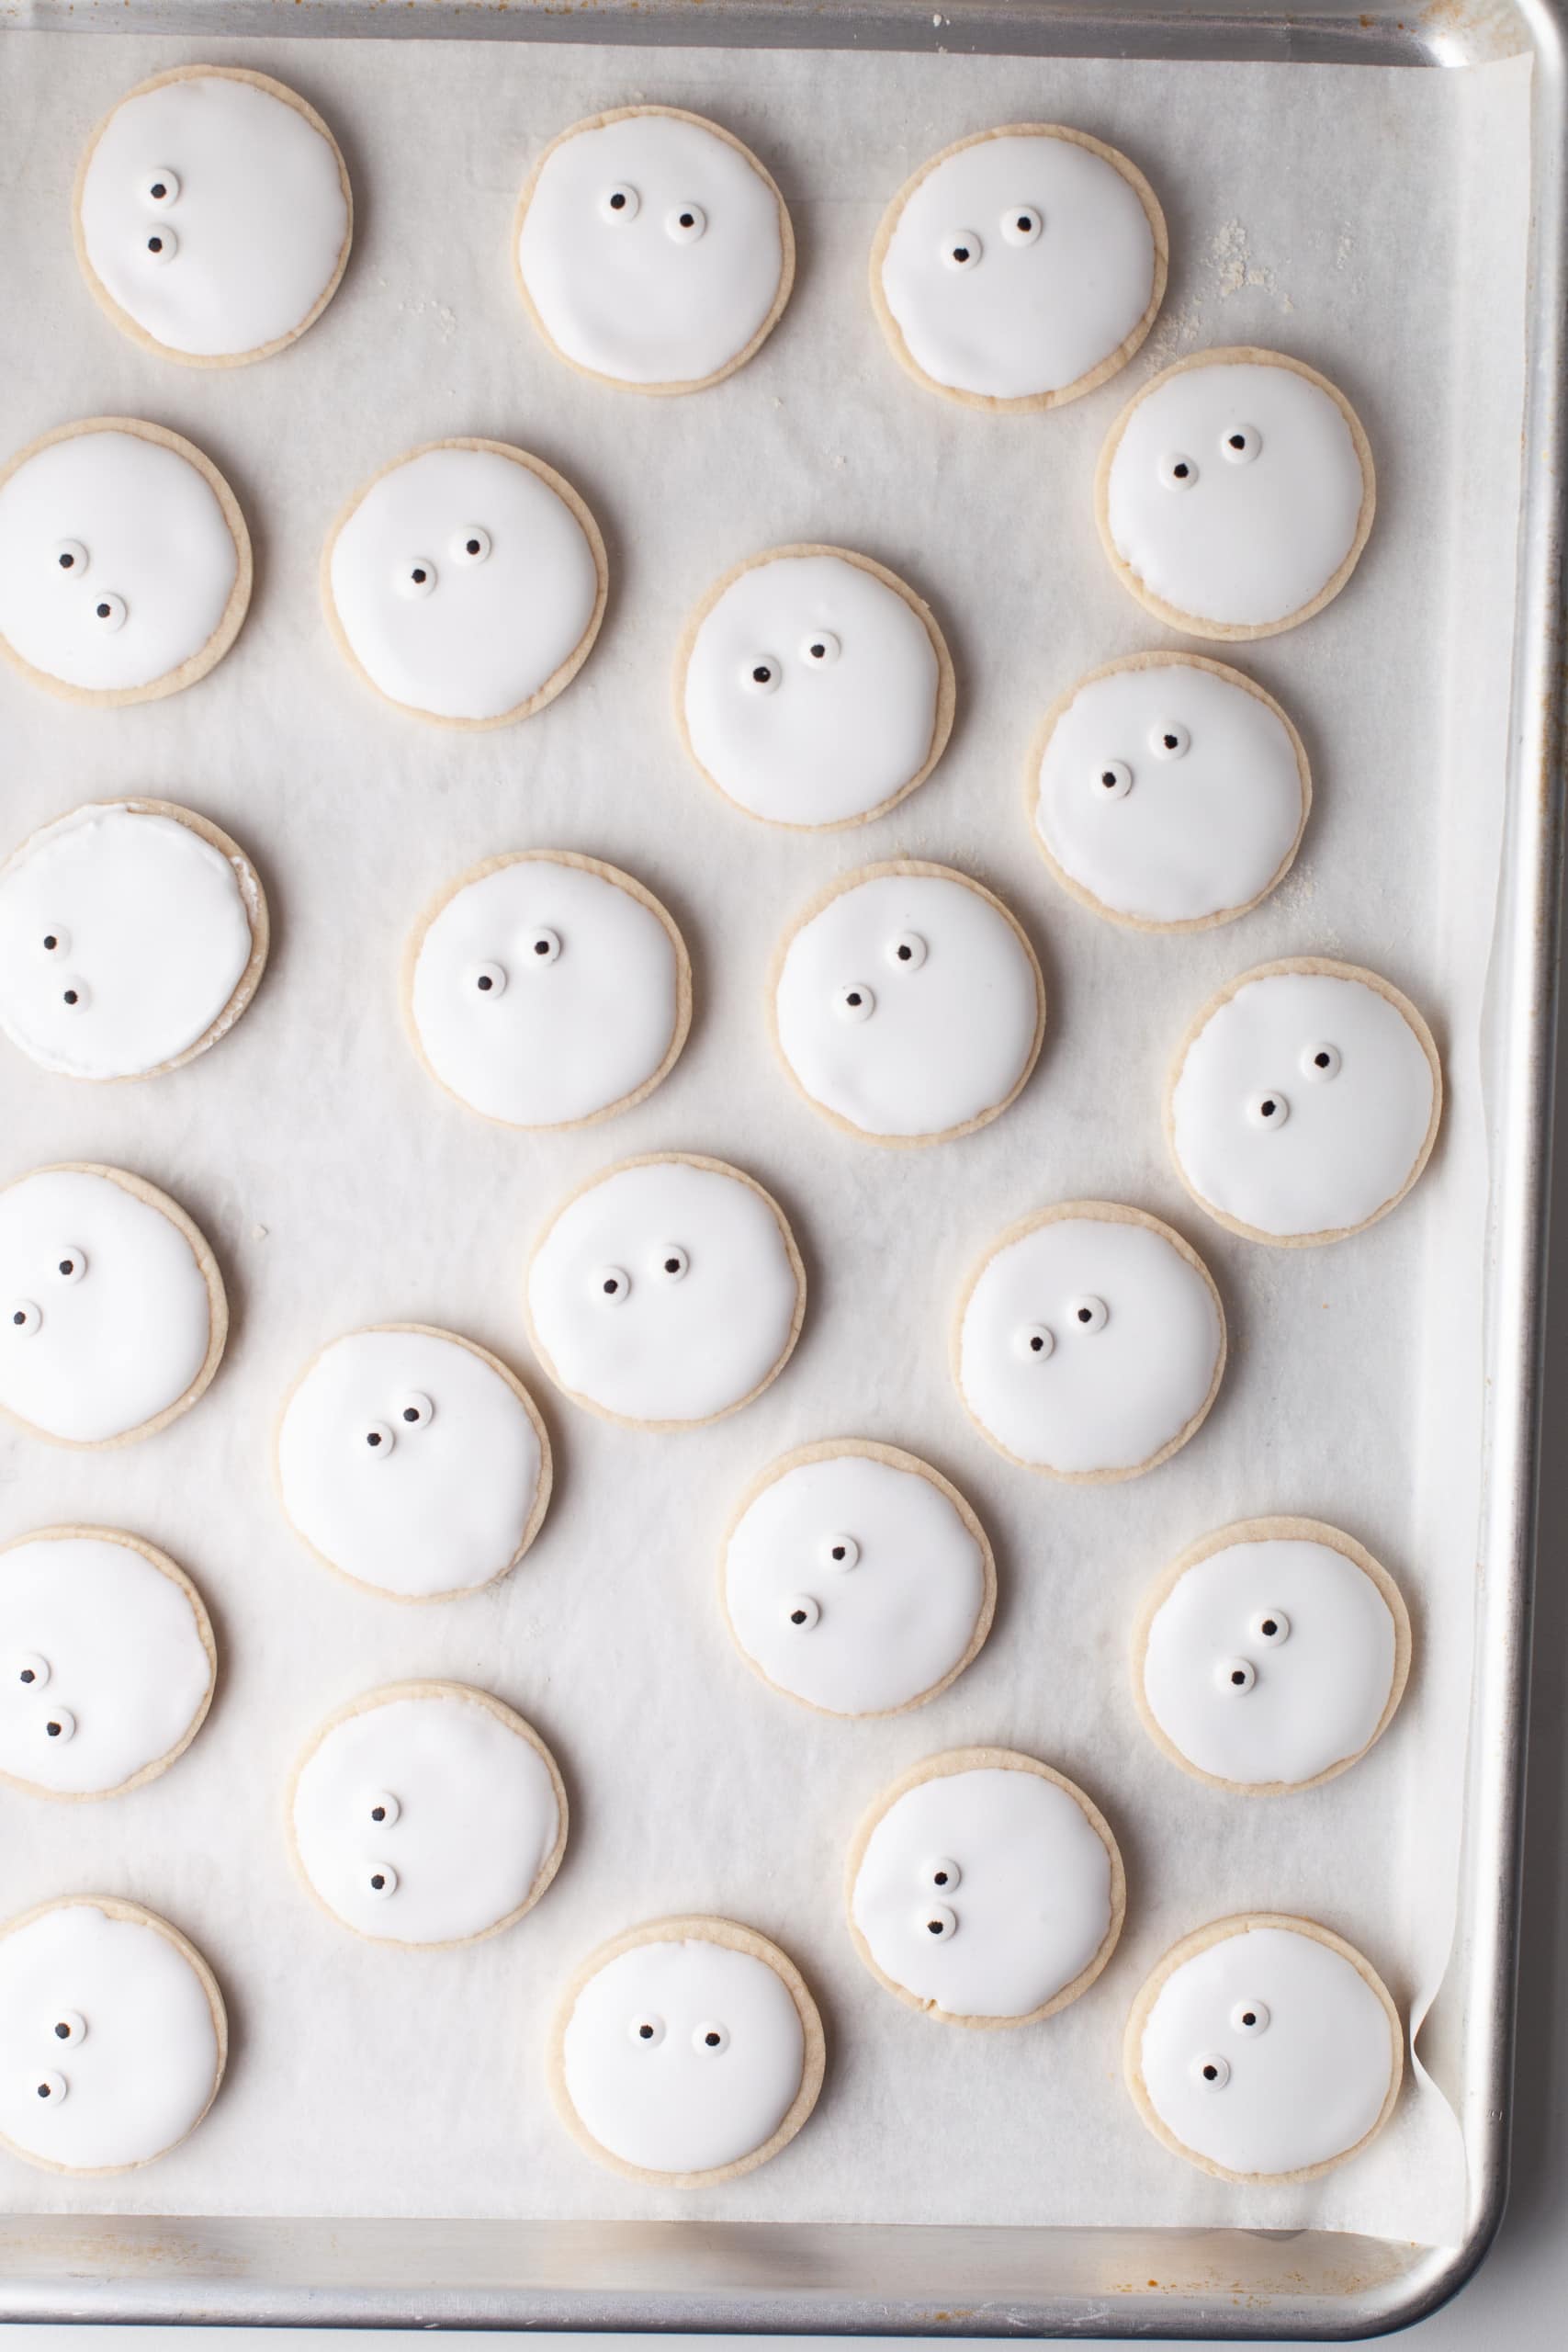
Step Five: Flood the Cookies with Icing
Once you have the consistency you want, transfer the royal icing to a piping bag. Seal the top of the bag with a knot or a rubber band, then cut a tiny edge of the bottom off the bag. Start by piping an outline around the edge of the cookie. Then, continue making a spiral inward toward the center of the cookie. After that, use a toothpick to spread the icing evenly over the top of the cookie and place two candy eyes in the center. Continue flooding the icing over the top of all the cookies, then allow the icing to set and harden before moving on to the next step.
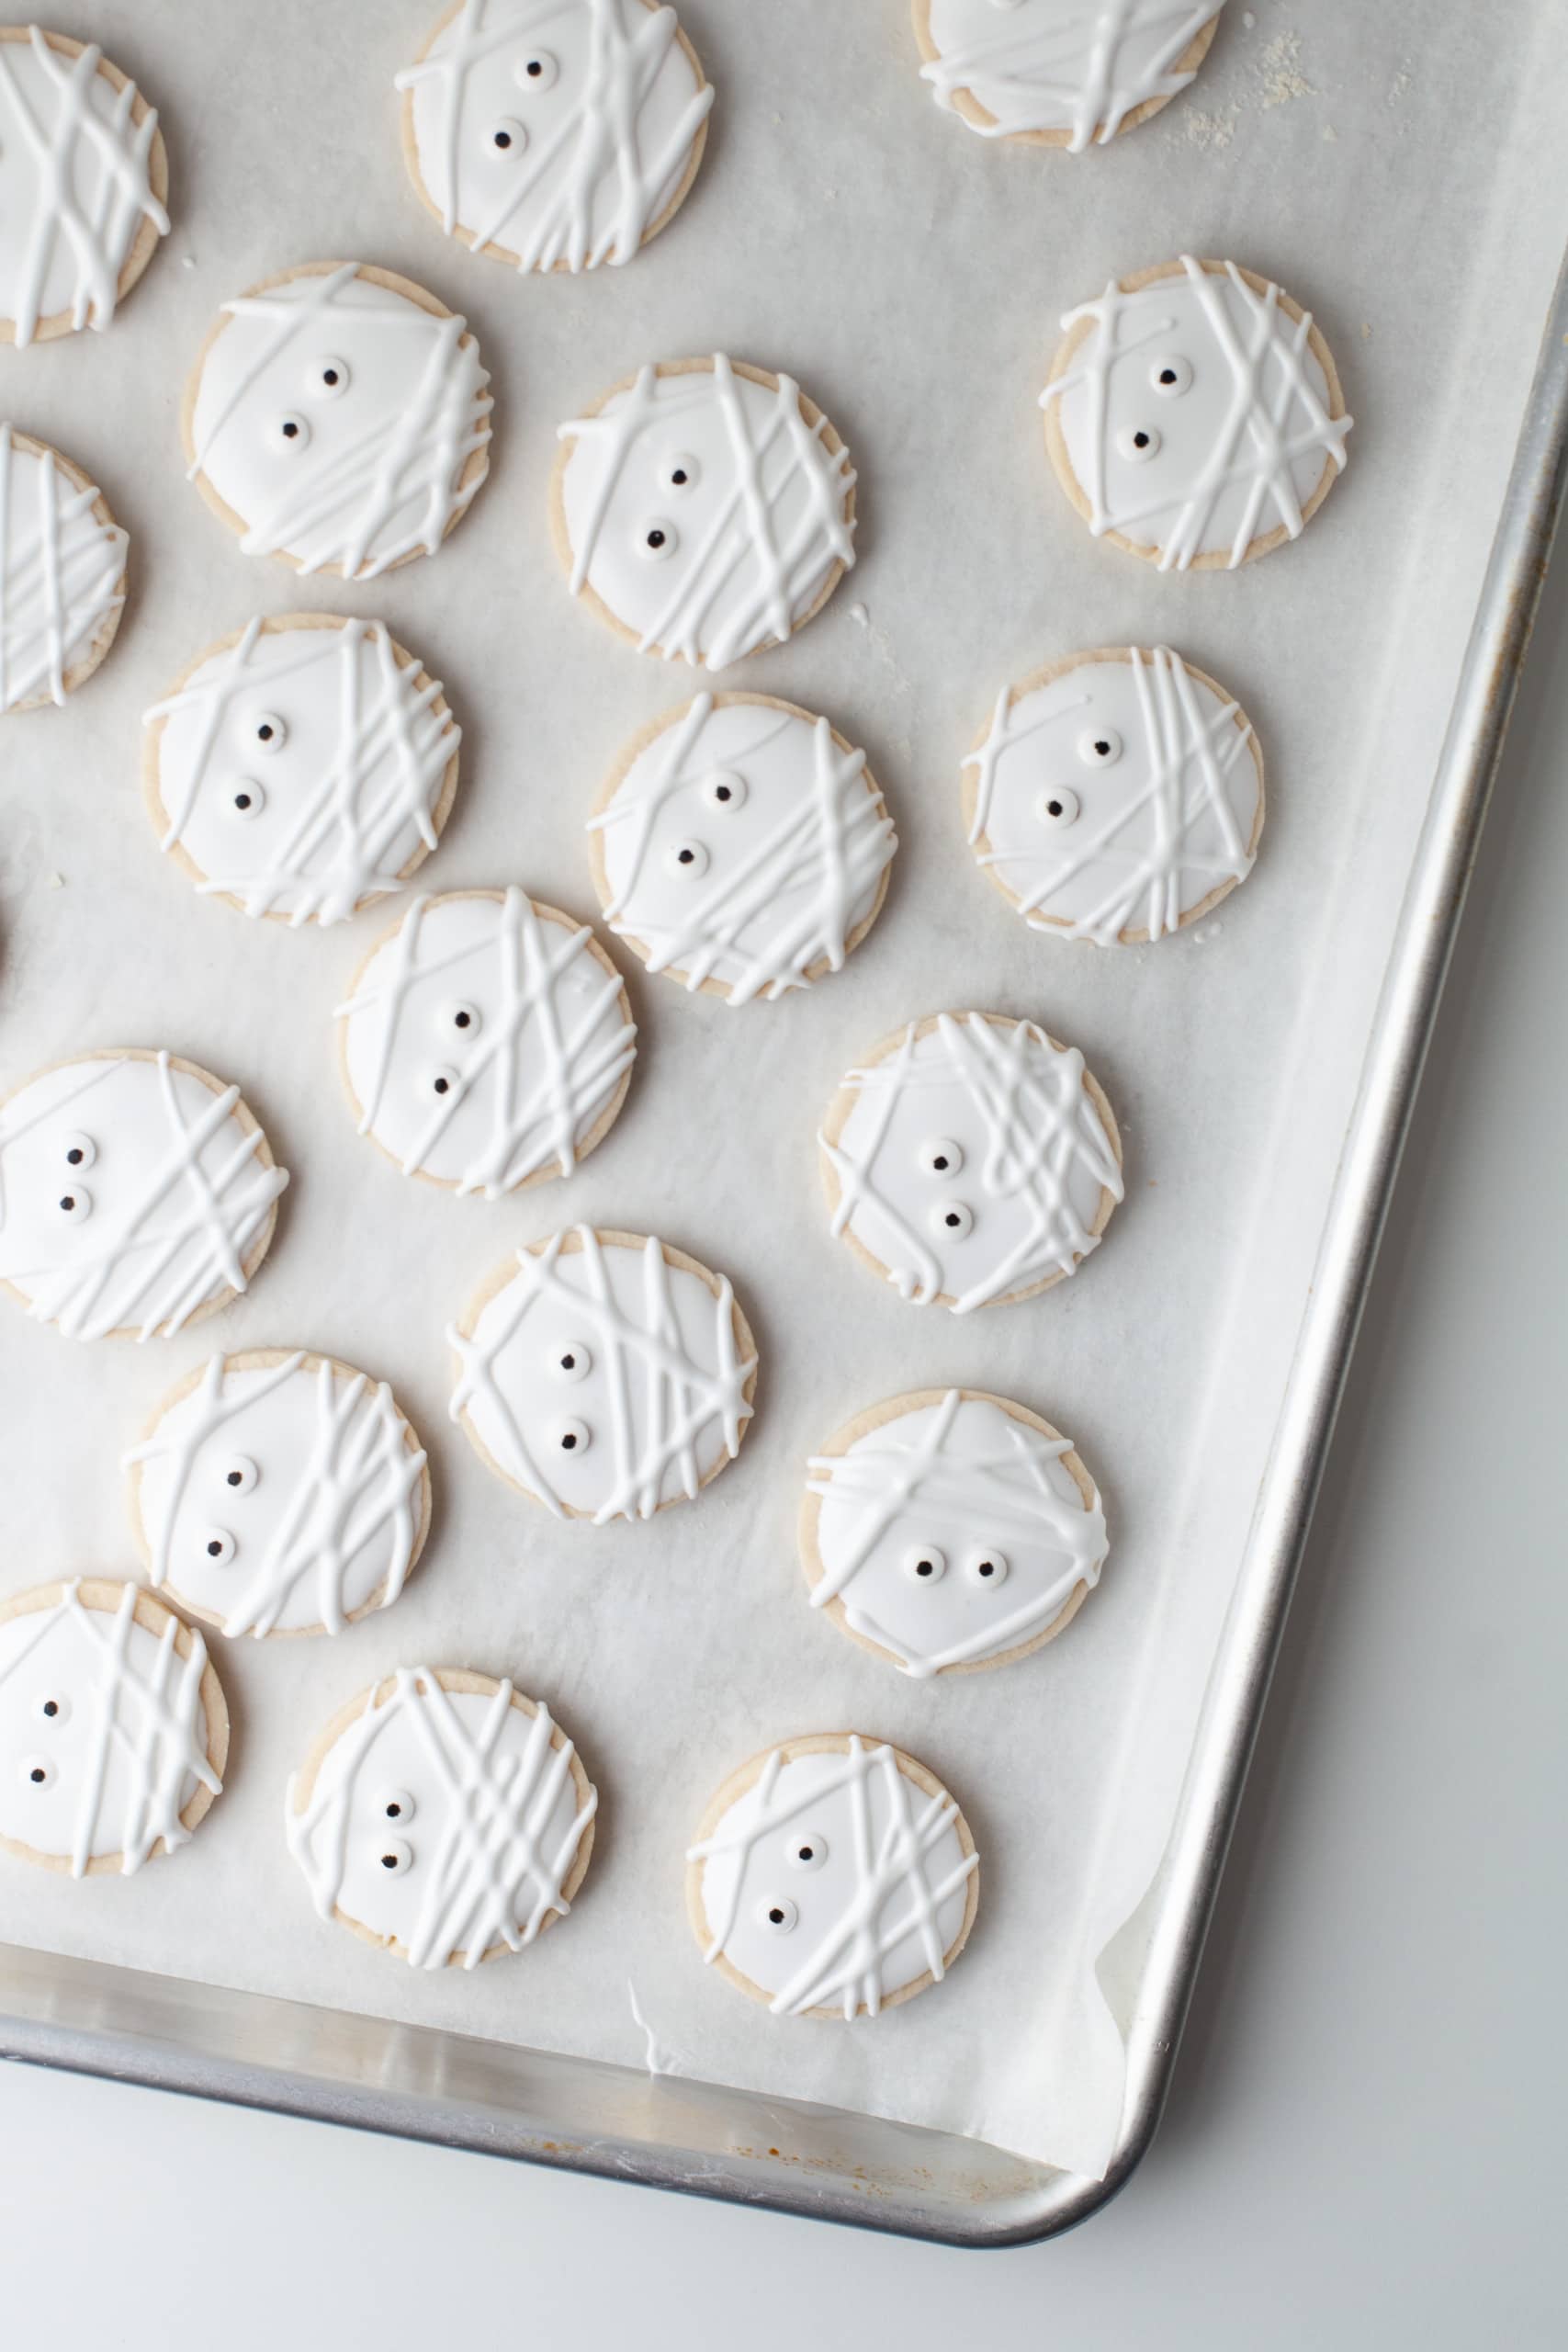
Step Six: Add the Mummy Decorations
When all the cookies are coated in a layer of white icing, it's time to add some fun Halloween mummy decorations to the top. Carefully drizzle icing over the top of each cookie to give the appearance of bandages, making sure not to cover the candy eyes as you decorate. Allow the bandage decorations to set before serving.
How Do You Store Mummy Cookies?
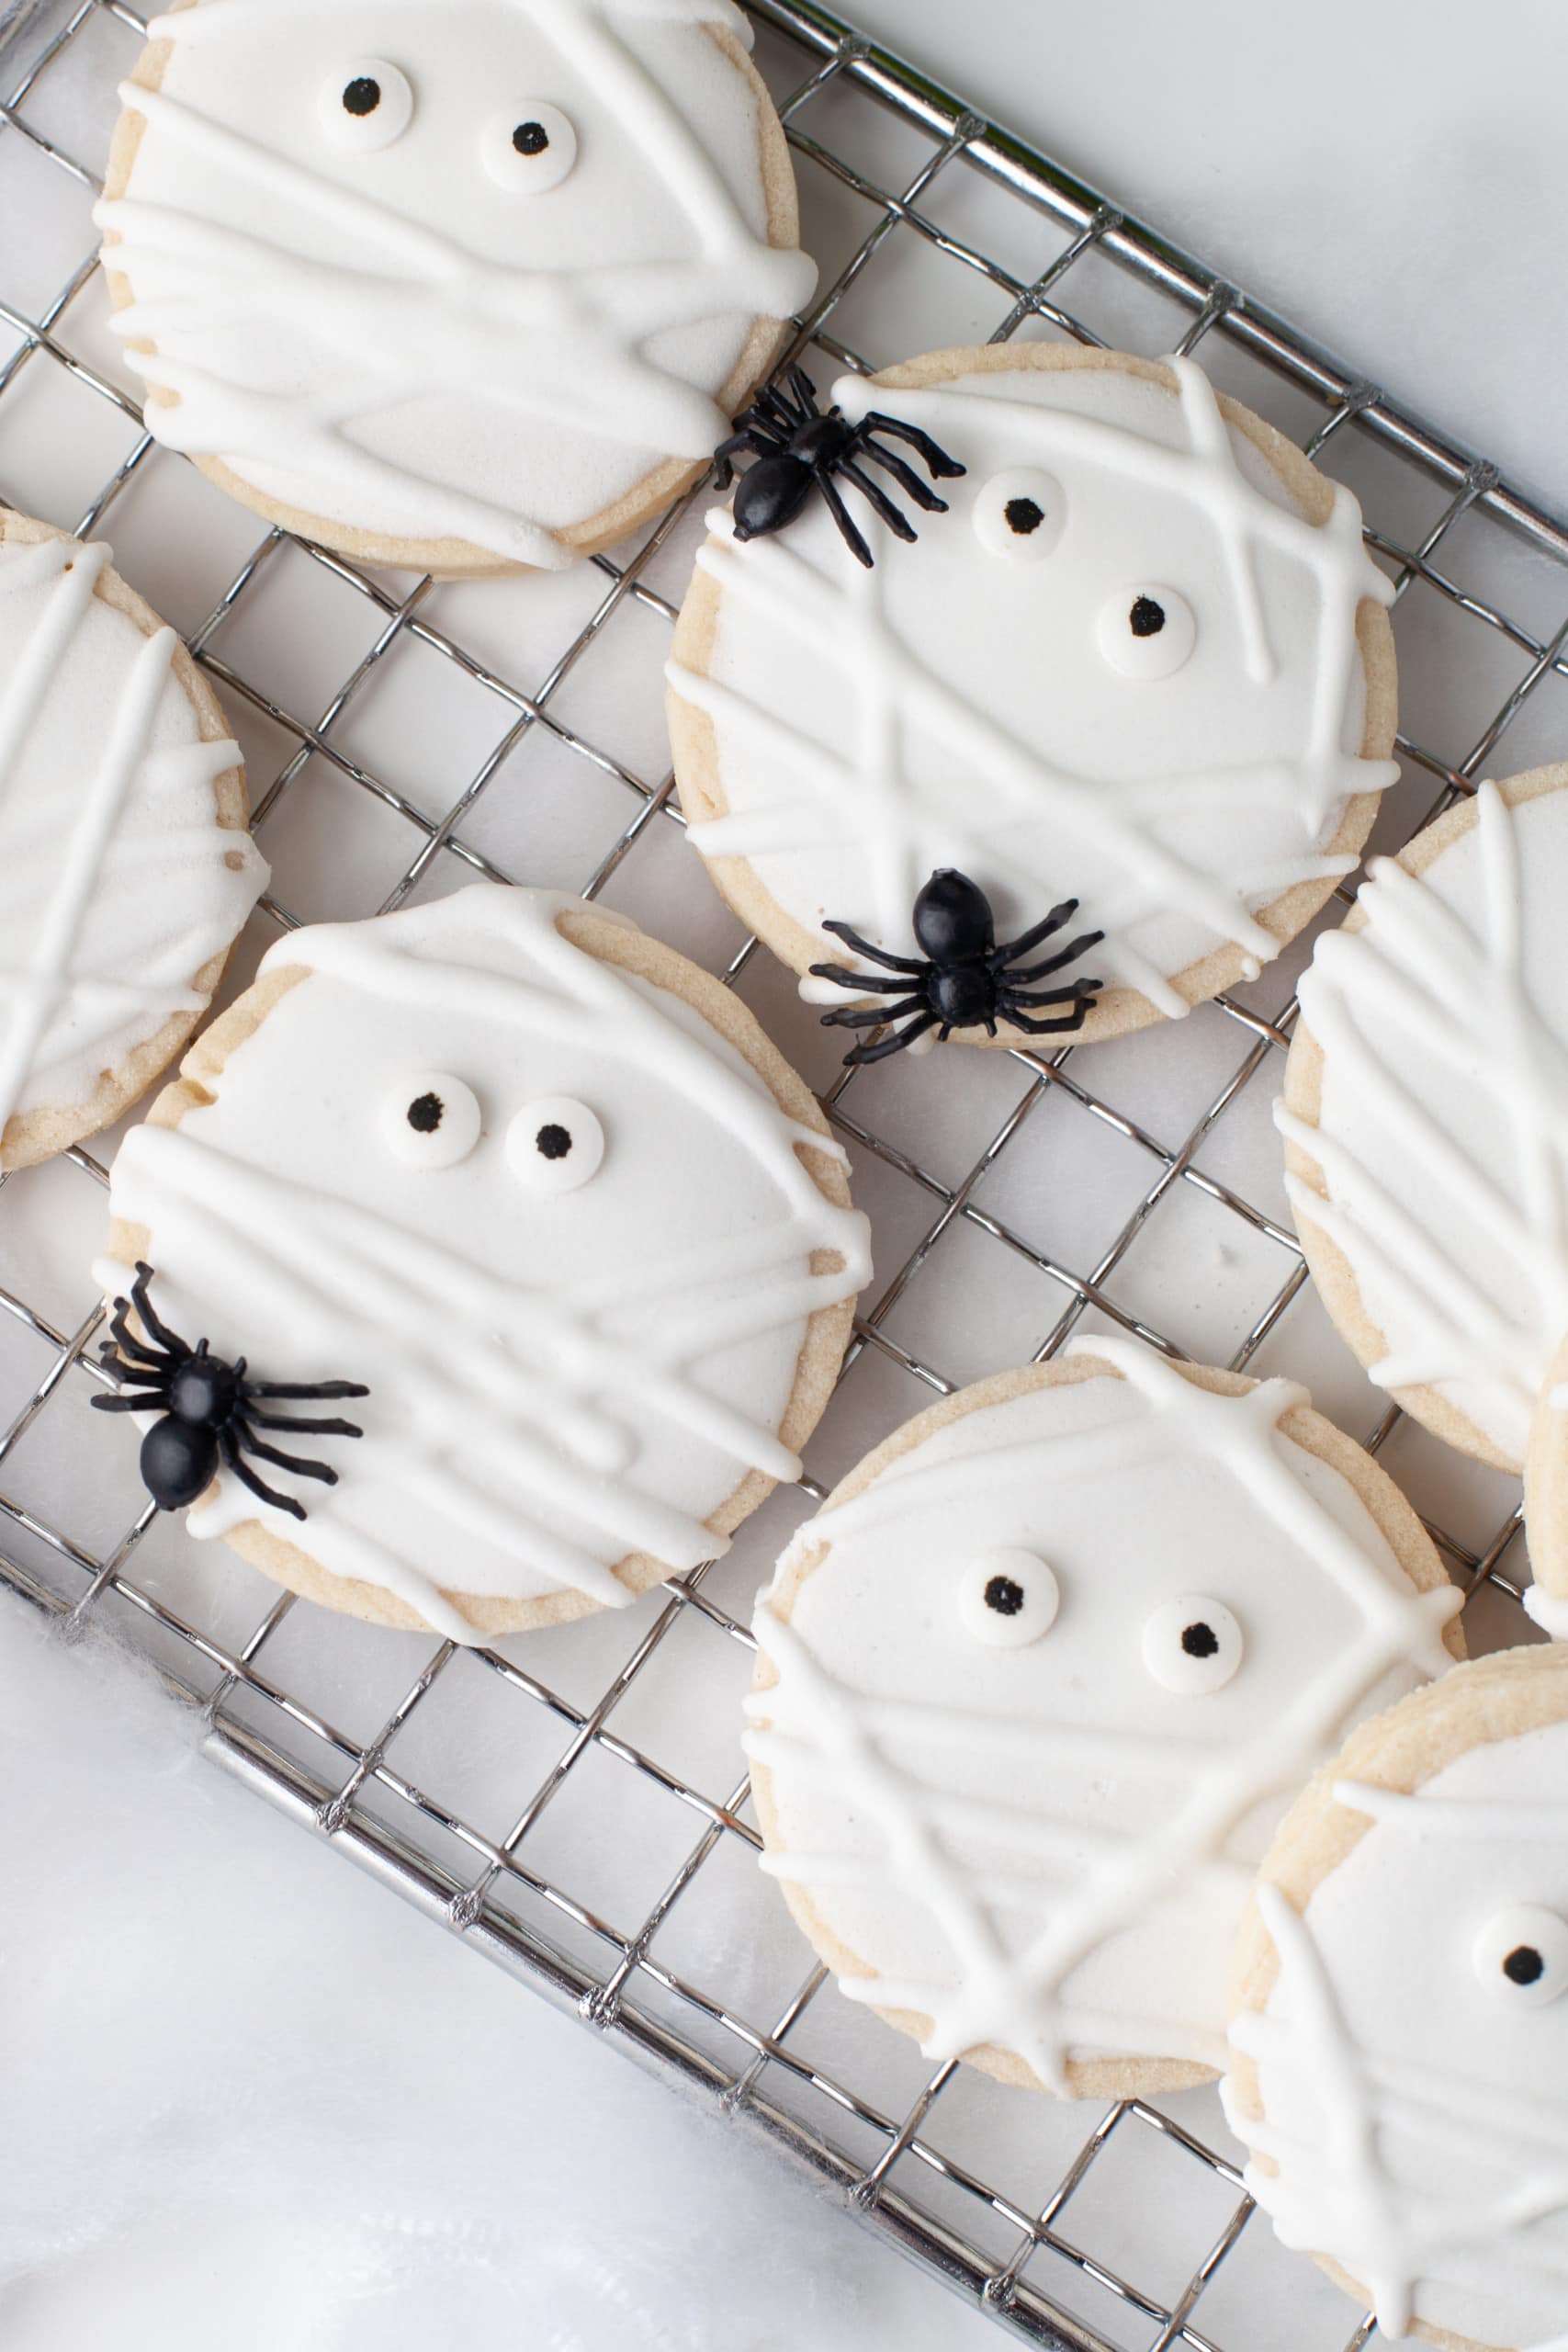
These yummy mummy cookies are going to be the star of your party! But if you have a few left over after the celebration is over, don't worry. You can easily store them at room temperature until you're ready to eat them again.
Transfer your cookies to an airtight container to help them stay soft. And don't forget to place a piece of parchment paper or wax paper between layers to keep the cookies from sticking together. Your cookies will stay good for up to five days when stored properly.
What is a Trick for Royal Icing?
It can be hard to know if you have the right consistency in your icing until you start piping. If the icing is too runny, it will start dripping while you decorate. But if it's too thick, it will be hard to get a smooth coating. Luckily, there's a simple trick you can do to check if your icing is the right consistency before you start decorating.
Drag a butter knife across the surface of your royal icing while it's still in the mixing bowl, then count to 10. If the icing surface becomes smooth and the drag mark disappears between 5 and 10 seconds, your icing is ready to use.
If the drag mark disappears before five seconds, add a small amount of powdered sugar to the bowl to help thicken it. And if the drag mark takes longer than 10 seconds to disappear, its too thick and needs a small amount of water added to it.
Mummy Cookies with Royal Icing
Ingredients
For the cookies:
- 1 cup unsalted butter softened
- 1 cup powdered sugar
- 2 small eggs important that, they are small
- 1 ½ teaspoons vanilla extract
- ½ teaspoon salt
- ⅓ cup cornstarch
- 3 ½ cups all-purpose flour
For Royal Icing:
- 1 ½ cups powdered sugar
- 2 ¼ Tablespoons warm water
- 1 Tablespoon meringue powder
- ¼ teaspoon clear vanilla-flavored extract may substitute with another flavor, like lemon. However, it is essential that it is a clear extract so the frosting stays a bright white color.
- candy eyes for decoration
Instructions
- To make the cookies:
- Mix butter and sugar in a stand mixer fitted with a paddle attachment at medium speed until well combined and creamy.
- Add the eggs and vanilla and combine.
- Whisk flour, salt, and cornstarch together in a separate bowl.
- Add the flour mixture to the wet ingredients little by little. Mix at low speed until well combined. Make sure you clean the sides of the bowl, so it is all mixed.
- Extend the dough into a sheet that is ¼” inch thick. Place it on a sheet of parchment paper or an acrylic sheet.
- Place the dough in the refrigerator for 30 minutes.
- Preheat the oven to 350 degrees. Spray some non-stick spray on a baking sheet and set it aside.
- Cut the shapes and place them on a baking sheet.
- Bake for 12 to 15 minutes, or until the edges are golden.
- Let them cool for at least an hour. They must be completely cool before you add the icing.
- To make the Royal Icing:
- In a stand mixer, whisk powdered sugar, flavor extract, water, and meringue powder until it’s fluffy and has peaks in it on medium to high speed. This could take anywhere from 4 to 5 minutes.
- Check the consistency of your icing. If it's too thick, add more water, very little at a time. For these cookies, you should have a medium consistency. It should take about 15 seconds to disappear. This should work for flooding and details so it should be smooth to make sure it does not fall through the sides. (Medium royal icing is slightly thinner than piping icing.)
- Once you have the consistency you want, place it into a piping bag or you can also use a ziploc bag. If you use a piping bag, seal it with a knot or rubber band.
- Cut a tiny edge of the bottom of the bag to use.
- To decorate the cookies:
- Outline each cookie with your icing, and continue making a spiral inwards. Then, immediately, with a toothpick or a tool, spread the icing evenly, smooth it out, and place the eyes on the cookie. Allow it to set before adding the lines. This consistency should allow you to fill in large cookie surface areas quickly. Repeat adding it into a piping bag and finish all the cookies.
- Continue with your icing and drizzle each cookie with a bit of icing to make it look like the mummy wrapping. Be careful not to cover the eyes.