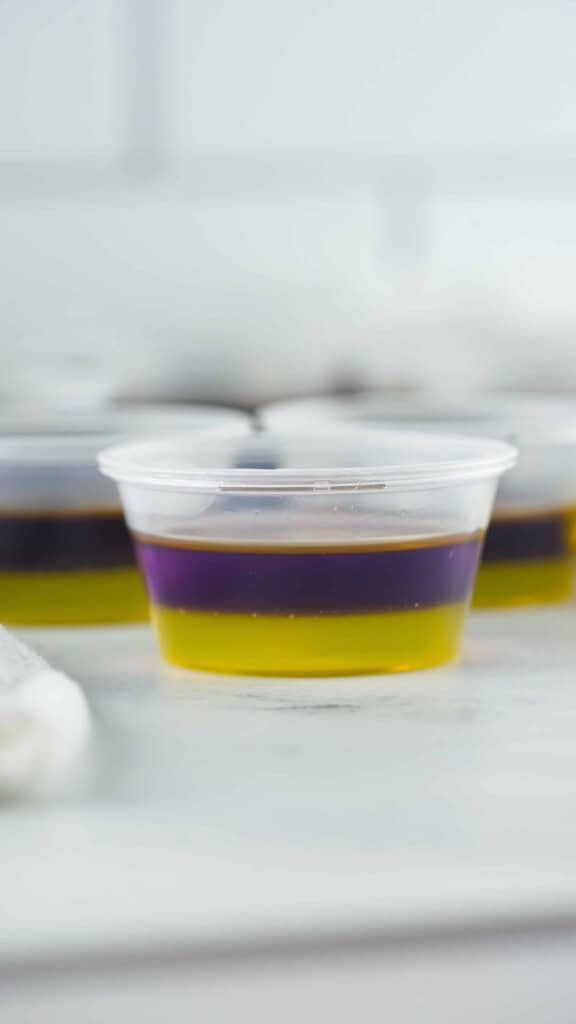
How to Make Layered Jello Shots


Spring is here, which means colorful blooms, outdoor gatherings, and vibrant celebrations! If you're hosting a party and want to add something playful and delicious to your menu, layered Jello shots are the way to go. Not only are they a visual treat, but they're also packed with flavor and fun. Here, we'll guide you step-by-step on how to create these delightful, multi-layered Jello shots that will wow your guests.

This post contains affiliate links. As an Amazon Affiliate, I earn a commission on qualifying purchases.
Why you will love this recipe
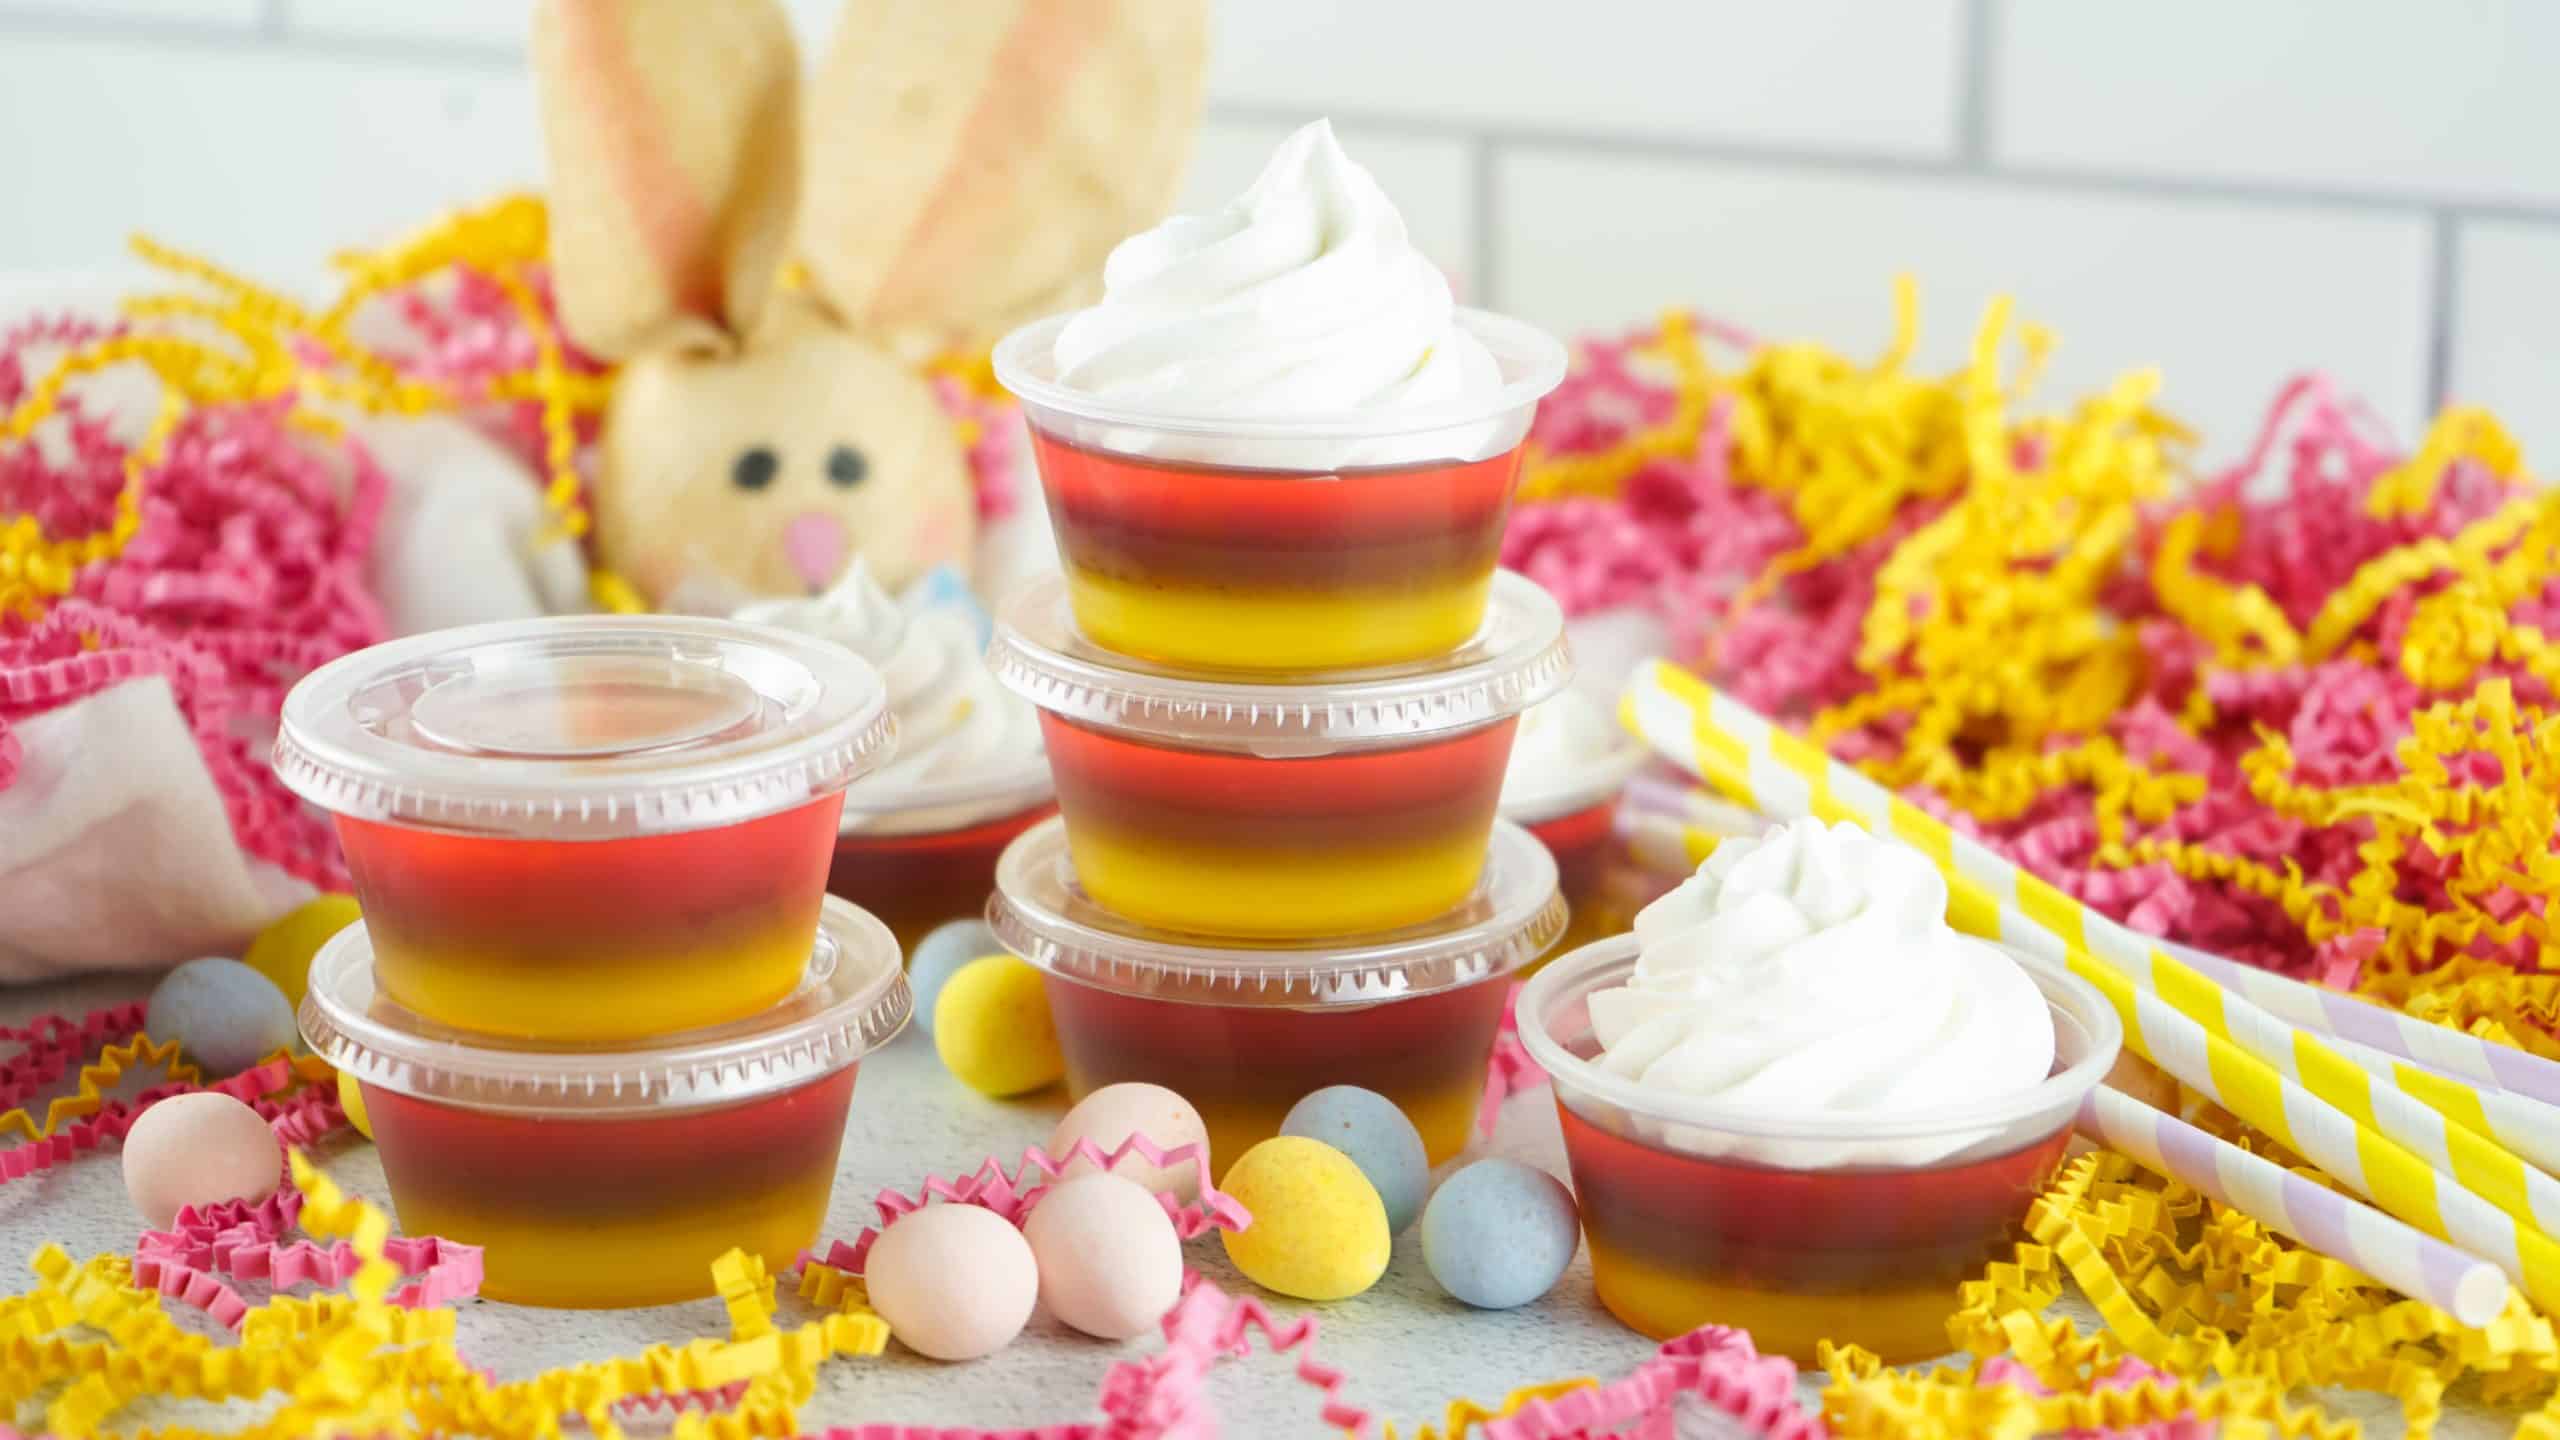
- Vibrant Colors: With cheerful yellow, purple, and pink layers, these Jello shots bring a pop of color to any spring celebration. They're practically edible decor.
-
Customizable for Any Theme: Want to match your shots with a party theme? Swap out the Jello flavors to create any color palette imaginable. Perfect for spring brunches, birthdays, or garden parties!
-
Quick and Easy to Make: This recipe breaks it down step by step, making it simple even if you're not the world's best baker or chef.
-
Made in Advance for Less Stress: Prepare your Jello shots up to 5 days in advance! Keep the lids on, and you're ready to serve whenever the party starts.
-
Perfect for Outdoor Gatherings: Springtime means picnics, garden soirées, and barbeques. These chilled, boozy treats are the perfect refreshment for al fresco fun.

Looking for some more Springtime recipes? Give these reader favorites a try!
Layered Blueberry Salad | Spring Flower Sugar Cookies | Pastel Hot Cocoa Bomb Recipe | Cadbury Mini Eggs Cookies
What You'll Need to Get Started
Before we get into the nitty-gritty, make sure you have all the ingredients and tools you'll need to make the magic happen.
Ingredients:
- 1 Box Pink Starburst Jell-O (3.93 ounces)
- 1 Box Lemon Jell-O (3 ounces)
- 1 Box Grape Jell-O (3 ounces)
- 2 ¼ Cups Whipped Cream Vodka
- 1 ½ Cups Boiling Water
- 1 ½ Cups Cold Water
- Whipped Cream (optional)
Needed:
- 30 2-Ounce Shot Cups with Lids
- Baking Sheet
- Injector

Step-by-Step Instructions for Layered Jello Shots
Here's how to layer your Jello shots like a pro.
Step 1: Prep Your Shot Cups
Start by lining up your 30 shot cups on a baking sheet. Be sure they're stable and don't add the lids for now. Using the baking sheet ensures easy transportation to and from your fridge.
Step 2: Make the Yellow Jello Base
Grab your Lemon Jell-O and empty the contents into a medium mixing bowl. Add ½ cup boiling water and whisk until completely dissolved. No graininess should remain. Next, pour in ¾ cup whipped cream vodka and ½ cup cold water. Mix until everything is well combined.
Using the injector, carefully fill the cups about a third of the way with the yellow mixture. Put the baking sheet in the fridge and leave it for 1 hour or until the layer is fully solid.
Step 3: Add the Grape Jello Layer
Once the yellow layer is fully set, repeat the same process with the Grape Jell-O. Dissolve it in ½ cup boiling water, then add ¾ cup vodka and ½ cup cold water.
Carefully pour or inject the purple layer directly on top of the yellow base, filling each cup until they're two-thirds full. Return the cups to the fridge for another hour to solidify.
(Tip alert! Grape-flavored Jell-O can behave oddly. If it doesn't solidify well, try reducing the liquid, particularly the vodka, in your mixture.)
Step 4: The Final Pink Jello Touch
For the final layer, prepare your Pink Starburst Jell-O the same way as the other layers. Dissolve in ½ cup boiling water, mix in ¾ cup vodka and ½ cup cold water, and give it a good stir. Fill your cups to the top and refrigerate for another hour or until fully solid.
Step 5: Add the Whipped Cream (Optional)
Once all the layers are set, top them with a dollop of whipped cream just before serving for a festive touch. If you're storing the shots for later, keep the lids on and add the whipped cream once you're ready to serve.

Pro Tips for Perfect Jello Shots
Want your shots to turn out flawless every time? Keep these essential tips in mind:
- Hold the Whipped Cream: Don't add whipped cream unless you're about to serve your shots. For storage, keep the lids on your cups to retain freshness.
- Patience Is Key: Wait until each layer is fully solid before adding the next. If it's even slightly runny, the colors will blend.
- Go Easy on the Alcohol: Stick to ¾ cup alcohol per layer. Too much vodka can prevent the Jello from setting.
- Storage: Your Jello shots can last in the fridge for up to 5 days with lids on, allowing you to prepare ahead for parties.
- Back-up Plan for Grape Jello: If the grape layer doesn't solidify, try freezing it for a short time before adding the next layer. Alternatively, reduce the alcohol slightly.
Why Layered Jello Shots Are Perfect for Spring Parties
Layered Jello shots are more than just treats; they're conversation starters. The vivid colors, combined with the creamy hint of whipped cream vodka, make them irresistible. They're ideal for spring gatherings because they:
- Bring a pop of color to your table.
- Are easy to make in advance.
- Offer customizable flavors and colors to match your theme.
- Add a playful, nostalgic vibe that guests of all ages (21+!) will love.
Plus, they're the perfect excuse to bust out creative trays, garnishes, and serveware.
Sip, Savor, Celebrate!
There you have it, your ultimate guide to making layered Jello shots for spring! Whether it's a garden party, brunch, or simply an afternoon of fun with friends, these colorful creations are sure to brighten the mood. Don't forget to snap a pic before your guests dig in because these beauties deserve a spot on your Instagram feed (#JelloShotGoals, anyone?).
Now it's time to gather your ingredients, get your injector ready, and start layering. Cheers to happy, colorful celebrations!

Spring Layered Jello Shots
Equipment
- 30 2-Ounce Shot Cups with Lids
- Baking Sheet
- Injector
Ingredients
- 3.93 ounces Pink Starburst Jell-O
- 3 ounces Lemon Jell-O
- 3 ounces Grape Jell-O
- 2 ¼ Cups Whipped Cream Vodka
- 1 ½ Cups Boiling Water
- 1 ½ Cups Cold Water
- Whipped Cream optional
Instructions
- Line your cups up on a baking sheet that will fit them. No lids.
- Place your yellow jello in a medium mixing bowl and add ½ cup boiling water. Mix until no graininess remains.
- Add ¾ cup vodka and ½ cup cold water to the bowl. Mix well.
- Using the injector, fill up each shot cup a third of the way.
- Place in the fridge for an hour or until solidified.
- Repeat steps 2-4, but use the grape jello instead.
- Once the purple jello has solidified, repeat steps 2-4 for the pink jello.
- Once the last layer has solidified, top with some whipped cream, if desired, and enjoy!
Notes
• For some strange reason, I had to go through three grape jello boxes as it seemed to react differently than the other flavors. If you have an issue with it not setting up, add less liquid, starting with the alcohol. You can also place it in the freezer before placing the last layer on.
• You can use any vodka or alcohol you prefer, just don’t go over ¾ cup alcohol in each layer as it won’t solidify if you do.
• Don’t try and add a new layer until the layer below it is solid. If it’s runny at all, it will make the colors mix.
• You can keep these in the fridge for up to 5 days, with lids.
• You can use other means to get the liquid in the cups. However, I have not found anything that works as quickly or cleanly as the injector.