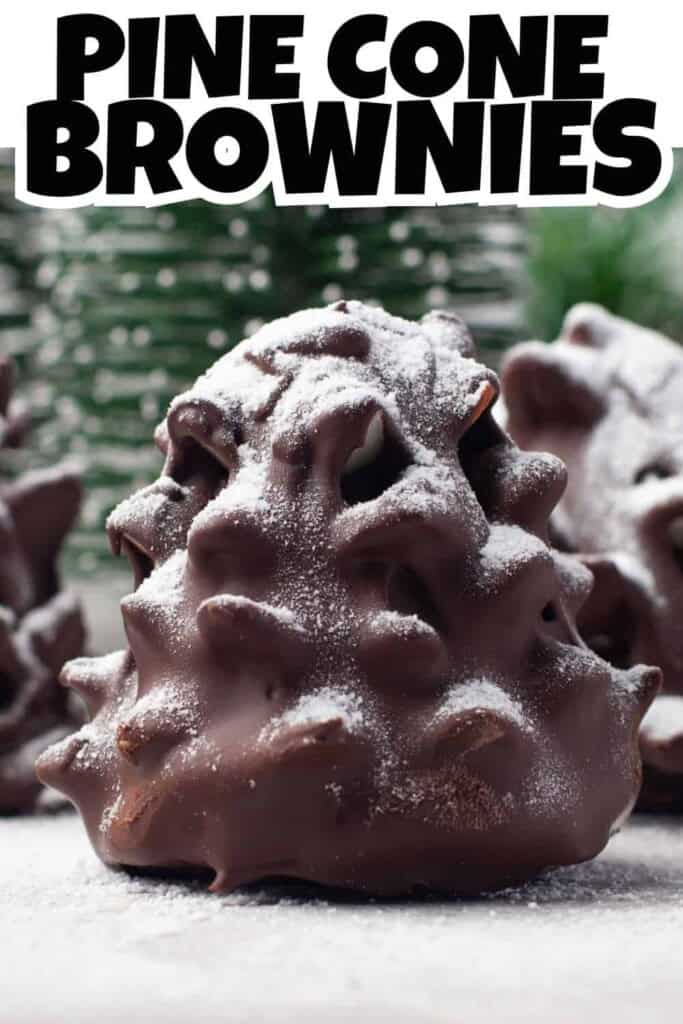
How to Make Pine Cone Brownies
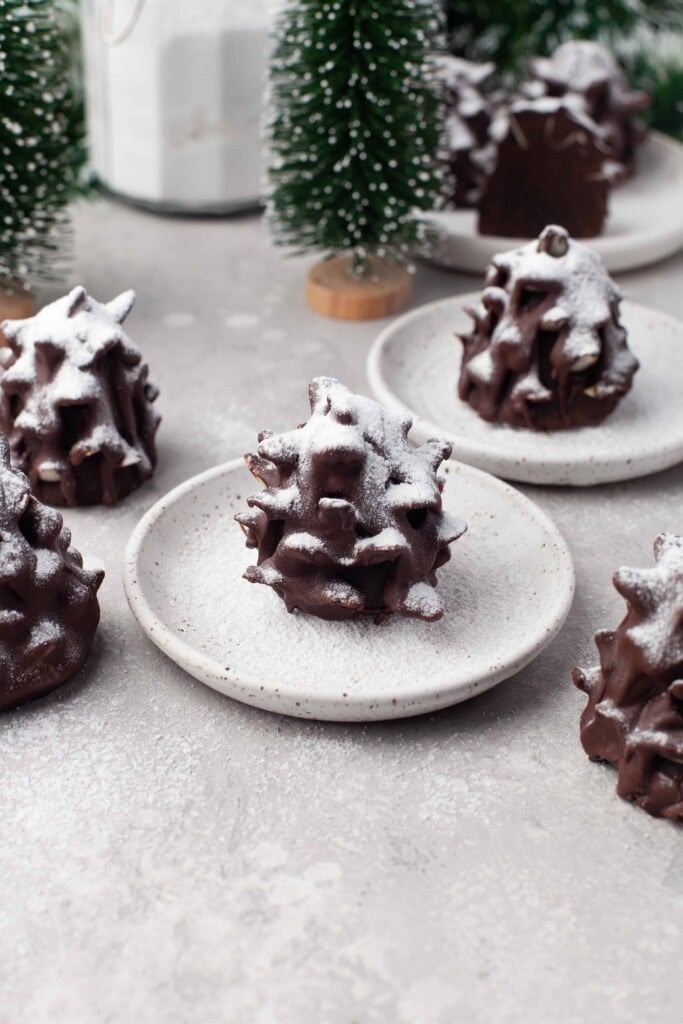
Indulge your love for chocolate with a dessert that's as stunning as it is delicious-Pine Cone Brownies. These cleverly crafted treats resemble frosted pine cones, making them a show-stopping addition to your holiday table or any special occasion. Perfect for baking enthusiasts, this recipe combines the decadence of rich chocolate brownies with an artistic twist.
By the end of this guide, you'll have a new favorite dessert and a fun and creative way to make your brownies stand out. Grab your apron, preheat the oven to 350°F, and let's get started!
This post contains affiliate links. As an Amazon Affiliate, I earn a commission on qualifying purchases.
What Makes Pine Cone Brownies Unique?
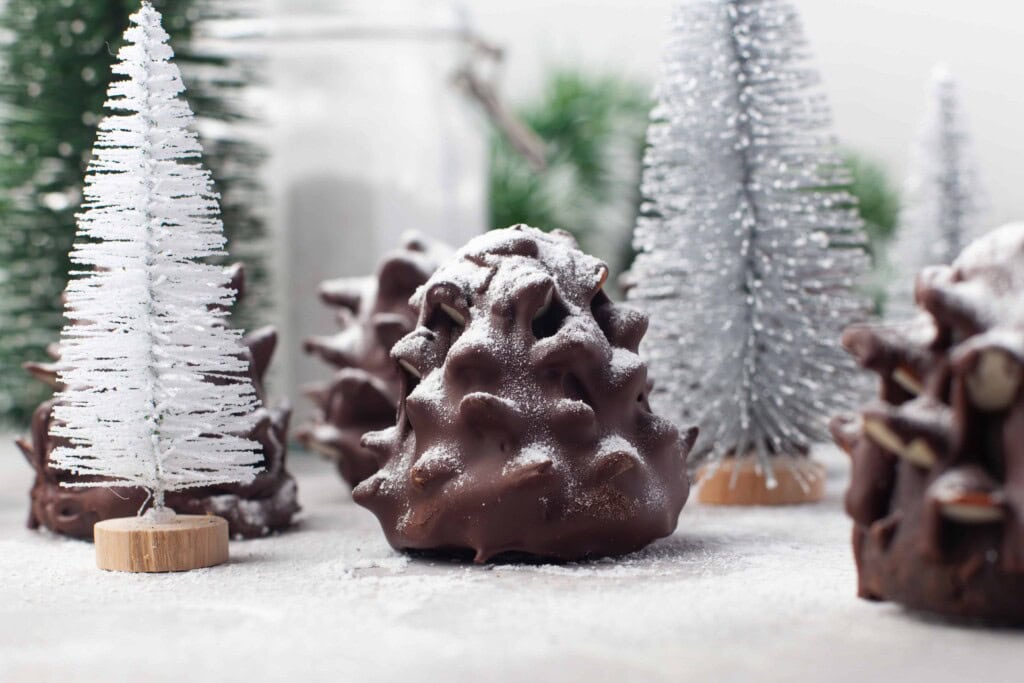
While brownies are a classic favorite, Pine Cone Brownies add a creative dimension to this timeless treat. Intricately shaped and adorned with almond slices to mimic the scales of a pine cone, these visually impressive treats are sure to go viral at your next gathering.
Here's why Pine Cone Brownies are worth the effort:
- Eye-catching Design: Perfect for impressing guests or sharing on social media (#ViralPineConeBrownies).
- Holiday Theme: Their frosted appearance makes them ideal for holiday gatherings or winter-themed events.
- Decadent Taste: The combination of rich chocolate brownies, a creamy spread, and almond accents guarantees indulgence in every bite.
- Fun Baking Activity: Shaping and decorating the pine cones transforms baking into a hands-on, artistic experience.
Now that you're intrigued, it's time to learn how to bake and assemble these delightful creations.
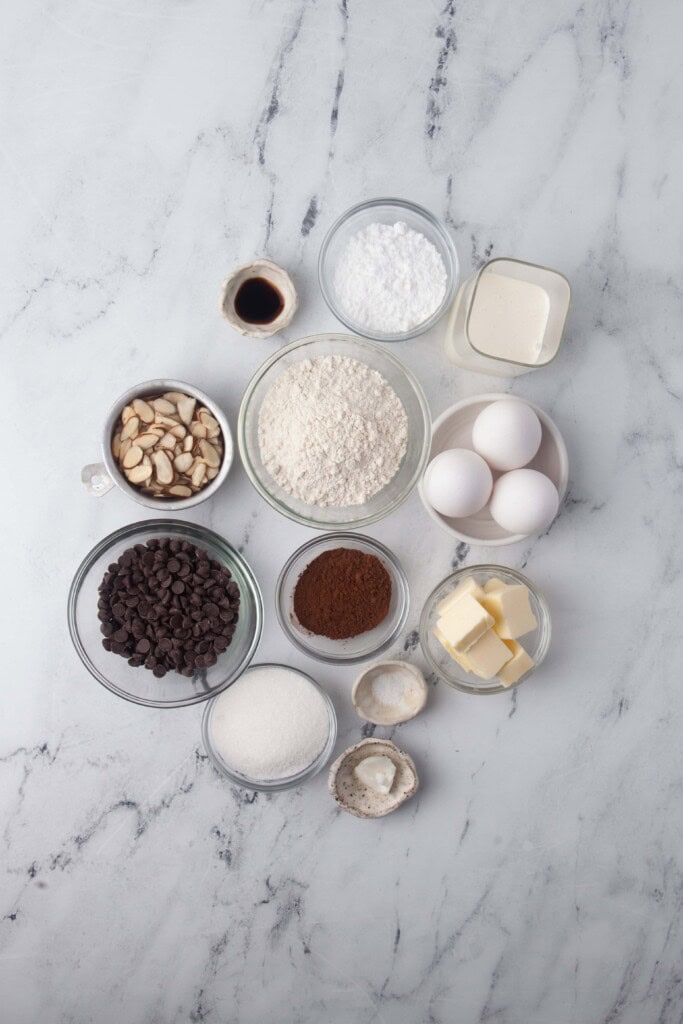
Pine Cone Brownie Ingredients
For the Brownies:
- ½ cup semi sweet chocolate
- 6 tablespoon unsalted butter
- 3 eggs
- ½ cup granulated sugar
- 1 cup plain flour
- ⅔ tablespoon unsweetened cocoa powder
- pinch of salt
For the Chocolate Spread:
- ½ cup heavy cream
- 2 Tablespoons unsweetened cocoa powder
- ¼ cup powdered sugar
- 2 tablespoons butter, softened
For the Pine Cones:
- ½ cup of sliced almonds
- 9 oz chocolate chips
- 2 ½ teaspoon coconut oil (Add more if you need it thinner)
- Powdered Sugar
With these ingredients, you're set to create delightfully festive desserts.
Step-by-Step Guide to Making Pine Cone Brownies
Step 1: Bake the Brownies
Melt Chocolate and Butter
Start by melting the semi-sweet chocolate and butter in the microwave or stovetop. Stir until smooth, but avoid overheating to prevent burning.
Whisk Eggs and Sugar
Beat the eggs and sugar together until light and fluffy. This gives the brownies their airy texture while keeping them moist.
Combine and Add Dry Ingredients
Slowly fold the melted chocolate into the egg mixture. Then, sift in the flour, cocoa powder, and a pinch of salt, carefully folding the ingredients to avoid overmixing.
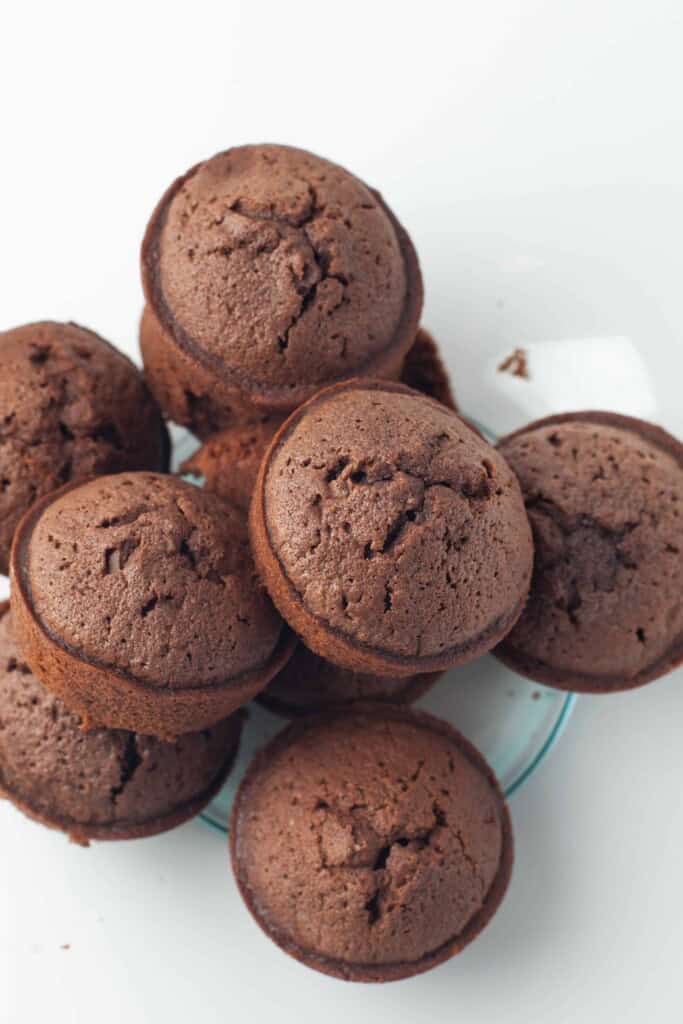
Bake
Grease cupcake molds and pour in the batter, filling each halfway to two-thirds full. Bake at 350°F (175°C) for 12-15 minutes or until a toothpick comes out with a few moist crumbs. Allow the brownies to cool completely.
Step 2: Prepare the Chocolate Spread
Make a Creamy Base
Heat the heavy cream in a small saucepan until warm (don't boil). Whisk in the cocoa powder and powdered sugar until fully dissolved.
Add Butter
Stir in the softened butter to achieve a silky, rich texture. At this stage, you can add melted dark chocolate for an extra chocolatey boost.
Set the chocolate spread aside to cool slightly.
Step 3: Shape the Pine Cones
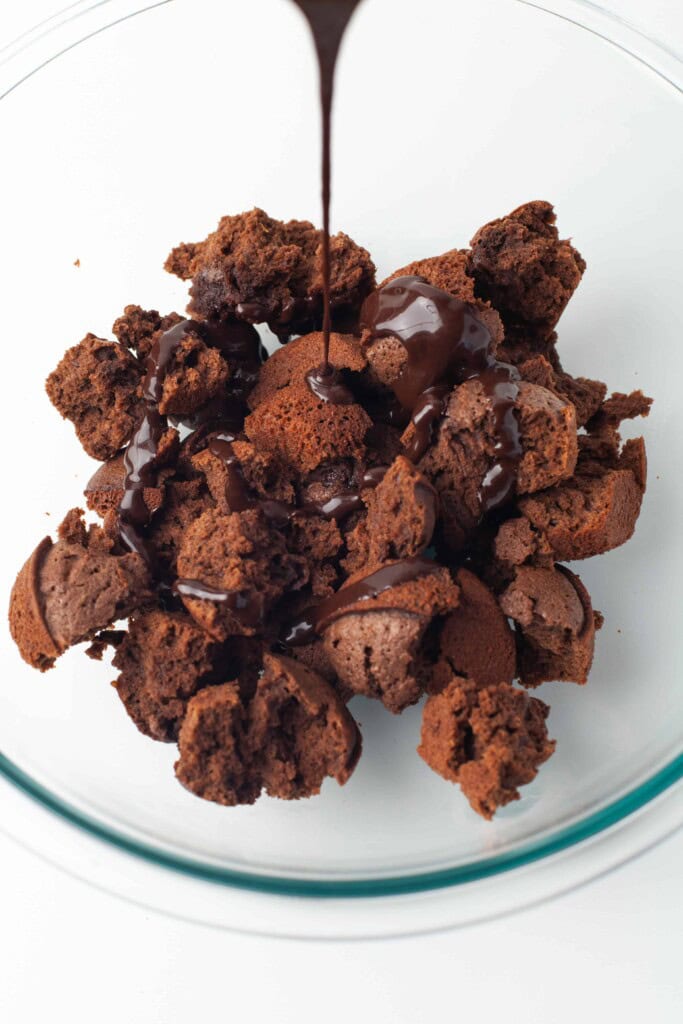
Crumble and Mix
Crumble the baked brownies into a bowl, then mix them with the prepared chocolate spread. The mixture should be firm enough to shape.
Would you like to save this?
Mold Pine Cone Shapes
Form the mixture into pine cone-shaped balls. Place them on a parchment-lined baking sheet and freeze for 30 minutes to help them hold their structure.
Step 4: Decorate the Pine Cones
Add Almond Slices
Carefully press sliced almonds into the pine cone balls to mimic the scales of real pine cones. Take your time; this step transforms the brownies into edible art.
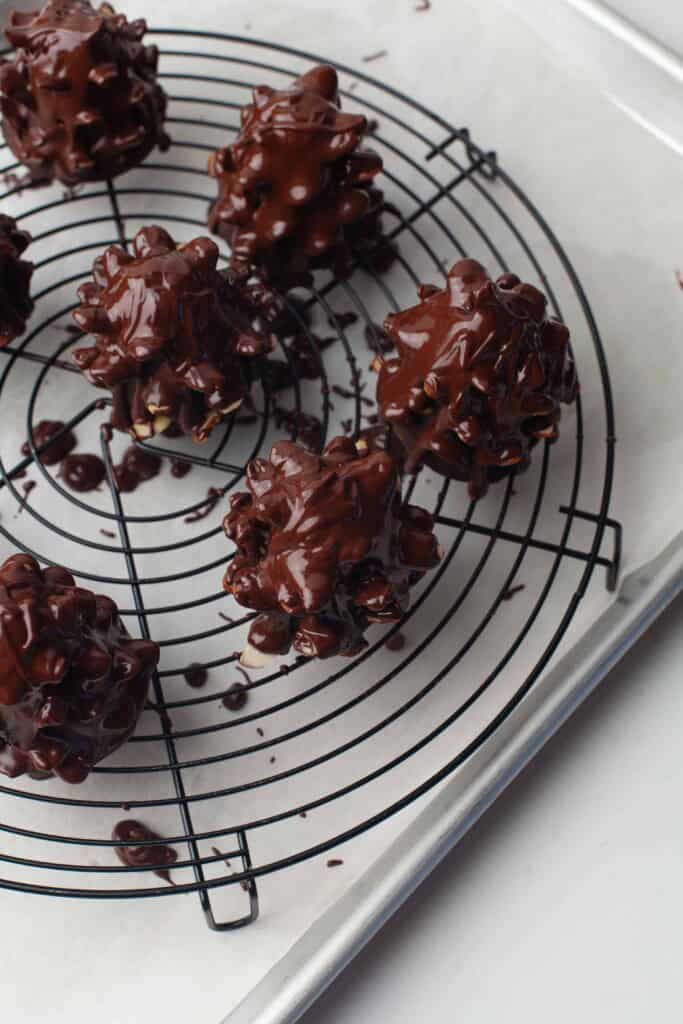
Coat with Chocolate
Melt the chocolate chips with coconut oil in the microwave in 30-second increments (or using a double boiler). Coat each pine cone with the melted chocolate and return them to the parchment paper to set.
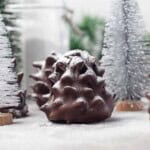
Add the Finishing Touch
Dust the pine cones with a layer of powdered sugar to create a frosted, wintry effect.
Presentation Tips
Make your Pine Cone Brownies even more impressive with these presentation ideas:
- Arrange them on a rustic wooden platter or a bed of powdered sugar to mimic snow.
- Add small decorative pine tree branches for a festive display.
- Use them as edible place cards, incorporating name tags tied to small toothpicks.
These little touches will make your Pine Cone Brownies the centerpiece of any gathering.
What to Serve with the Pine Cone Brownie Bites
Vanilla Ice Cream
The classic pairing. The warm, fudgy texture of brownies and the cold, creamy sweetness of vanilla ice cream create the ultimate dessert harmony. Serve them side by side or go all out with a brownie sundae.
Fresh Berries: Pair brownies with strawberries, raspberries, or blueberries to add some freshness to your indulgence. Their tartness adds a delightful contrast to the richness of the chocolate.
Whipped Cream: Whether it's homemade or store-bought, whipped cream adds a light, airy touch to balance pine cone brownies' dense texture. Layer it on top or serve it on the side for a luxurious bite.
Caramel Drizzle: Warm caramel sauce drizzled over a brownie pine cone creates a gooey masterpiece. The buttery notes of caramel perfectly complement the deep chocolate flavor.
Espresso or Coffee: For the grown-up crowd, a strong shot of espresso or a cup of coffee is the ideal pairing. The bitterness of the coffee highlights the sweetness of the brownie, while the flavors blend together beautifully.
Salted Pretzels: For a sweet-and-salty treat, serve your brownies with salted pretzels on the side. The crunchy texture and hit of salt heighten the chocolate flavor.
Fruit Coulis: Elevate your brownies with a drizzle of fruit coulis made from strawberries, raspberries, or cherries. The vibrant color and fresh flavor will make your dessert taste (and look) like it's straight out of a patisserie.
Why Baking Enthusiasts Love This Viral Recipe
Pinecone brownies combine creativity and flavor, appealing to chocolate lovers and baking artists. Whether you're hosting a holiday party, contributing to a potluck, or simply looking for a fun weekend project, this recipe promises to impress.
Baking Pine Cone Brownies is more than following a recipe-it's engaging in a creative project that delights the senses. With detailed steps and quality ingredients, you'll elevate your baking experience and create a treat that's perfect for sharing.
Why not give it a try this weekend? Gather your ingredients, turn on your favorite holiday playlist, and enjoy the process of putting together this edible work of art.

Chocolate Pine Cone Brownies
Ingredients
Brownies:
- ½ cup semi-sweet chocolate
- 6 tablespoon unsalted butter
- 3 eggs
- ½ cup granulated sugar
- 1 cup plain flour
- ⅔ tablespoon cocoa powder, unsweetened
- pinch of salt
Chocolate Spread:
- ½ cup heavy cream
- 2 Tablespoons unsweetened cocoa powder
- ¼ cup powdered sugar
- 2 tablespoons butter softened
Pine cones:
- ½ cup sliced almonds
- 9 oz chocolate chips
- 2 ½ teaspoon coconut oil Add more if you need it thinner
- powdered sugar
Instructions
For the Brownies:
- Melt the chocolate with butter in the microwave or on the stove top. Make sure it doesn't boil or burn. Let it cool slightly.
- Whisk Eggs and Sugar Well: Beat the eggs and sugar together until light and fluffy. This helps create a moist, airy texture.
- Combine with Chocolate Mixture: Gently fold in the chocolate mixture and vanilla.
- Add Flour and Cocoa Gradually: Sift together the flour, cocoa powder, and salt. Gently fold into the batter just until combined. Be careful not to overmix, as it can make the brownies dense.
- Bake: Pour the batter into greased cupcake molds about half to two thirds full and bake at 350°F (175°C) for 12 - 15 minutes, checking for a few moist crumbs on a toothpick.
For the Chocolate Spread:
- Warm the Heavy Cream: In a small saucepan, gently heat the heavy cream over low heat until it is warm but not boiling.
- Add Cocoa and Sugar: Whisk in the cocoa powder and powdered sugar until fully dissolved and smooth.
- Add Butter: Stir in the softened butter until it’s fully incorporated, creating a silky texture.
- Add Vanilla and Salt: Remove the pan from heat and stir in the vanilla extract and a pinch of salt. For an extra boost of chocolate flavor, you can also add melted dark chocolate at this stage.
For the Pine Cones:
- In a bowl crumble your brownies.
- Add the melted chocolate spread, and mix until you can form a solid mass. Form into pinecone shaped balls and set aside.
- Place the almond slices in and around the brownie cones (carefully because they are fragile), making the pine cone look.
- Place the pine cones on a parchment paper lined sheet pan, and stick them in the freezer for 30 minutes.
- Melt the chocolate chips with the coconut oil by heating them in a bowl in the microwave in 30-second increments.(Or use a double boiler on the stove).
- Take the pine cones out of the freezer and carefully coat each one with the melted chocolate. Place the pine cone brownies back on the parchment paper to set.
- Sprinkle some powdered sugar on top for a frosted look and enjoy!
Nutrition