
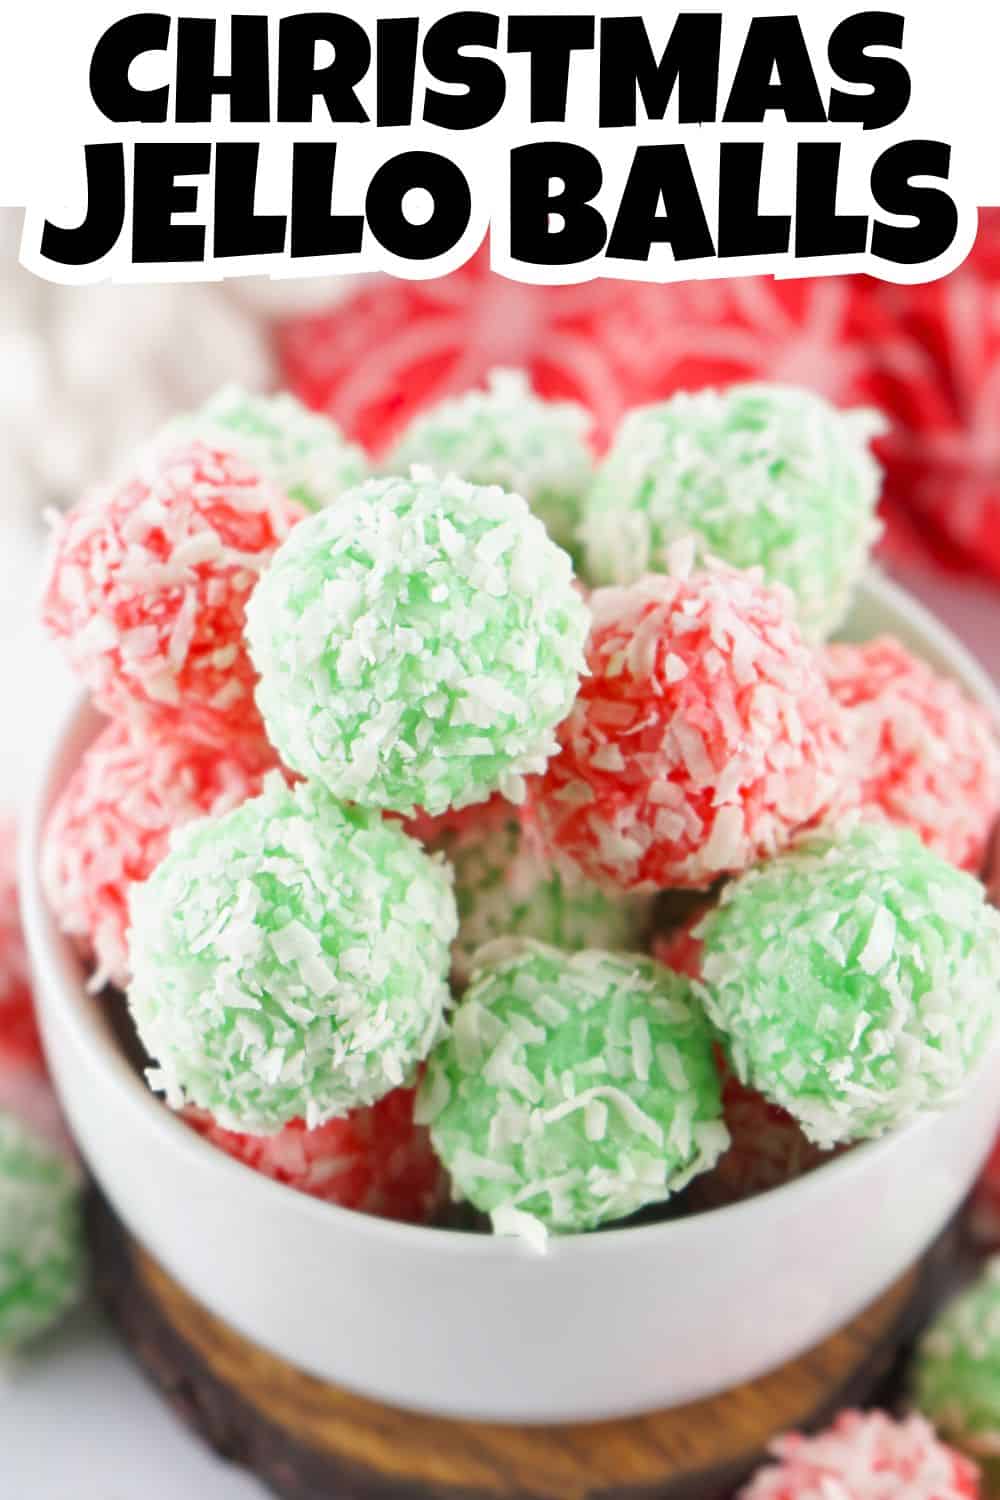
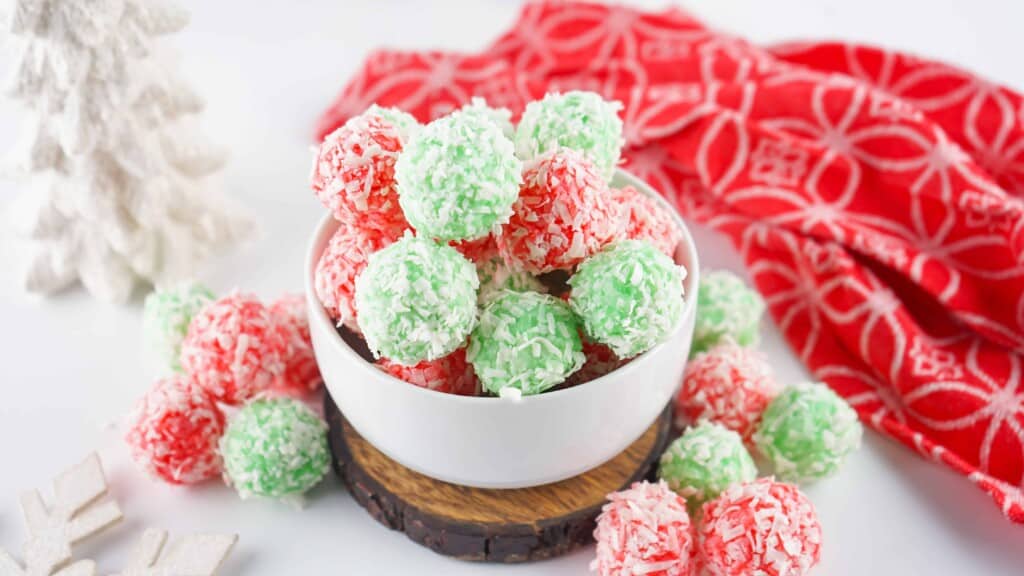
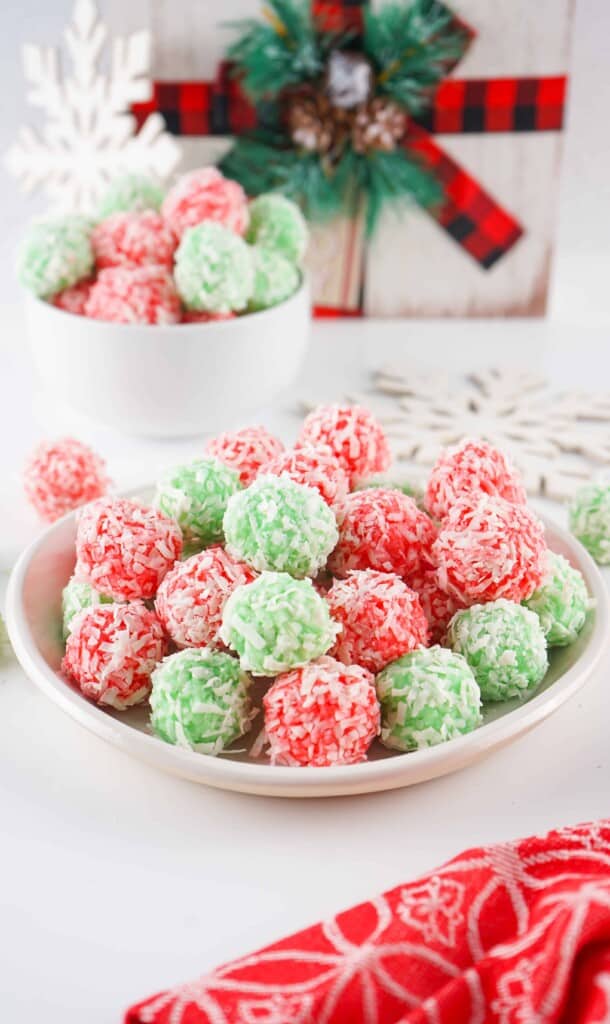
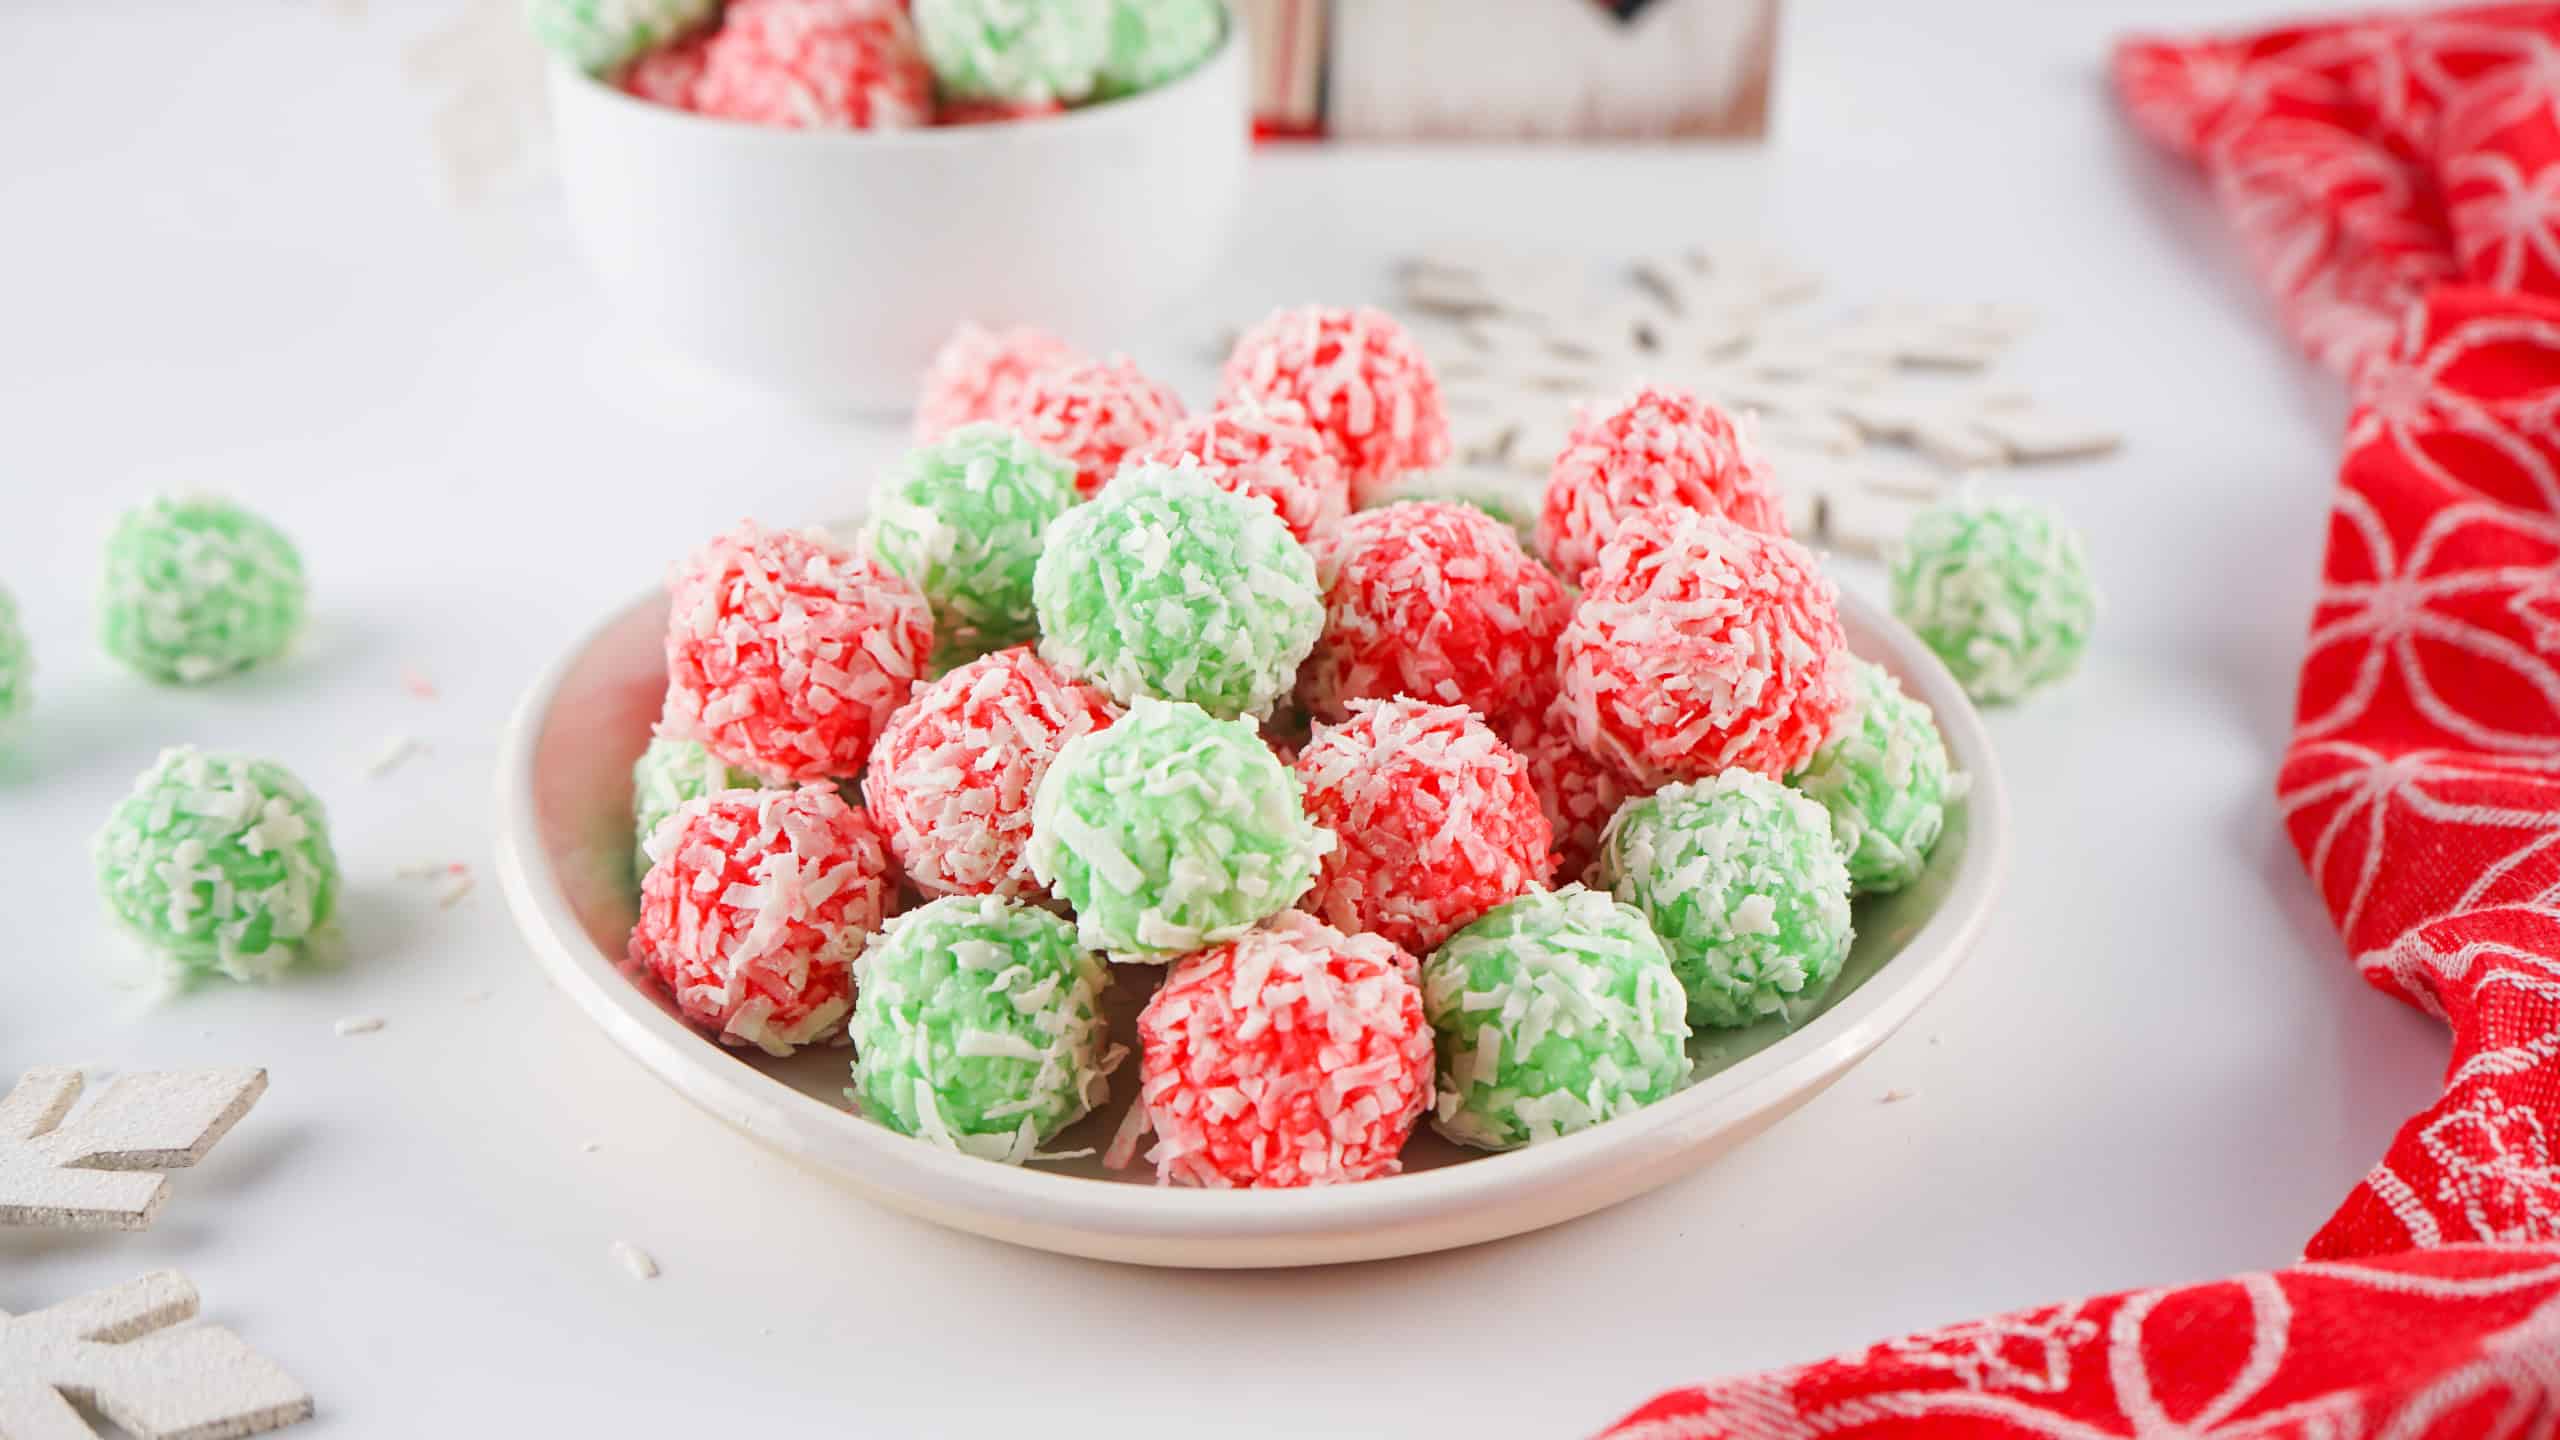
Christmas Jello Balls

Finding delicious holiday treats to serve your party guests doesn't have to be difficult! Just take a look to the past to get inspiration for classic Christmas treats! This recipe for Jello balls uses an old-fashioned dessert as inspiration, then adds a modern twist. Whip up these no-bake snacks to enjoy at all your holiday parties this year.
This post contains affiliate links. As an Amazon Affiliate, I earn a commission on qualifying purchases.
What Do I Need to Make Jello Balls?
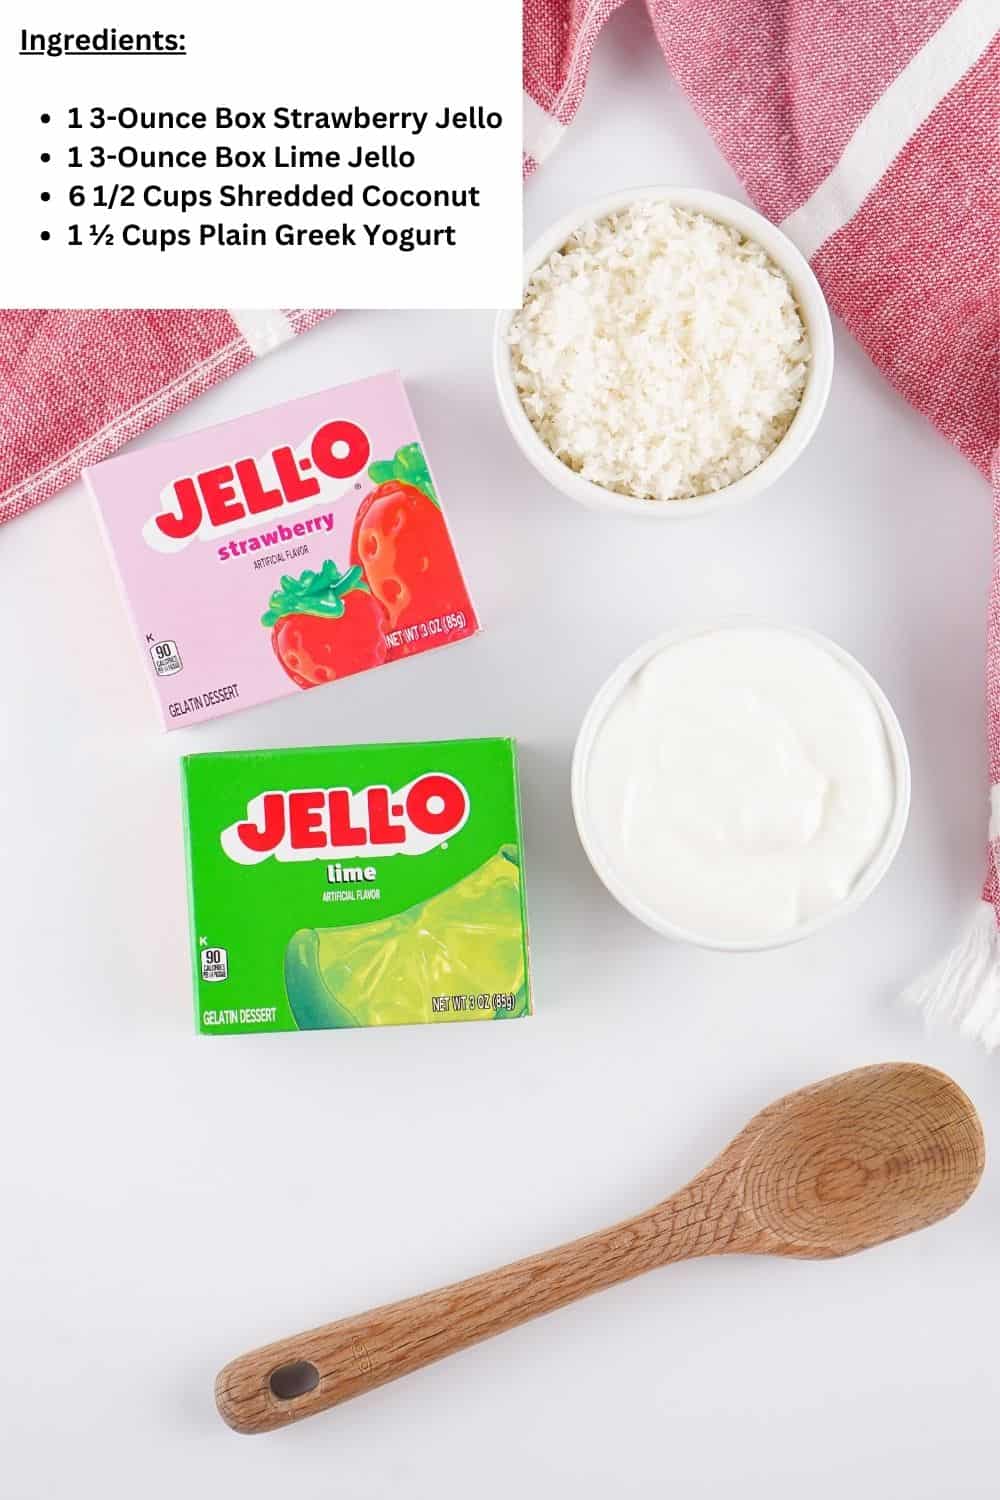
There's no baking involved in making this classic Christmas treat! That's because you can whip them up with just a few simple ingredients that don't need to be cooked. To make your own old-fashioned Jello balls, you'll need:
- Strawberry Jello
- Lime Jello
- Sweetened desiccated or finely chopped coconut
- Plain Greek yogurt
How Do I Make Jello Balls?
Making this classic treat is easier than you may think! That's what made them so popular in the past! Whip up these no-bake Christmas treats by following these simple instructions.
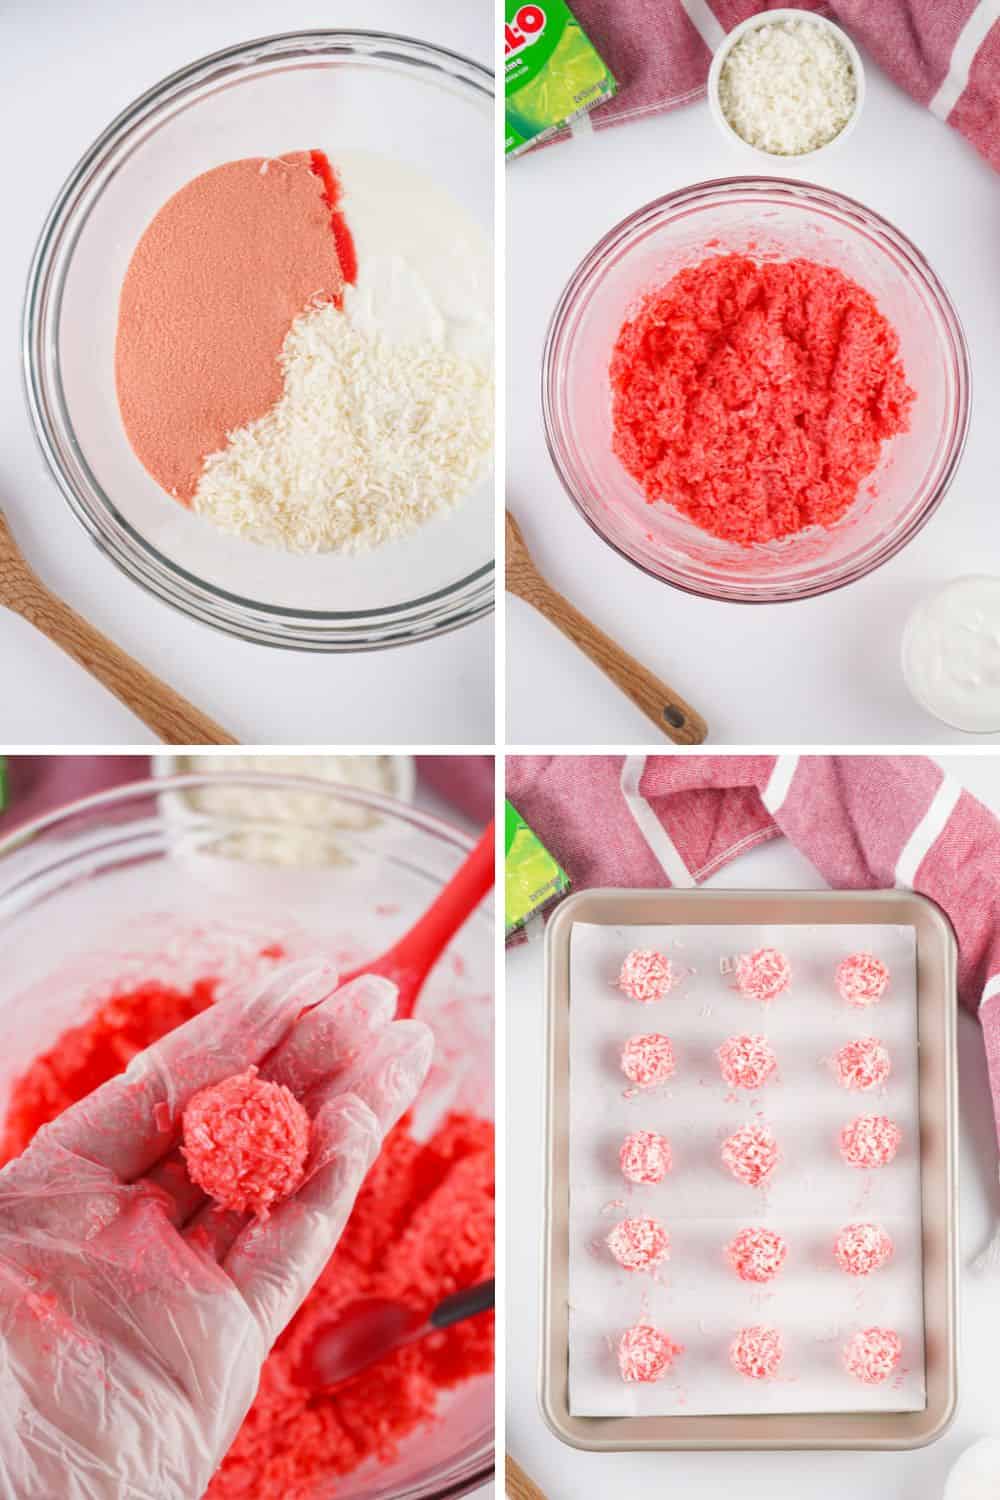
Step One: Mix the Red Jello
To create the Jello ball mixture, start by combining ¾ cup of yogurt with the red Jello and 2 ½ cups of coconut. Mix all the ingredients together until they're well combined and the gelatin is dissolved.
Step Two: Coat the Jello Balls
Fill a small bowl with around ¾ cup of coconut. Wearing gloves, scoop out a heaping ½ tablespoon of the Jello mixture and roll it into a ball. Roll the ball in the coconut until it's fully coated, then place it on a baking sheet lined with parchment paper.
Step Three: Prepare the Green Jello Balls
Would you like to save this?
In a separate bowl, mix the green Jello with the remaining Greek yogurt and 2 ½ cups of coconut. Stir all the ingredients together until they're well combined, then scoop them into balls. Add ¾ cups of coconut to a clean bowl, roll the green Jello balls in the coconut, and place them on a baking sheet lined with parchment paper.
Step Four: Chill the Jello Balls
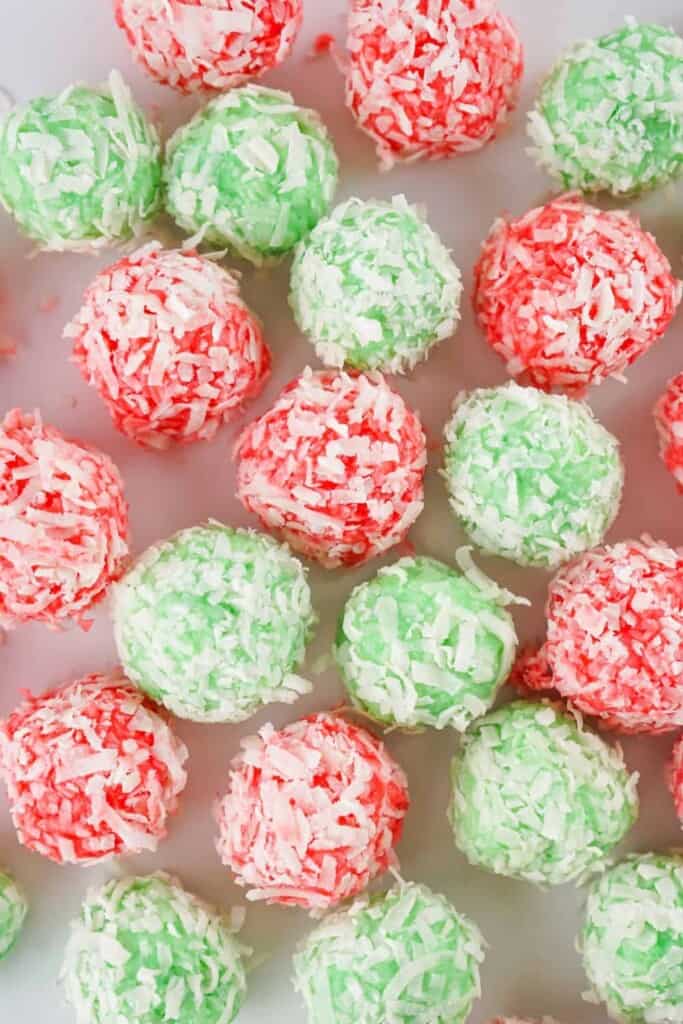
Place both baking sheets in the refrigerator to chill for at least two hours or until they're fully set. Once the balls are soft but solid, they're ready to enjoy!
Jello Ball Tips & Tricks
Now that you know just how simple it is to make this old-fashioned treat, you'll want to enjoy them at all your holiday celebrations. Use these tips and tricks to ensure your Jello balls come out amazing every time you make them.
- Try other flavors. Red and green Jello are great color choices for the holidays. But these Jello balls can be prepared using any flavor of Jello. Try different colors and flavor combinations for every holiday, like red and pink for Valentine's Day or rainbow for St. Patrick's Day!
- Don't replace the Greek yogurt. Classic Jello balls were made with Nestle's thick cream in a can. Since that ingredient has been discontinued, we had to find a substitute! After some trial and error, we found that Greek yogurt is the best substitute for this outdated ingredient. No other substitute created the right flavor and consistency.
- Reduce the sweetness with unsweetened coconut. Sweetened coconut is the best option for creating these treats. But if you find that they're too sweet for your taste, you can replace the sweetened coconut with unsweetened coconut flakes. Just keep in mind that unsweetened coconut might soak up more of the moisture, so it's a good idea to start with a small portion of coconut and add more as you mix.
- Make your own desiccated coconut. Can't find desiccated coconut in your grocery store? You can make your own by pulsing regular shredded coconut in the food processor a few times.
- Roll in a different topping. While you need to add coconut to the ball mixture to get the right texture, you can substitute the coconut mixture on the outside of the ball with other ingredients. Try decorating the balls in crushed nuts or sprinkles for a fun holiday look!

How Do You Store Jello Balls?
Since these treats are prepared with Jello, they need to be refrigerated. Once the balls are set, you can transfer them to an airtight container. The balls can be combined and stacked without worrying about the colors mixing. When stored in the fridge, they'll stay good for up to two weeks.
You can also store your Jello balls in the freezer for more long-term storage. Transfer the chilled balls to a freezer-safe container and they'll stay good for up to three months. Make sure to allow the Jello balls to defrost in the refrigerator overnight before serving them.
Why Are My Jello Balls Sticky?
Different flavors of Jello have different levels of sugar, which means some flavors may get stickier than others. If you find that your Jello balls are too sticky to roll, simply add more coconut to the mixture ¼ cup at a time. Stir the coconut in, then try to roll the mixture into balls. Continue adding more coconut to the mixture until it's not sticky.
Christmas Jello Balls
Equipment
- 2 9x13 Baking Sheets
- Measuring Cups & Spoons
- 2 Medium Mixing Bowls
- 2 Rubber Spatulas
- Rubber Gloves
- Small Bowl
Ingredients
- 3 Ounce Box Strawberry Jello
- 3 Ounce Box Lime Jello
- 6 ½ Cups Sweetened Desiccated or Finely Chopped Coconut divided
- 1 ½ Cups Plain Greek Yogurt divided
Instructions
- Line two 9x13 baking sheets with parchment paper and set aside.
- Add ¾ cup yogurt, the red jello, and 2 ½ cups of the coconut to a medium mixing bowl. Stir until fully combined.
- Add about ¾ cup of the coconut to a small bowl.
- Grab some gloves. Scoop up a slightly heaping ½ tablespoon of the mixture and roll it into a ball. Roll the ball in the bowl of coconut and place it on one of the prepared cookie sheets.
- Repeat until all of the red mixture has been rolled into balls.
- Repeat steps 1-5 for the green jello. Be sure to swap out the coconut you were using to roll the red balls with a fresh ¾ cup of coconut to roll the green balls in. This will ensure no colors mix.
- Place in the fridge for 2 hours or until set. Enjoy!
Notes
You can use other flavors of jello to get other colors, if desired.
Once set, these can be stored stacked on top of each other without issue.
These used to be made with Nestle’s thick cream in a can. However, that has been discontinued. Through testing, we found Greek yogurt to be the best replacement, and it ended up making them taste even better than the original recipe! We did not find another replacement that worked as well.
If you don’t want these to be as sweet, you can use unsweetened coconut instead. However, be aware that unsweetened coconut might soak up more of the moisture, so start with only a portion of the coconut and add more as you mix.
If you find it difficult to locate desiccated coconut, you can just grab regular shredded coconut and pulse it a few times in a food processor. Works perfectly.


2 Comments