The Ultimate Guide to Crispy Air Fryer Food Every Time
There's nothing quite like biting into perfectly crispy food-that satisfying crunch on the outside with tender, juicy perfection on the inside. And while air fryers make it easier to achieve these results at home, there's definitely a science to getting that restaurant-quality crispiness every single time.
As a Registered Nurse and food blogger, I've spent years perfecting my air fryer technique. Today, I'm pulling back the curtain and sharing exactly how to achieve crispy perfection with every batch.
This post may contain affiliate links. As an Amazon Affiliate, I earn a small commission on purchases.
Understanding the Science of Crispy
Before we dive into techniques, let's talk about what's actually happening when your food gets crispy. Understanding the science helps you make better decisions in the kitchen.
The Maillard Reaction
When food browns and develops that crispy, flavorful crust, you're witnessing the Maillard reaction-a chemical reaction between amino acids and sugars that occurs at high temperatures. This reaction not only creates crispiness but also develops hundreds of new flavor compounds that make food taste incredible.
The Maillard reaction typically begins around 285°F, which is why most air fryer recipes call for temperatures between 350°F and 400°F. At these temperatures, you get optimal browning and crisping without burning.
How Air Fryers Create Crispiness
Your air fryer works by rapidly circulating super-heated air around your food. This creates a convection effect that:
- Quickly evaporates surface moisture (dry surface = crispy surface)
- Maintains consistent high heat for even browning
- Promotes the Maillard reaction across all exposed surfaces
Understanding this helps you see why certain techniques work-and why moisture is your biggest enemy when you're going for crispy.
Secret #1: Choose the Right Oil (and Use It Correctly)
Here's the truth from my nursing perspective: we're not eliminating oil with air frying; we're using it more intelligently. A light coating of the right oil can make the difference between soggy and sensational.
Why Oil Matters for Crispiness
Oil serves several critical functions:
- Conducts heat more efficiently to the food's surface
- Helps create that golden-brown color
- Promotes even crisping across the entire surface
- Carries fat-soluble flavors and seasonings
Even just 1-2 teaspoons for a whole batch can dramatically improve your results, while still using 75-90% less oil than traditional frying methods.
Best Oils for Air Frying
Not all oils are created equal for air frying. You want oils with high smoke points that can handle the 400°F temperatures without breaking down or smoking.
Avocado Oil (520°F smoke point) - My #1 Choice
- Highest smoke point of common cooking oils
- Neutral flavor that won't compete with seasonings
- Heart-healthy monounsaturated fats
- Perfect for high-temperature air frying
Extra Virgin Olive Oil (375-400°F smoke point)
- Great for vegetables and Mediterranean dishes
- Adds subtle flavor
- Rich in antioxidants
- Use for temps 375°F and below
Refined Coconut Oil (450°F smoke point)
- Excellent for sweet applications
- Mild coconut flavor (refined is more neutral than virgin)
- Great for baked goods and desserts in the air fryer
Grapeseed Oil (420°F smoke point)
- Clean, neutral flavor
- Good all-purpose option
- High in polyunsaturated fats
Oils to Avoid
- Butter (low smoke point, burns easily)
- Flaxseed oil (low smoke point)
- Unrefined nut oils (low smoke points, expensive for this purpose)
- Aerosol cooking sprays (can damage non-stick coating over time)
How to Apply Oil Correctly
The application method matters almost as much as the oil itself. Here are the best techniques:
Method 1: The Bowl Toss (My Favorite)
1. Place food in a large bowl
2. Drizzle with 1-2 teaspoons of oil
3. Toss until evenly coated
4. Transfer to air fryer basket
This ensures the most even distribution and you can control exactly how much oil you're using.
Method 2: Spray Bottle
Use a refillable oil spray bottle (not aerosol cans) to lightly mist food on all sides. This works great for:
- Larger items like chicken breasts
- Spraying food mid-cook for extra crispiness
- Coating breaded items
Method 3: Brush Application
For proteins like fish or large cuts of meat, brush a thin layer of oil directly on the surface with a pastry brush.

Secret #2: Master the Shake Method
This is the game-changer that most people skip-and it makes a massive difference in your results. Here's my exact timing strategy for perfect crispiness.
Why Shaking Matters
Even with excellent air circulation, food that's touching the basket or other pieces won't crisp as well on those contact points. Shaking or flipping redistributes everything so all surfaces get maximum exposure to that hot circulating air.
The Perfect Shake Schedule
For Small Items (fries, vegetables, chicken bites, nuggets):
- Total cook time under 15 minutes: Shake once at the halfway point
- Total cook time 15-25 minutes: Shake at ⅓ and ⅔ marks
- Total cook time over 25 minutes: Shake every 8-10 minutes
For Large Items (chicken breasts, pork chops, fish fillets, steaks):
- Flip once at the halfway mark
- Optional: Spray lightly with oil after flipping for extra crispy tops
For Very Small Items (chickpeas, nuts, small cubed vegetables):
- Shake every 5 minutes
- These items can roll around and pile up, so frequent shaking is essential
Pro Shaking Tips
1. Set a timer for each shake interval-it's easy to forget!
2. Use oven mitts-the basket is HOT
3. Don't shake too vigorously or you might knock breading off
4. For sticky marinades, use tongs to flip instead of shaking
5. If food is sticking, it's not ready-wait another minute before flipping
Secret #3: Optimize Your Temperature Strategy
Most foods hit their crispy sweet spot between 375°F and 400°F, but understanding when to adjust can take your results to the next level.
The Two-Temperature Technique
This is my secret weapon for perfectly crispy outsides and juicy insides, especially with proteins:
Step 1: High Heat Sear (400°F)
Start at 400°F for the first 5-7 minutes. This initial blast of high heat:
- Quickly sears the outside
- Locks in juices
- Jumpstarts the Maillard reaction
- Creates that initial crispy crust
Step 2: Moderate Heat Finish (375°F)
Reduce to 375°F for the remainder of cooking. This prevents:
- Burning the outside before the inside cooks
- Drying out the interior
- Overcooking while achieving perfect doneness
This works especially well for:
- Chicken thighs and drumsticks
- Thick pork chops
- Bone-in chicken pieces
- Any protein thicker than 1 inch
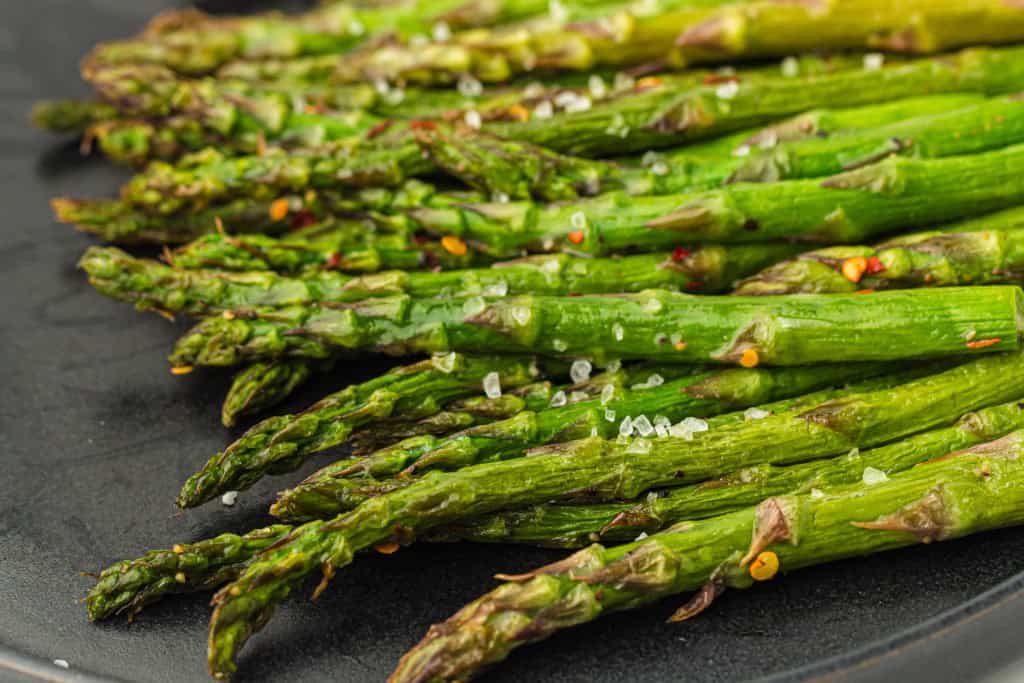
Temperature Guide by Food Type
400°F - Maximum Crisp:
Would you like to save this?
- Frozen foods (fries, tater tots, nuggets)
- Vegetables you want extra crispy (Brussels sprouts, broccoli)
- Wings and drumettes
- Initial sear for proteins
375°F - Balanced Cooking:
- Chicken breasts
- Fish fillets
- Most vegetables
- Breaded items
350°F - Gentle Cooking:
- Baked goods
- Delicate fish
- Reheating (prevents over-browning)
- Smaller portions that cook quickly

Secret #4: Eliminate Moisture (Your #1 Enemy)
If I could give you only one tip for achieving maximum crispiness, it would be this: moisture is your enemy. Every surface that's wet or damp will steam instead of crisp.
Pre-Cooking Moisture Removal
Pat Everything Dry:
Use paper towels to thoroughly pat dry:
- Chicken, especially after marinating
- Fish fillets (both sides)
- Vegetables after washing
- Any frozen food (let thaw slightly, then pat dry)
For Extra-Moist Foods:
Sometimes patting isn't enough. Try these advanced techniques:
- Salt and rest: Lightly salt protein 15-30 minutes before cooking. The salt draws out moisture, which you can then pat away
- Cornstarch coating: Toss vegetables with a light dusting of cornstarch to absorb surface moisture
- Air dry: Place marinated chicken on a wire rack over a sheet pan in the fridge for 30-60 minutes to air dry the surface
During-Cooking Moisture Management
Even with dry starting surfaces, food releases moisture as it cooks. Here's how to manage it:
1. Don't overcrowd-trapped steam can't escape
2. Empty the drip tray if it fills during cooking (especially with fatty proteins)
3. If food looks steamed halfway through, increase temperature by 25°F
4. For extremely juicy items, place on a wire rack in the basket to let moisture drip away
Secret #5: The Crispiness Boosters
These are my advanced techniques that take crispy from good to extraordinary.
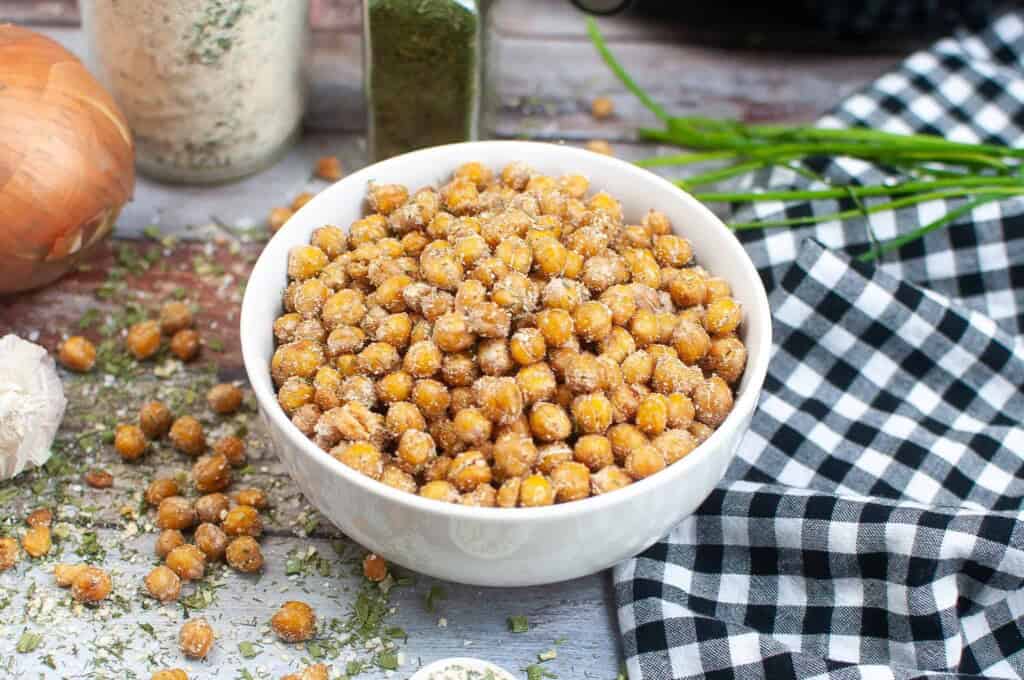
1. The Cornstarch Trick
Toss vegetables or proteins with 1-2 tablespoons of cornstarch before adding oil. The cornstarch:
- Absorbs surface moisture
- Creates an ultra-crispy coating
- Helps browning
- Works especially well for: cauliflower, tofu, chicken wings
2. The Double-Spray Method
Spray food lightly with oil before cooking, then spray again after flipping halfway through. This ensures both sides get maximum crispiness.
3. The Baking Powder Secret
For chicken wings and drumsticks, toss with 1 teaspoon of baking powder (NOT baking soda!) per pound of meat. The alkaline baking powder:
- Raises the pH of the skin
- Breaks down proteins for extra-crispy skin
- Creates a restaurant-quality crunch
4. The Parchment Paper Hack
Use perforated parchment paper liners to prevent sticking while still allowing proper air circulation. This keeps food crispy without the mess.
5. The Final Flash
In the last 2-3 minutes of cooking, increase temperature by 25°F for a final crispy boost. This works especially well for:
- Chicken that needs extra browning
- Vegetables that aren't quite crispy enough
- Any food that looks cooked but not crispy
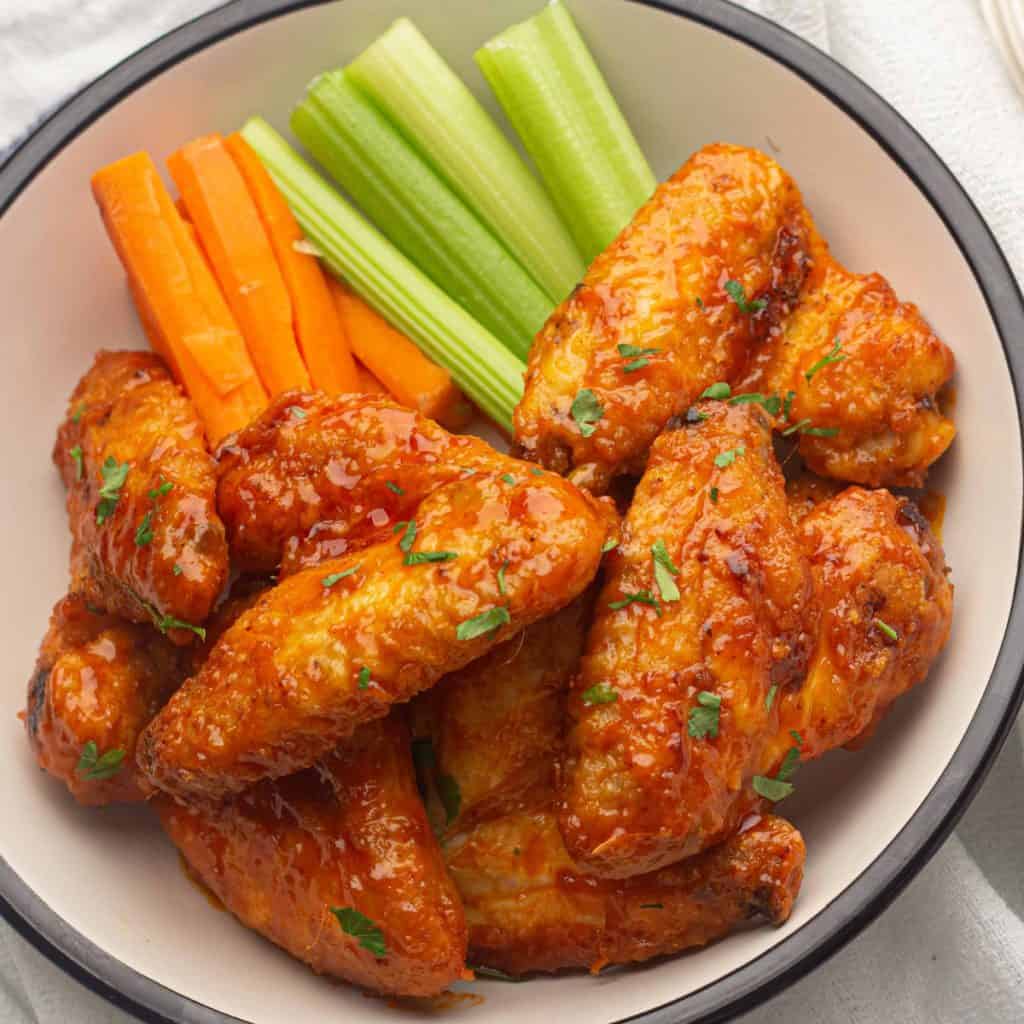
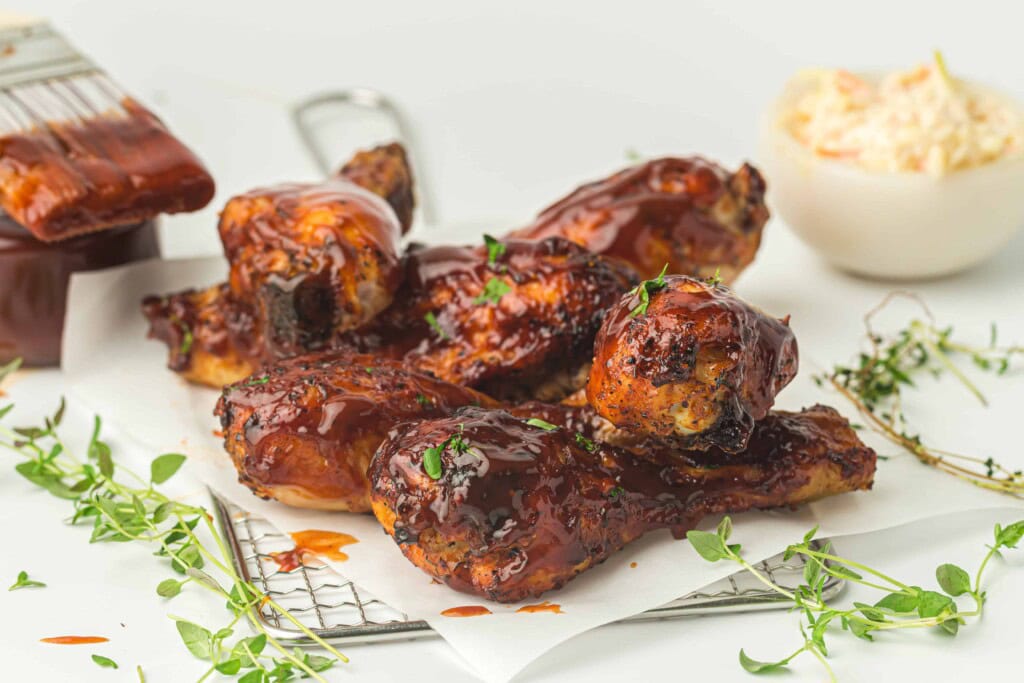
Putting It All Together: The Crispy Chicken Wings Formula
Let me show you how all these secrets work together with my go-to crispy chicken wings recipe:
Prep (Moisture Control):
1. Pat wings completely dry with paper towels
2. Toss with 1 teaspoon baking powder per pound (crispiness booster)
3. Let sit on rack in fridge for 30 minutes (moisture removal)
Cook (Temperature Strategy):
1. Preheat air fryer to 400°F
2. Toss wings with 1 tablespoon avocado oil (right oil choice)
3. Arrange in single layer (no overcrowding)
4. Cook at 400°F for 10 minutes
5. Flip wings, spray lightly with oil (shake method + double spray)
6. Reduce to 375°F, cook 10-12 more minutes (two-temperature technique)
7. Check temp (165°F internal)
8. For extra crisp: increase to 425°F for final 2 minutes (final flash)
Result: Shatteringly crispy skin with juicy meat-better than any restaurant!
Troubleshooting: When Food Isn't Crispy Enough
Even with perfect technique, sometimes things don't turn out as crispy as you'd like. Here's how to diagnose and fix the problem:
Problem: Food is cooked but soggy
Likely cause: Too much moisture or not enough oil
Fix: Pat drier next time, use more oil, try the cornstarch trick
Problem: Crispy but burnt in spots
Likely cause: Temperature too high or didn't shake enough
Fix: Lower temp by 25°F, shake more frequently
Problem: Unevenly crispy
Likely cause: Overcrowding or irregular sizes
Fix: Cook in batches, cut food into uniform sizes
Problem: Takes forever to crisp
Likely cause: Not preheated or air fryer needs cleaning
Fix: Always preheat, clean heating element and air vents
Quick Reference: Your Crispy Food Checklist
Before you start cooking, run through this checklist:
✓ Food patted completely dry
✓ Appropriate oil chosen and applied
✓ Air fryer preheated 3-5 minutes
✓ Food arranged in single layer with space between
✓ Timer set for shaking/flipping
✓ Temperature appropriate for food type
✓ Meat thermometer ready for proteins
Follow this checklist and you'll achieve crispy perfection every single time!
Final Thoughts
Achieving restaurant-quality crispiness in your air fryer isn't magic-it's science combined with proper technique. By understanding how crispy textures develop and applying these proven strategies, you can create incredibly delicious food that rivals (or beats!) anything from a professional kitchen.
Remember, every air fryer is slightly different, so don't be afraid to experiment and adjust these techniques to work with your specific model. Take notes on what works best, and soon you'll be an air fryer crispy food expert!
What's your biggest crispy food challenge? Drop a comment below and let me know-I love helping fellow air fryer enthusiasts achieve their crispy food dreams!
Happy air frying!
Angela